We are still hard at work on our master bathroom remodel and today I'm going to show you how to tile a shower. It's been a little while since I have updated you with our master bathroom remodel, but it is slowly and surely coming along! I have previously shared our inspiration, the bathroom demo process, the shower prep work and also how to build a shower pan! After all of that was done, we were finally ready to install our backer board and tile the shower!!! Wahoo! And can I just mention up front that we absolutely LOVE how it turned out!
A big huge thanks to The Tile Shop for sending us the product to help make this post possible.
We spent hours trying to decide on an exact shower tile pattern and design but we are grateful we spent so much time figuring out all the details ahead of time because it made the actual installation so much easier!
Here is the process we used to tile a shower.
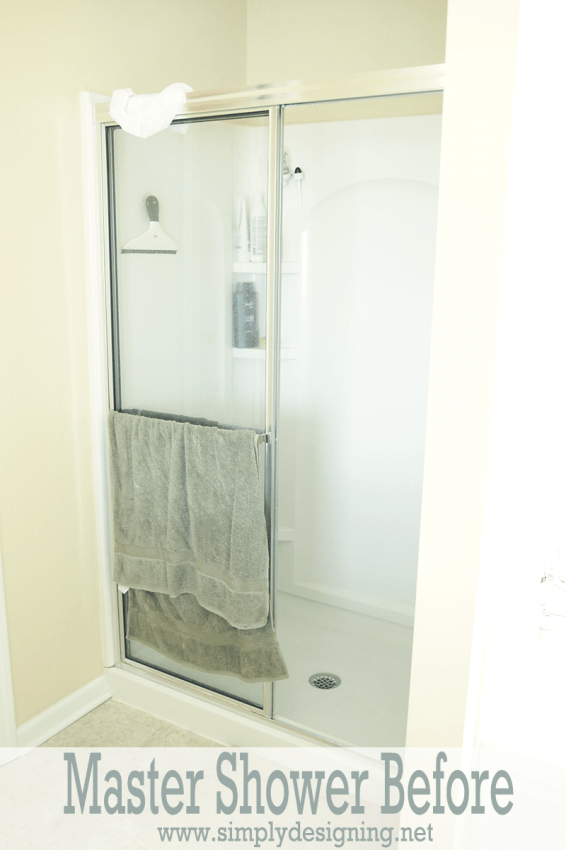
As a reminder, here is our shower before...
Steps to tile a shower.
1. Install Shelves
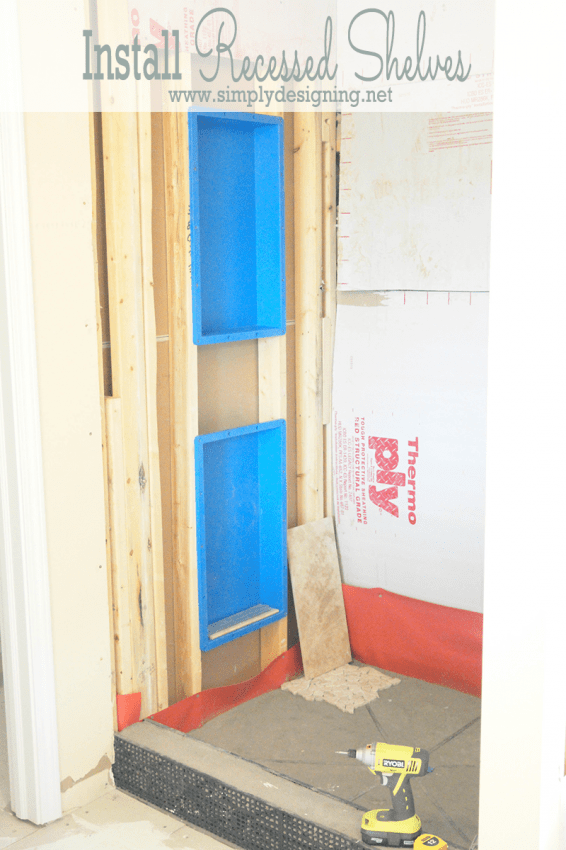
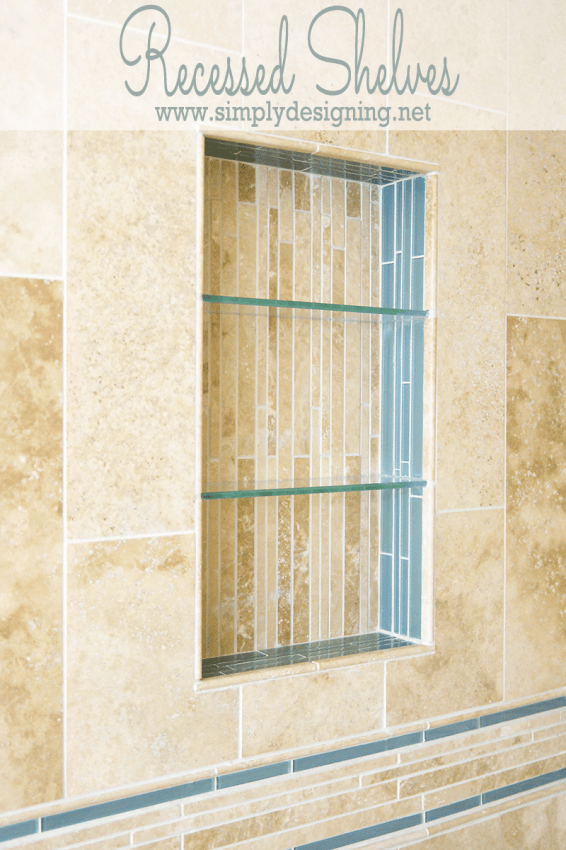
Before you tile a shower everything has to be put into place behind the scenes. Because we wanted recessed shelving in our shower, we installed the Pro Recessed Shelves from The Tile Shop in between the studs.
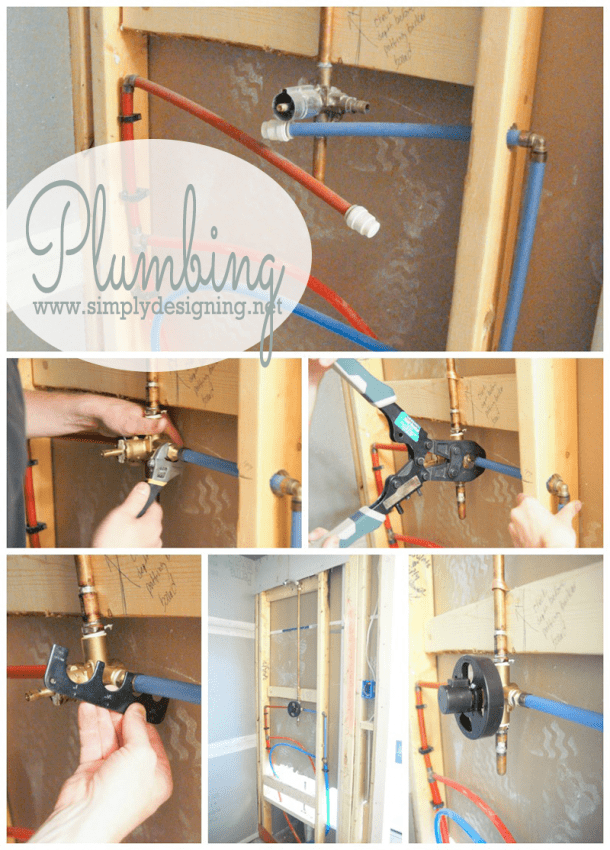
2. Ensure Your Plumbing is Hooked Up and Working
I mentioned in a previous post that we had to reconfigure a bit of our plumbing. But before moving on we needed to install a new mixer by soldering the copper piping for the shower head to the new mixer. And we also attached the hot and cold water line PEX piping to the new mixture with crimp fittings. You can read more about our PEX plumbing system here and read here for an example of how to solder copper piping from another project we did.
3. Install Backer Board
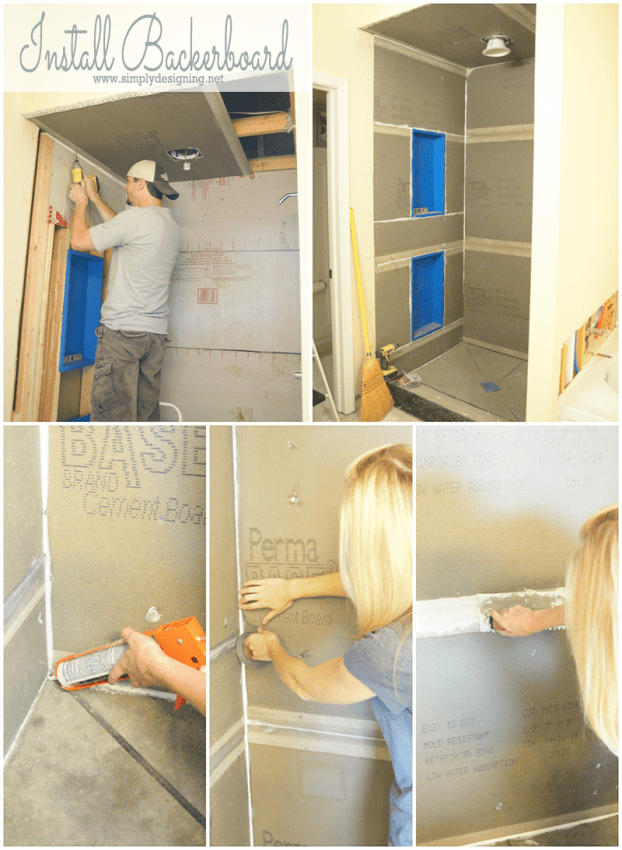
Next, we were ready to install our Perma Base Cement Board! We used ½" thick cement board for this and boy was it heavy! This is definitely a two-man (or woman) job. I am grateful I had my hubby to help with this part, especially in the hard to reach high places. We simply installed the cement board on the sides and ceiling of our shower using backer board screws. After it was in place we caulked all of the seams with silicone caulk, applied 2" mesh tape and then covered with a thin layer of thin to help create a solid sturdy surface for the tile to be installed onto.
4. Tile a Shower Floor
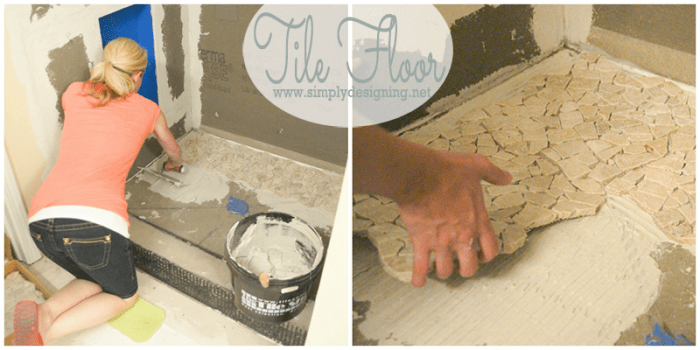
Then we were able to begin laying our tile floor! We applied a layer of thinset to our shower pan and then used a notched trowel prior to laying the tile down. Check out this post here for more detail on installing floor tile.
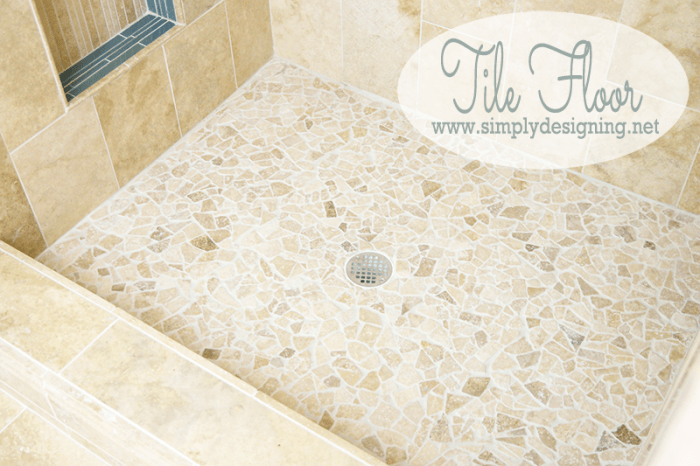
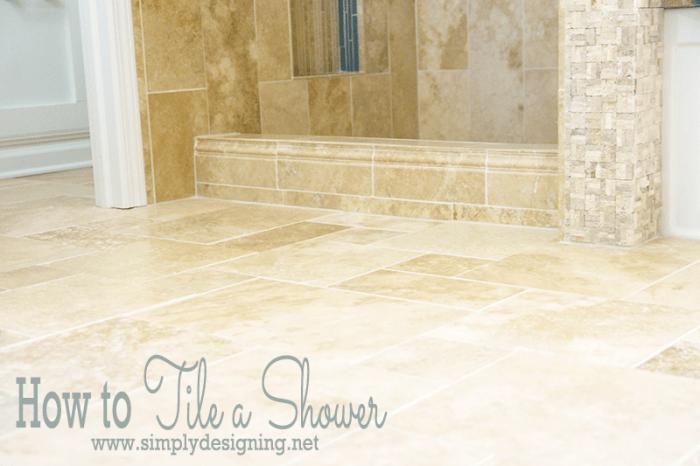
It is important to note that because the shower pan has a slope, smaller tiles should be chosen for the floor otherwise installation will be more complicated. We chose Bucak Medley Tumb Cobble #659240 for our floor tile which is a really fun tile that had small enough pieces to be able to account for the slope without needing to make creative cuts.
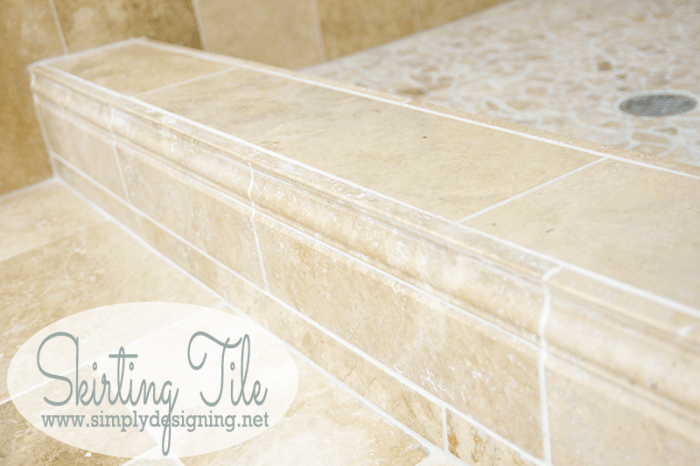
We used a skirting tile (Bucak Lt Walnut Skirting, #658312) on both sides of the shower curb. We installed the skirting on top of the tiled floors.
5. Install Tile on the Sides of the Shower
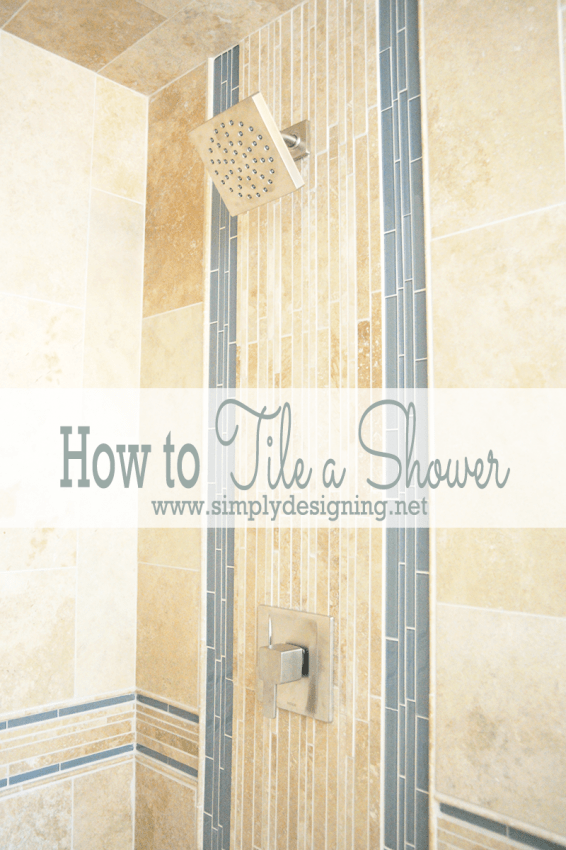
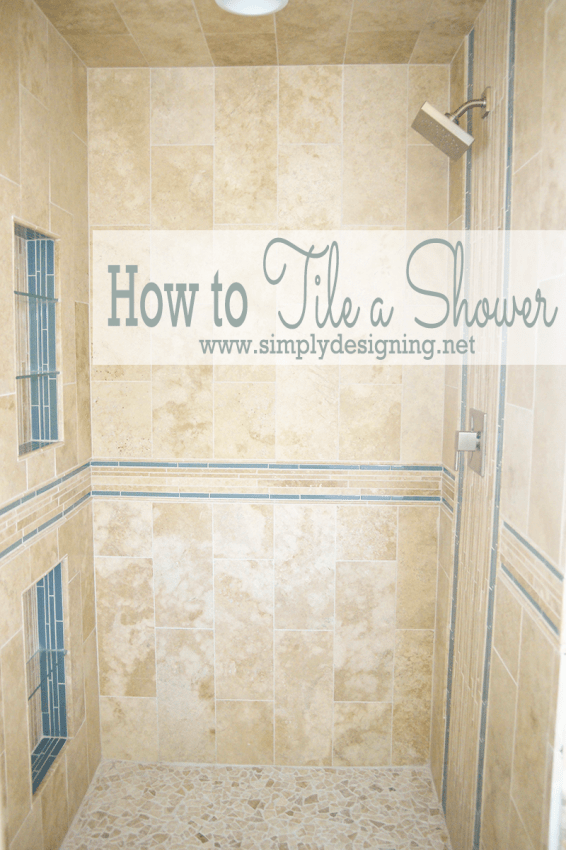
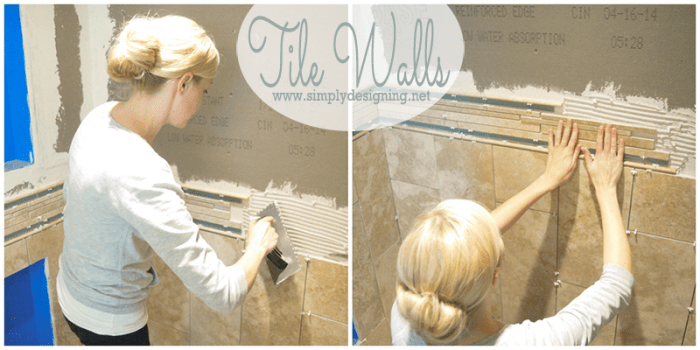
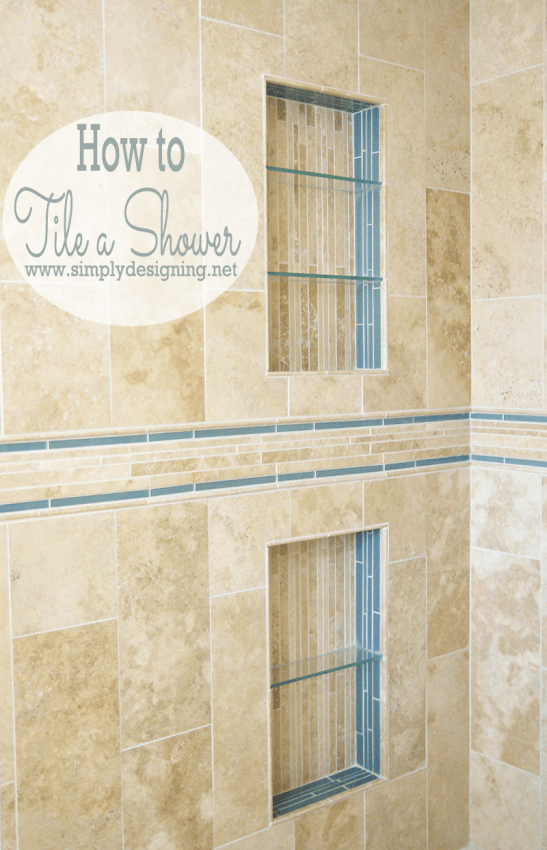
After the floors were installed and set, we moved on to installing the tile on the walls. It is really important to plan your design out ahead of time. We even measured and marked on the walls where our border would go to help ensure all of our cuts were accurate. Our shower design ended up having a horizontal border and a vertical waterfall design on the wall with the shower head. We chose to lay our Bucak Light Walnut, H/F, 20-50cm, #657580 wall and ceiling tile in a staggered brick pattern with the tile placed in a vertical direction.
For our horizontal border, we used four rows of the Bucak Medley, H/F, Corinth, #690190 tile with one row of the Glass Aloe Corfu, WFD 3-8-2 tile on either side. Between the border and our wall tile, we used the Bucak Lt Walnut Somerset, #658307 Pencil tile to finish it off. Our vertical waterfall design was similar to an entire 12" sheet of the Corinth tile surrounded by four rows of the glass tile and a pencil border on either side.
We used the Corinth tile on the back of our recessed shelves and the Glass tile on the sides of the shelves. We also framed the entire shelf in with the Pencil tile. The Tile Shop has a great video showing more detail on how to install recessed shelves here.
6. Grout, Dehaze & Seal the tile
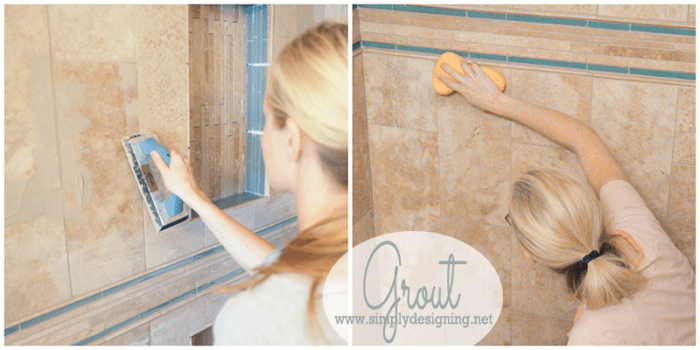
Finally, we were able to grout our shower! We used unsanded grout on every surface except the floor. On the floor, we used sanded grout. Once that was done we de-hazed and sealed it and it was nearly ready to go! You can see more details about how to do this in a previous post I did here.
7. Install Shower Fixtures
Our last step to completing our shower was to install brand new Moen 90 Degree fixtures in our shower! They are so easy to install and they look amazing! You can read about how to install the fixtures below in part 6 where I have provided links to this entire series.
Supplies we used to tile a shower
- Wall and Ceiling Tile: Bucak Light Walnut, H/F, 20-50cm, #657580
- Accent Tile: Bucak Medley, H/F, Corinth, #690190
- Floor Tile: Bucak Medley Tumb Cobble #659240
- Accent Glass Tile: Glass Aloe Corfu, WFD 3-8-2
- Pencil Tile: Bucak Lt Walnut Somerset, #658307
- Skirting Tile: Bucak Lt Walnut Skirting, #658312
- Grout: Desert Sand, Unsanded
- Grout: Desert Sand, Sanded
- Pro Recessed Shelf, 24 x 14 x 3.5, #349052
- Pro Recessed Glass Shelf, 3.5 x 14, #349054
- Flexible Grout Admixture
- Poultice Stain Remover
- Proflex Thinset (aka mortar)
- Travertine and Sandstone Sealer
- Trowel
- Notched Trowel
- Grout Float Tool
- Mortar Mixing Paddle (for use with a power drill)
- Large Sponge
- Sealer Sponge
- Bristle Brush
- ⅛" Spacers
- Tile Saw
- Tile Snippers
- Eye Protection
- Ear Protection
- 3+ Buckets (one for mortar, grout, and water)
- PermaBase Cement Board
- Backerboard Screws
- 2" Mesh Tape
- Silicone Caulk
- Moen 90 Degree Posi-Temp Shower Fixture (more details HERE)
Check Out Our Complete Master Bathroom Remodel Series:
Part 1: Master Bathroom Inspiration
Part 5: Tile the Shower
Part 6: Installing Moen Posi-Temp® Shower Fixtures
Part 7: How to Install Radiant Heated Tile Floors
Part 8: Install New Tile Counter Tops
Part 9: Install a Tile Accent Wall
How to Install a new Shower Door
How to Install new Bathroom Mirror Frames (in about 10 minutes!)
DIY Framed Mirror with Hidden Jewelry Organization
Please note that I am not a professional. I am just sharing what worked for us. As always please use all proper safety precautions and read and follow all manufacturer instructions. Please note that I am not responsible in any way for any outcome if you try this yourself. I am not liable for any injury or additional cost or expense incurred. I always recommend consulting and hiring a professional if needed. And always be sure to check with local building codes to obtain all permits needed for any DIY project.




Corinna
Beautiful job! I love how you used the tile horizontal and vertical. It made such a difference. I would love to see more pictures of the finished product though. 🙂
Ashley Phipps
Thank you!
Hoosier Party Girl
Whew. That looks like a lot of work, but the finished project is beautiful. Well done!
Ashley Phipps
Oh thank you so much!!
Tricia
I'm completely amazed. Never in a millions years would I have attempted something like this. But you make it look possible!!!
Ashley Phipps
Oh thank you so much Tricia!!! And thanks for stopping by!
Heather at Basilmomma
I love this. ALL of this. Especially the shower head!!
Amy
Your shower is awesome, great job!
Ashley Phipps
Thank you so much Amy!
Pamela
Wow! This is a beautiful shower and inspiring me as I get ready to do our Master Bath shower. Would love to see the rest of the bathroom. Well done!
Ginny
What's an estimated cost of this shower makeover?
Chris
No waterproofing on tile backer??
Ashley Phipps
Thanks for taking the time to write. We used waterproof tile backer board so there is no need to also install waterproofing on top of it! Best of luck!