Ok. I made two. One for me, and one to give to someone else.
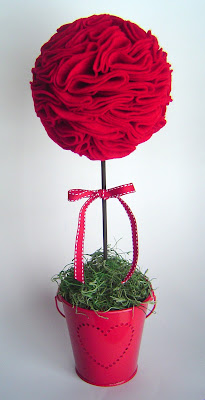
I made this one below for someone else:
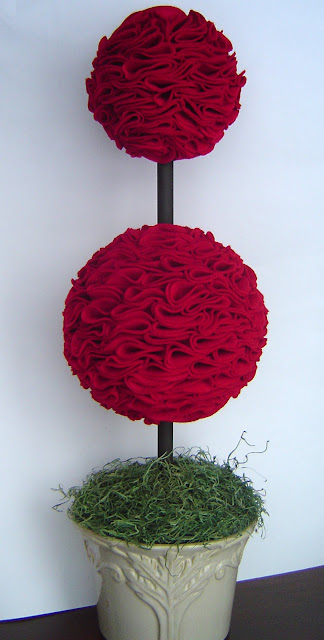
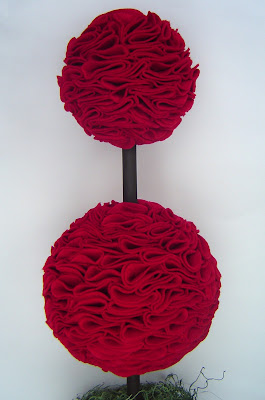
And I made the two-tiered topiary for myself! I am in love with it!
You can make these either by using a styrofoam ball and a wooden dowel to create your own topiary, or you can actually buy styrofoam topiaries already put together!
I made my own for the single tiered topiary, but bought the two-tiered topiary at Hobbby Lobby. Gotta love that store!
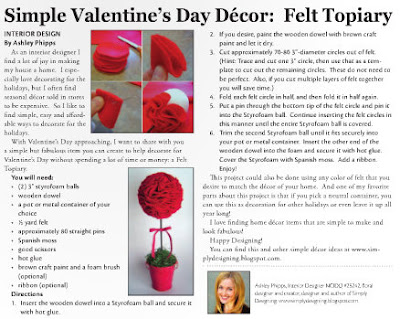
Here's how to make the single topiary:
You will need:
- (2) 3” styrofoam balls
- wooden dowel
- a pot or metal container of your choice
- ½ yard felt
- approximately 80 straight pins
- Spanish moss
- good scissors
- hot glue
- brown craft paint and a foam brush (optional)
- ribbon (optional)
- Insert the wooden dowel into a Styrofoam ball and secure it with hot glue.
- If you desire, paint the wooden dowel with brown craft paint and let it dry.
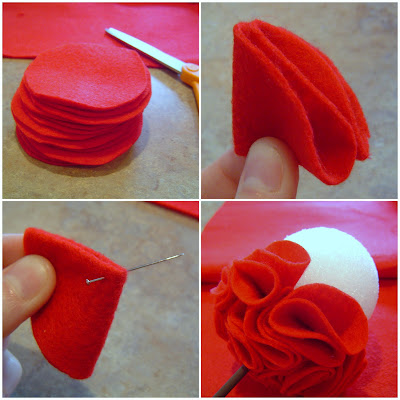
- Cut approximately 70-80 3”-diameter circles out of felt. (Hint: Trace and cut one 3” circle, then use that as a template to cut out the remaining circles. These do not need to be perfect. Also, if you cut multiple layers of felt together you will save time.)
- Fold each felt circle in half, and then fold it in half again.
- Put a pin through the bottom tip of the felt circle and pin it into the Styrofoam ball. Continue inserting the felt circles in this manner until the entire Styrofoam ball is covered.
- Trim the second Styrofoam ball until it fits securely into your pot or metal container. Insert the other end of the wooden dowel into the foam and secure it with hot glue. Cover the Styrofoam with Spanish moss. Add a ribbon. Enjoy!
For the two-tiered topiary you will need:
- (1) styrofoam topiary form premade with a 3" ball on top and a 5" ball on bottom
- pot or metal container of your choice
- 1 ½ yard felt
- approximately 300 straight pins
- Spanish moss
- good scissors
- brown craft paint and a foam brush (optional)
Follow steps 2-6 above, modifying as needed. For example, you will need to cut approximatly 250-300 circles for this one. Yeah, that's a lot, but it is totally worth it!
This project could also be done using any color of felt that you desire to match the décor of your home. And one of my favorite parts about this project is that if you pick a neutral container, you could use this as decoration for other holidays or even leave it up all year long!
I love finding home décor items that are simple to make and look fabulous! And this one is definitely a favorite of mine!
P.S. - A local small paper has asked me to write for them. My first article was published this week! And I used this idea in my article! Enjoy!
Please Follow my blog (on the sidebar)
Like me on Facebook
Follow me on Twitter
And Subscribe to a Daily Newsletter
This idea was also published in The Current
I participate in the link parties found here.



Sarah @ Sarahndipities
What a pretty topiary!! Great tutorial, too! Thanks for sharing!
Ashly@Moon Walk
Thanks, Ashley. It looks great.
AliLilly
OH!! That looks so sweet! I love it! 🙂
Allison {A Glimpse Inside}
Looks awesome!
Courtney ~ French Country Cottage
This is just so cute!! Love topiaries- thanks for sharing at Feathered Nest Friday! 🙂
Breanne
I love this idea, thank you for the directions! Great pictures too!
Sarah at Finishing Touch Interiors
What a fabulous idea, Im rubbish with plants so something like this on display would be a really great alternative to brighten a room ill give this ago thank you for sharing it
echick
i have masde this twice now they are so cute and fun i did it in grey and glitter blasted it with spray so fun!!!! thanks for the inspiration your awesome
Joanna
Wow! I just made one of these to use as a money tree for my best friend's wedding. I had the idea in a dream and I did a much tighter placement of the circles, which meant double the circles. Now I've found your blog 🙂 they say great minds think alike.
Joanna
Wow! I just made one of these to use as a money tree for my best friend's wedding. I had the idea in a dream and I did a much tighter placement of the circles, which meant double the circles. Now I've found your blog 🙂 they say great minds think alike.
Ashley Phipps
I bet they turned out great!!!
Donna S Emmons
How do you get the bigger "rod" in the styrofoam? Where do you get it? How do you cover it up where it meets the styrofoam? Thanks so much! I LOVE this idea and want to make one.