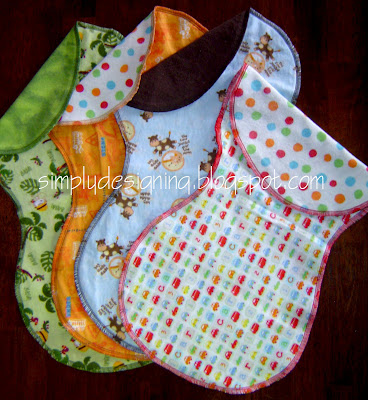
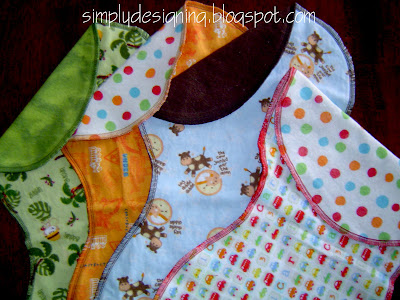
DIY Burp Cloths can be made several different ways but this tutorial is the best EVER! I made these for my daughter but also received a myriad of other burp cloths at her baby shower. These were by far the most functional and the cutest!
I have made some in anticipation of our son’s arrival, so these are more “boy” oriented ones, but you can obviously use any prints you want to.
I was lucky and found my fabric on a 50% off sale! Then I had a coupon for 20% off your entire purchase, even sale items. So, I figured my cost was 80 cents per burp cloth! (Plus the thread costs, but since we didn’t need to buy new thread…).
So not only are they the best burp cloths, they are also the cheapest!
Supplies you'll need to make DIY Burp Cloths
• Brown paper grocery store bag to make a pattern with
• Ruler
• Pencil/Pen
• Scissors for paper
• Fabric Pins
• Fabric scissors
• ⅓ yard flannel fabric per burp cloth (44”-45” wide fabric) (Flannel is the key here, so don’t buy cotton fabric. Spit up will just run off of cotton burp cloths and/or soak through to your clothes. Ew. The flannel fabric will absorb the spit up and they actually work better after each washing!)
• Matching or contrasting thread (4 spools of each color)
• A serger, or someone who loves you who owns a serger and is willing to sew a bit for you
Directions to make DIY Burp Cloths
Step 1: Prewash your fabrics
I know it is not a lot of fun, and I accidentally left my flannels in the dryer too long and they became entangled and wrinkly (Yes, I then had to iron them before I could cut them out…don’t make that mistake!), but prewash your flannel fabrics. You will be SO happy you did this!
If you don’t, they will shrink and cause the edges of your burp cloths to become wavy and then your burp cloths will not look nearly as good and, if you are like me, you will want to iron your burp cloths, which really is a ridiculous thing to have to do.
So please, avoid the heartache and prewash all your flannels before you get started!
Step 2: Create your Pattern!
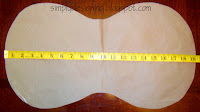
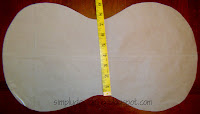
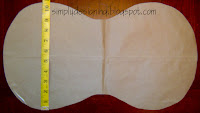
Use the following dimensions and photograph to sketch out your burp cloth pattern on to an open brown paper grocery bag.
(Or go here to purchase the template!)
This does not have to be perfect, but try to get it as symmetrical as possible. However, remember that you will be serging around these so that will make up for some discrepancy in this step.
Once you have the pattern sketches on the bag, cut it out.
Length: 19.5"
Width middle: 7.25"
Width (widest point): 10.5"
Step 3: Cut the burp cloths
Fold your fabric in half. You will be cutting two burp cloth sides at a time. These burp cloths are double sided and made with 2 pieces of flannel each. (⅓ yard fabric yields 2 burp cloths sides).
If you are really adventurous, you can put two, folded fabric pieces together and cut four sides at a time. However, if you try this, be sure to pay attention that the pattern fits in all directions on all fabric layers otherwise you may end up with a short burp cloth in there. Oops.
Pin the pattern to both thicknesses of flannel and cut!
I like to cut all my burp cloths at the same time before moving on.
Step 4: Decisions, decisions, decisions…pair your burp cloths
Decide how to pair your fabrics. You will use two flannel pieces to make one burp cloth. You can, of course, use the same pattern for both sides of the burp cloth, but I like to mix mine up!
You get 2 flannel sides out of ⅓ of fabric. So, if you choose 2 different fabrics, you will have 4 sides which means you can use one fabric for the front and one fabric for the back and you would have 2 matching burp cloths. (does that makes senses?)
Once you have figured out your pairing, place both sides, right-side out together.
Step 5: Serge
Ok, well I fall into the group who does not own a serger. But I do know someone to owns a serger and who loves me. (Thanks, mom!) So I enlisted my mom’s help to with the final step of this project.: serging the edges together!
With wrong sides together (right sides out), serge around the outside edge in either a matching, complementing, or contrasting color of thread, your choice!
Step 6: Use and Wash…or give away!
Use these burp cloths often and wash them to death! They will absorb better after each wash! Or make a few DIY Burp cloths to give away as baby gifts!
Looking for other great ideas for your baby?
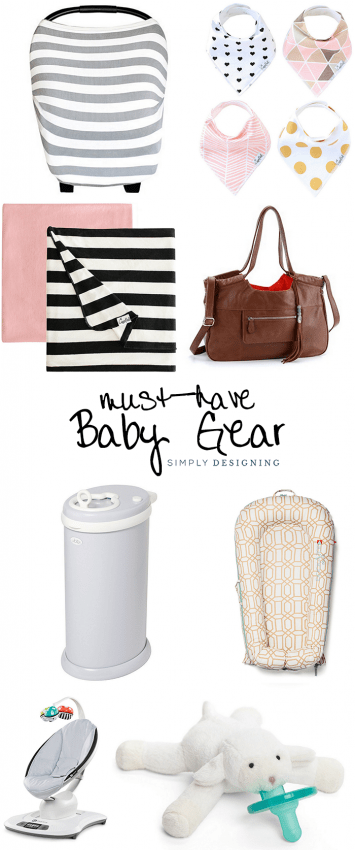
Must-Have Baby Gear for 6-12 Months and Beyond
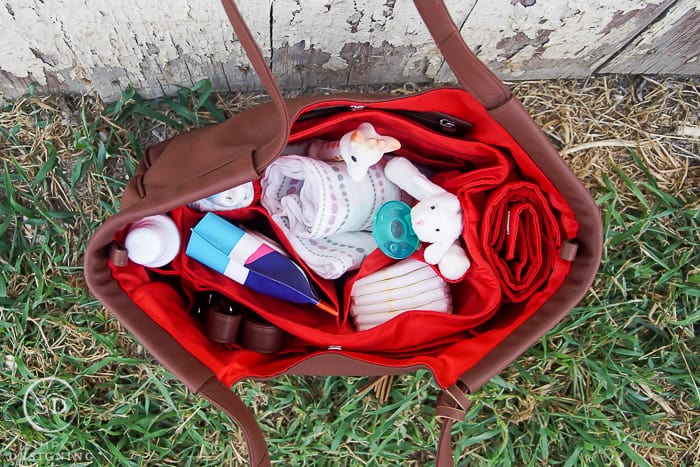
How to Choose a Diaper Bag




Randi
I love those burp cloths. Thanks for the tutorial!
Steph @ somewhatsimple
this is fantastic! I love these!
Maridith
Great tutorial!! I am a new aunt and I have LOTS of friends who are pregnant. This is a great gift. I just need to wipe the dust off my serger (and remember how to thread it)to make these. Thanks so much for sharing. I will be back for your give away tomorrow!!
Lori
Those are so cute. I wish I could have fun some as cute as those when my daughter was youner. She drooled so much she made all of her clothes wet.... I used a lot of burp cloths, and none matched what she was wearing...<br /><br />thanks for joining my party.<br />Lori
toni
cute!! great job Ashley : )
just me...
Too cute! TFS
Denise Marie
this is exactly what I want my mom and I to make as our 1st serger project. We have 3 cousins with newborns to make them for.
Andrea @ The Train to Crazy
Great job! Very cute!
Empty Nest Full Life
I love those, and a good reason to figure out how to use my new serger. I need to make a stack for baby gifts that I often need. Jackie
Suzanne
Love them! Thanks for this!
Cheryl
Love this idea. i have a pattern similiar to yours, but it doesn't suggest serging. This serging idea does make them easier. i would of never thought of flannel. I usually get cotton for one side and a cloth diaper for the spit up side (smile.)
Anonymous
Ashley you have such wonderful ideas! Glad I found your blogspot. Take care & good luck w/ everything! hugs, cb
Katie
Great idea!! I've been looking for easy burp cloths, so this is awesome. Thanks for checking out my tiny little blog! 🙂
simplydesigning.blogspot.com
This comment has been removed by the author.
simplydesigning.blogspot.com
Maridith, good luck making these! They are GREAT to give as gifts! Good luck tackling your serger!
simplydesigning.blogspot.com
Denise Marie, good luck making these! They are so simple and they really are great burp cloths!
simplydesigning.blogspot.com
Empty Nest Full Life - good luck with the serger! I know they can be troublesome sometimes but these are worth it and they will be well received baby gifts I am sure!
simplydesigning.blogspot.com
Cheryl, thanks for visiting my post! The flannel works amazingly well and as you wash it more and more it becomes more absorbant! But I bet the cotton fabrics are easier to find in cute patterns. Maybe one day I will need to try doing them your way! Thanks for sharing!
Lynette
Does the flannel have to be wool flannel then and not cotton flannel? Or is any kind of flannel okay?
simplydesigning.blogspot.com
Katie, good luck making your burp cloths!!
simplydesigning.blogspot.com
Sorry it has taken me so long to respond to these comments!<br /><br />To everyone, thank you SO MUCH for coming and checking out my blog! I am glad you liked this tutorial so much! These are easy to make and the greatest to use!<br /><br />Remember to check out my current Giveaway which includes 1 burp cloth and a template to make your own burp cloths!<br /><br />Also, if you make some of these
bec4
Those are so great--I will have to make some for gifts (luckily I don't need any for my shoulders). Thanks for linking up!
simplydesigning.blogspot.com
bec4, thanks for visiting my blog and this post! Good luck making these for gifts! I am sure they will be well-received! Forward me some photos of your final projects! Thanks again!
Nicole
do you absolutely need a surger?? I don't have one, nor does anyone I know... but they are exactly what I need. And way cuter than anything you can buy!
simplydesigning.blogspot.com
Nicole, great question! No you to not need a serger to do this. There are several options. <br /><br />1. Many sewing machines do have a serger type stitch, it is a stitch that goes along the edge of your fabric and covers both the top, bottom and side of the layers. Not sure if that makes sense. This type of stitch is often seen on fabric napkin edges. I would experiment first with this
Kimm at Reinvented
So cute, and would make a great gift, one can never have too many burp cloths! :)<br />Thanks for linking up to Trash to Treasure Tuesday, could you please add a link to REINVENTED in your post? Thanks. 🙂
Carolyn @ My Backyard Eden
Those are the cutest burp cloths ever! I love your choice of flannel and I LOVE a tutorial!<br /><br />Thanks so much for linking up to "Make It Yours" day!
simplydesigning.blogspot.com
Carolyn, thanks for checking out my link! I enjoy your parties!
rose
they are cute...tutorial was really helpful
Kaysi
Those are so cute, thanks for the tutorial, I would have never known how to do it! Thanks for linking to the Motivate me Monday party, please add a link or grab my button, thanks!<br />Kaysi Keeping It Simple
thecruices
I cannot wait to make these for 4 close friends who are pregnant and due within the month! I am wondering if you could just use binding all the way around - I don't have a serger and my machine does not have a great serge stitch! LOVE THIS POST!
simplydesigning.blogspot.com
thecruices - Thank you for checking out my blog! In answer to your question, I do not see why you couldn't use binding all the way around. I am sure they would look cute! My other ideas are as follows:<br /><br />-Sew both sides together with insides-out leaving a small opening. Flip right sides out and finish stitching the last little part together. Could even top stitch around the edge
thecruices
Thanks! I think I will try the binding and see how it turns out!!! This is going to be so much fun and I will definitely post pics when I'm finished!!
thecruices
Thanks! I think I will try the binding and see how it turns out!!! This is going to be so much fun and I will definitely post pics when I'm finished!!
Heather@ theherberfamily.blogspot.com
Very cute and totally usable!<br /><br />Thank you so much for stopping by the Talented Tuesday at My Frugal Family link party, and adding this to the page! Don’t forget to stop back next week to see which links from this week are featured, and to add your new links!
Leigh of Bloggeritaville
Ty you mush for sharing this! Thanks for sharing today. Thank you also for linking up to Thrifty Thursday!<br />~Hugs~<br />Leigh<br />Tales from Bloggeritaville<br />www.lbratina.blogspot.com
fawnda
These are ADORABLE! I love the fabric that you picked!
Tasha
Those are seriously fabulous! I love having fun burpclothes. They make me want a serger. Someday, someday. For now I will just keep trying to earn for one.
Its So Very Cheri
On my Favs list<br /><br />Cheri
simplydesigning.blogspot.com
thecruices - I can't wait to see how they turn out!
simplydesigning.blogspot.com
Heather - Thanks for stopping by! I always enjoy your link parties!
simplydesigning.blogspot.com
Leigh - thanks for stopping by my blog!
simplydesigning.blogspot.com
fawnda - thank you so much for stopping by my blog! And thank you for the sweet comment! I had a hard time finding fabric I liked for a boy...it was so much easier with my girl for some reason. So thank you!!
simplydesigning.blogspot.com
Tasha - thanks for stopping by my blog and for the nice comments! I know...you and me both...one day we will both own a serger. 🙂
simplydesigning.blogspot.com
Cheri - thanks for stopping by my blog and THANK YOU for adding me to your Fav list!! I am so excited!!
Angie - treasuresfortots@gmail.com
Thank you for sharing your awesome project at Thursday’s Treasures last week! Come share your crafty projects in this week’s Thursday’s Treasures too!<br />http://treasuresfortots.blogspot.com/2010/02/thursdays-treasures-week-9.html
simplydesigning.blogspot.com
Angie - thanks for taking the time to visit my blog! I enjoy your link parties! We will see you this week for your next one!
Delna Irving
Thank you for this excellent tutorial. It is a great boon for first time mothers like me.
Irina Johnson
Thanks for the brilliant tutorial. It was a boon for first time mothers like me
Alena
Thank you for your tutorial! I just wanted to clear something up that might be confusing for people. You had said to get flannel, not cotton fabric. However, cotton is the material, and flannel is the weave of the fabric. I believe that you are calling for cotton flannel as opposed to cotton broadcloth/plain weave, which is often sold as quilting fabric. Both are cotton, but the flannel weave is what makes the fabric absorbent. My guess is that a poly flannel won't do you any favors in the absorbency department. I hope this helps!