I know I've mentioned that I love a lot of the designs, art and furniture from Pottery Barn, but you know I don't always love the price. So when I saw this really pretty Yellow Diamond Panel from Pottery Barn (retails for $199), I knew that I could easily recreate it with the help the new Chalky line of paints from Americana! This piece took a little bit of patience to create, but mostly due to dry time. This knock-off was not difficult at all and so I am excited to how you how I re-created this Pottery Barn Knock-Off Diamond Art!
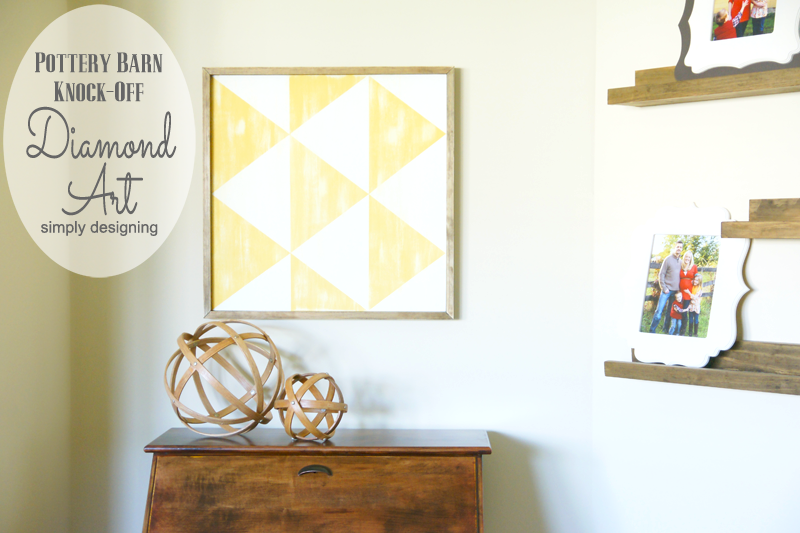
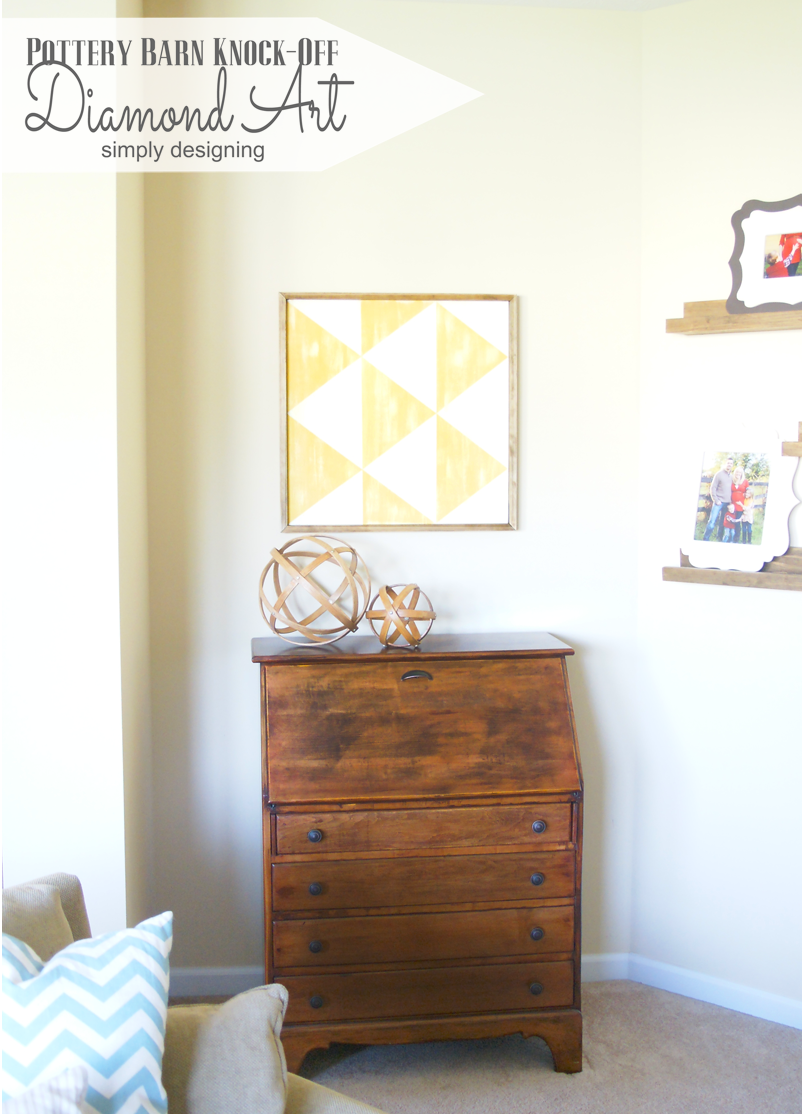
Isn't that just so much fun! It is a bit modern and a bit rustic. I think the triangle shapes are so much fun and unexpected and the cream and yellow color is just perfect for my home! You can of course customize this to match the colors in your home too!
So in case you are wondering, here is the the original one from Pottery Barn:
And here is my version:
Pretty amazing huh!? Here is what I did...
Pottery Barn Knock-Off Diamond Art
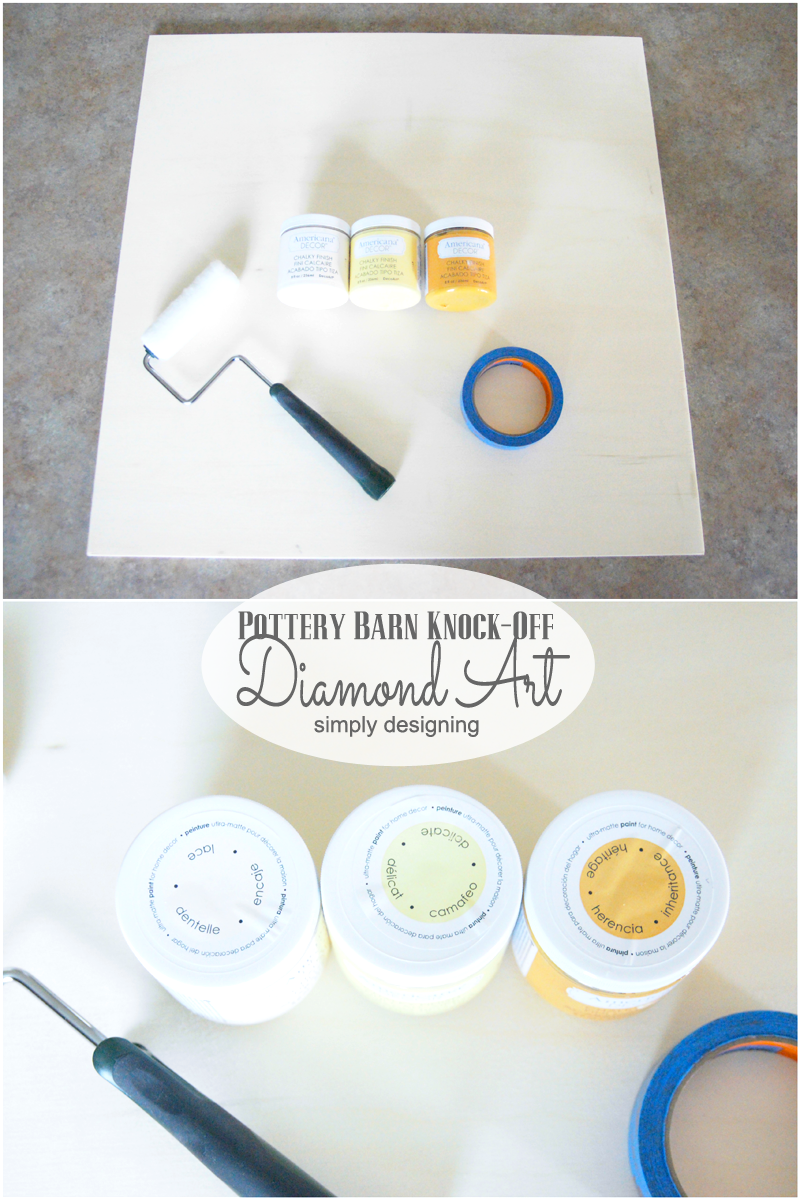
To Create this, You Will Need:
- Americana Chalky Paint, Lace (or other)
- Americana Chalky Paint, Delicate (or other)
- Americana Chalky Paint, Heritage (or other)
- Stain, Minwax Dark Walnut (or similar)
- Foam Brush
- Foam Roller Brush (optional)
- Painters Tape
- 24" x 24" x ½" plywood
- (2) 6' long 1" x 2" boards
- Sandpaper
- Wood Glue
- Brad Nail Gun (optional)
- Picture Hanger
Before I began, I gave my plywood a quick sanding to remove any rough edges. Then I used a foam roller and my off-white chalky paint to give my entire board a white base. Then I let it dry completely. Thankfully, chalk paint dries really quickly so the board went together quickly.
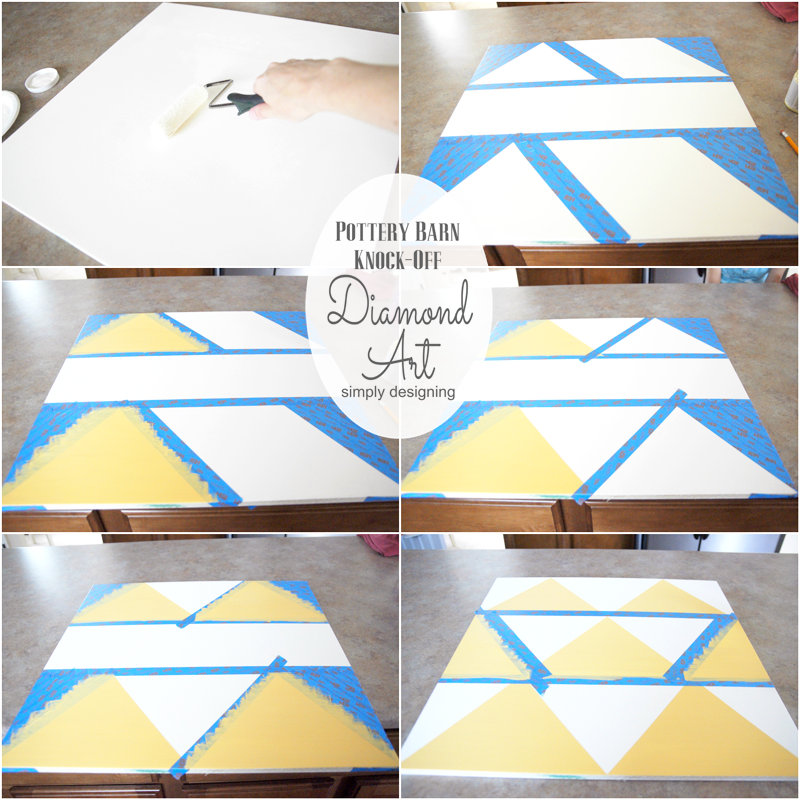
Then I took my painters tape and began taping off my board. Because the triangles all touch, I had to tape off just one or two triangles at a time to paint.
I mixed about 50% Delicate (light yellow) and 50% Heritage (dark yellow) paint to create the perfect yellow for this project. Then I used my foam brush to give each triangle two coats of my mixed yellow paint.
Check out my pictures below to see how I taped and painted my board.
Can I tell you how much I LOVE this Chalky paint!? It paints and covers so nicely and leaves such a pretty finish. It is also really easy to sand and distress which makes it the perfect kind of paint for a project like this.
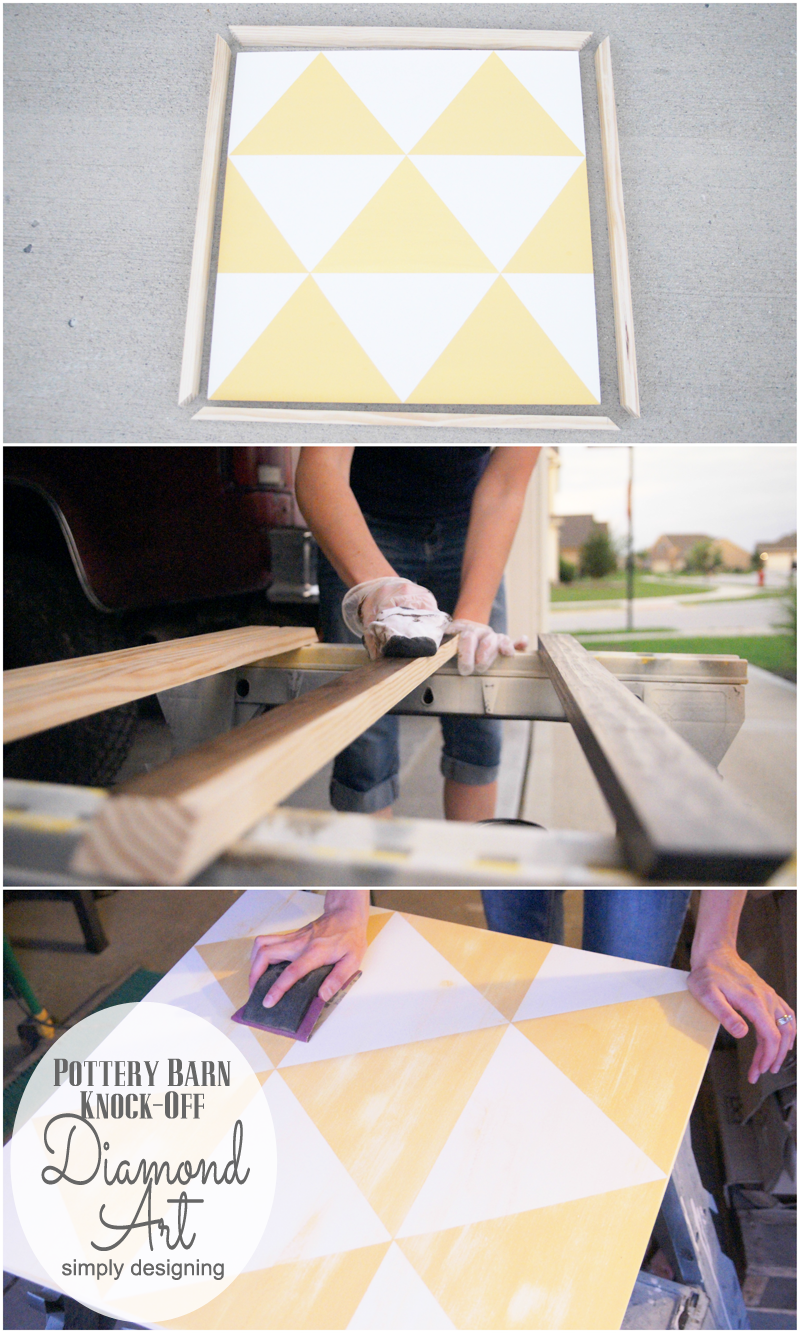
After my board was dry I cut my 1" x 2" boards to fit around my final board like a frame. Then I sanded and stained the frame pieces and then I distressed my triangle board using sandpaper.
I attached my frame to the sides of my plywood using our brad nail gun and some wood glue. But if you don't have a brad nailer, don't worry, you can use just wood glue instead! Just be sure to secure the boards together with clamps or painters tape to clamp it all together while it dries.
Then attach a hanger to the back of your board and enjoy!
I love how our new artwork looks in our home! It took less then half a day to DIY (including all dry time) and only cost me about $20! Seriously! Who would pay $199 when you can DIY it for $20! (Note: I had many of my supplies on hand already for this project. If you don't have any of them, it will cost a bit more then that to re-create yourself. 🙂
You Might Also Enjoy these Other Knock-Off Projects I've Done:
PB Knock-Off Hanging Ghosts
PB Knock-Off Shelves
PB Knock-Off JOY Decor



Amy Gehen
Love it!
Ashley Phipps
Ah thanks so much Amy!
Erin @ Magenta & Lime
This looks great!!! Love it!
Ashley Phipps
Thanks Erin!!
Krys W
Ashley, Great job at recreating this piece. It looks great! Thank you for the tutorial on how you did this.
Have a Wonderful Day!
Ashley Phipps
Oh thank you so much Krys! And thanks for stopping by!
Katie Goldsworthy
Very cool! I love this! Pinning to the Monday Funday board.
Ashley Phipps
Thanks so much for pinning!!
Jennifer Dawn
This looks great! I'd love for you to share this at my weekly link party! http://www.thelifeofjenniferdawn.com/2014/09/a-little-bird-told-me-link-party-108.html Hope to see you there!
Ashley Phipps
Thanks so much!
Layne
Super darling - I love the color you chose!
Ashley Phipps
Thank you so much!
Katie Adams
Thanks for linking to Create Link Inspire at The Crafty Blog Stalker. You have been featured and pinned! Thank you for sharing.
–Katie, TheCraftyBlogStalker.com
Ashley Phipps
Oh thank you so much Katie!!
kristina
This looks fantastic! I love the price on it and that fact that you made it, makes it look all that much better! Thanks for an idea and inspiration.
Ashley Phipps
Oh thank you so much!!
Trisha D.
Ashley, your Rockstar KnockOff project made it to our features this week! Pinning & sharing this week! Thanks for linking up to Outside [the Box]. I hope to see you again this evening at 5pm EST: http://bit.ly/BlackAndWhiteObsession
Ashley Phipps
Oh thank you so much!!! I truly appreciate the feature!
Megan
I love the piece and who doesn't love a PB Knock off!
Thank you for linking them up to Outside the Box link party! Your projects is being featured on our blogs today!