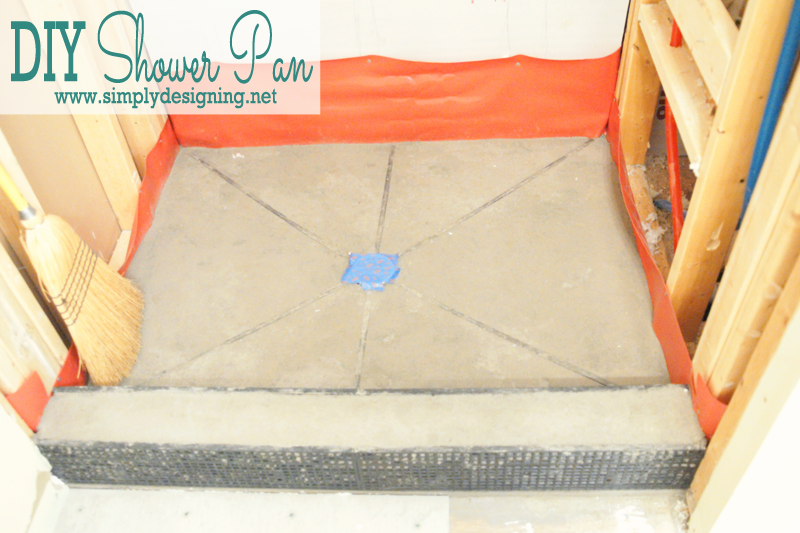
If you follow me on Instagram you have probably noticed that we are hard at work creating our dream master bathroom! In my most recent post about our master bathroom remodel, we showed you all the prep work we did prior to installing our shower pan (check it out here). Today, I am going to show you how we created our Shower Pre-Pan and Our Shower Pan.
Yes. We did all this work ourselves. No we did not hire out. The Tile Shop has created a great Shower Pan kit that allows almost anyone to be able to do this themselves and so we knew with their help, we could tackle this project!
In case you don't remember, this is what our shower pan area looked like after we did all of our prep work:
This is our finished sub floor with our new drain installed. We put a sponge inside the drain to help ensure that nothing would fall inside while we were working.
Building a Shower Pan
Here is what we did next:
Attach Tar Paper
Tar paper helps to prevent the sub floor from absorbing moisture from the pre-pan mix that will go on top of it. So we laid out the tar paper in the bottom of our shower area where our pre-pan would go. We stapled the tar paper to the sub floor with a staple gun. We overlapped any edges and then used a box cutter to cut out a hole for the drain.
Snap Chalk Lines
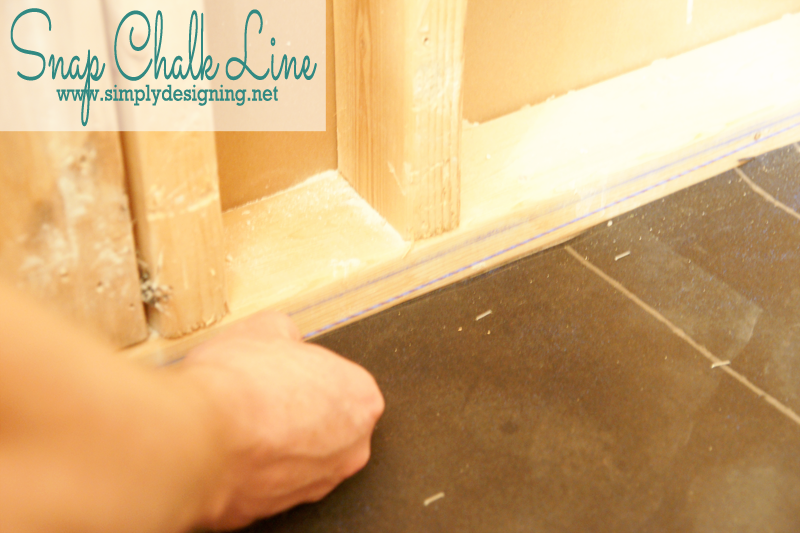
Next we snapped a chalk line around all shower walls, 1" above the sub floor. This gave us a level exterior guide for our pre-pan mix height. The pre-pan will then slope at an angle down to the drain.
Pour Pre-Pan
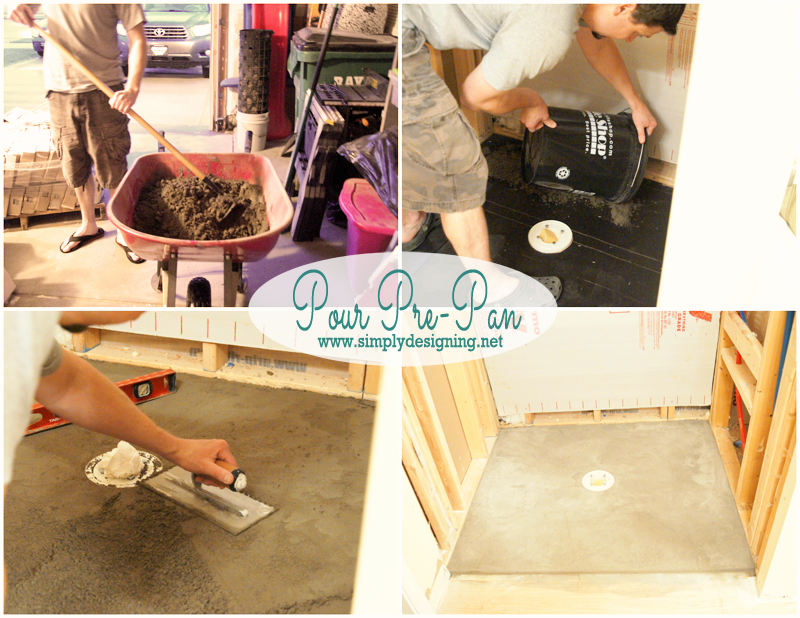
Then we mixed the pre-pan mixture in our wheel barrow with a garden hoe. We mixed an 80 lb bag of Floor Mix and approximately 1 gallon (4 qts) of Flexible Grout Admixture until we reached the consistency of wet sand that could easily be formed into a ball. We needed more than just one batch of the mixture for this space, but these were the proportions we used.
After the mixture was well mixed, we let it sit for about 5 minutes. And then we poured the mixture into the shower pan space. We used a trowel to pack the mixture and to create a slope from the outer chalk line down to the drain. There should be ¼" pitch from the exterior walls to the drain. We used a level to confirm that our ¼" pitch was correctly done. Also, we temporarily placed a 2" x 4" piece of wood along our open wall to contain the mixture.
We then let the pre-pan dry for 24+ hours.
Lay Moisture Barrier
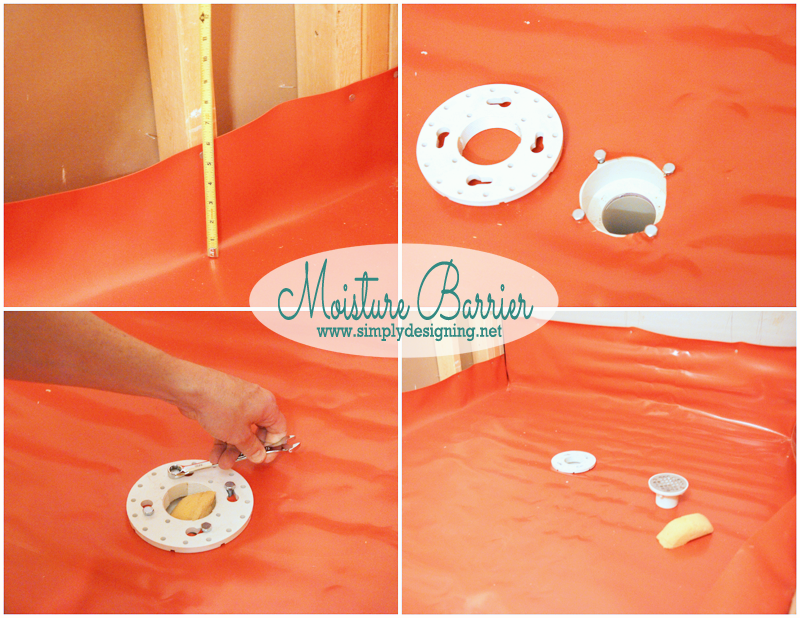
After our pre-pan was completely dry, we laid our moisture barrier (shower liner) in our shower space. We let the liner go up all walls at least 6", but it is wise to plan for a little extra just in case.
We used 1" galvanized nails to secure the liner to the studs. We placed the nails at least 5" from the bottom of the floor to prevent leakage. We tucked the shower liner into the corners behind the studs (keeping the liner up) and then secured that in place with nails.
Next we trimmed the liner around the inside of the drain hole using a box cutter and we removed the excess liner. Then we secured the second piece (top clamp) of the drain to the base and tightened it down, securing the liner in between the base of the drain and the top clamp.
Install Goof-Proof Shower Pan Kit
At this point we took the center ring from the Goof-Proof Shower Kit and placed it on top of the top clamp of the drain. The Tile Shop has created this awesome kit to help anyone DIY their own shower pan! So if you plan to do this yourself, I highly recommend picking up one of these kits!
Next we measured and cut the spokes and then we attached them to the center ring. Then we twisted the top piece of the drain into place. This secured the kit from moving.
We also installed the curb assembly with the shower liner run in between the two curb sides. We also covered the top of our drain with tape to prevent our shower pan mixture from getting in there.
Pour Shower Pan
We first adjusted the height of our drain to be flush with the height of where the tile will be. We figured this out by placing a piece of our floor tile on top of the spokes and then we adjusted the height of the drain to be flush with the height of the tile (we tried to account for a bit of mortar as well.)
Then we mixed more shower pan mixture using the same method as for the pre-pan above. We poured the mixture into our liner and packed it down. We used the plastic spokes as a guide for creating our pitch. We were careful to create a smooth, even surface.
We also packed this mixture into our curb assembly. We allowed the top of the curb to have a slight pitch inward so that any water will drain into the shower.
Do a Happy Dance and Let it Dry Completely!
We are really happy to have this part of our shower pan completed! And we are excited to move on to our next step too.
Check Out Our Master Bathroom Remodel Series:
Part 1: Master Bathroom Inspiration
Part 6: Installing Moen Posi-Temp® Shower Fixtures
Part 7: How to Install Radiant Heated Tile Floors
Part 8: Install New Tile Counter Tops
Part 9: Install a Tile Accent Wall
How to Install a new Shower Door
How to Install new Bathroom Mirror Frames (in about 10 minutes!)
DIY Framed Mirror with Hidden Jewelry Organization
Please note that I am not a professional. I am just sharing what worked for us. As always please use all proper safety precautions and read and follow all manufacturer instructions. Please note that I am not responsible in any way for any outcome if you try this yourself. I am not liable for any injury or additional cost or expense incurred. I always recommend consulting and hiring a professional if needed. And always be sure to check with local building codes to obtain all permits needed for any DIY project.


Bill thewoksoflife
Found your site on a link party - I love the goof-proof show pan kit for getting the slope to the drain right! I have done many of these and the kit really seems quite foolproof. Thanks for posting this!
Ashley Phipps
Oh thanks so much for stopping by and for your kind comments. Have a great day!
Lou Vaughn
Nice!
Kevin
Great site, and job well done! My biggest concern is the mud mix (floor mud). I read you used 80lb bag and the admixture, was this product (Floor Mix) from the Tile Shop as well? Lastly, I read a lot about just using water, so is the admixture to make it stronger because of how thin it gets rather than wire mesh for preslope and quick pitch?
Thanks,
Kevin
Ashley Phipps
Hi Kevin,
The admixture (from Tile Shop) helps prevent cracking. Water can be used, but the admixture makes it stronger.
ALIAS ROSE
I know the last reply was over a year ago. Why did you make the fall on the pre pan 1/4" if when you do the pan with the goof proof shower pan kit it has the 1/4" per foot required fall? Did this double up increase the fall to 1/2" per foot? Thank you for the post as it helps me lots.. I have a 60"x42" rh drain shower to do and the price and reviews of the prebuilt pan I was going to use is making me highly consider doing this method myself. Thanks for your time.
Ashley Phipps
Hi, so sorry if this wasn't clear. We created the fall in the pre-pan stage because the liner that goes on top of the pre-pan needs to be angled at a pitch to help direct water that seeps through the tile and other layers towards the drain. If you do not have a pitch in the pre-pan, the water will just sit on the liner creating many issues, including potentially mold. So you don't want to skip that step. Typically shower pans have a total pitch change of 1/4" - 1/2" fall per 12". So building the pre-pan in this manner allows the goof proof shower kit to work properly, keep the correct pitch change and insure that we don't have any water pooling or old issues down the road. I hope that helps!