You guys, I just love this project from Brittany, and I am so honored that she would share it here in a guest post while I'm snuggling my sweet baby girl. Thanks Brittany!
Hi, everyone! I’m really excited to be guest posting on Simply Designing today! My name is Brittany, and I blog about DIY, home, and garden at by Brittany Goldwyn. Today I am sharing a tutorial about how to make a tree stump side table!
This tree stump side table project had been a long time coming. It's an easy project when it comes down to it, but it took a lot of patience. That's because you have to wait for your stump to dry completely before you can start working on it, and that can be anywhere from weeks to months depending on when the tree was cut down and what conditions the stump has been sitting in. My process was even longer because my dad accidentally chucked my first stump that I had drying out at their house. He thought I had forgotten about it because it had been drying for so long! (It's okay dad, I forgive you.) So when my parents recently took down a tree in their backyard, I was all over finding the best stump from the pile to start my tree stump side table project again.
Here was my inspiration from West Elm...with a $249 price tag.

Lovely, but $249? Nah. Not when you just bought a house! Take a look at my version:
Maybe I'm biased, but I actually like mine better! What do you think? I love how mine has a bit deeper of a color and a little bit more shine to it. So let's chat about what I used and how I did it!
Here's what you need to make a tree stump side table:
(Affiliate links below!)
- Tree stump or pry bar
- Flat tip screwdriver
- Bleach and water
- 220-grit sandpaper (assorted pack here)
- Minwax Stain in Special Walnut
- Minwax Polyurethane in Semigloss
And here's how to do it!
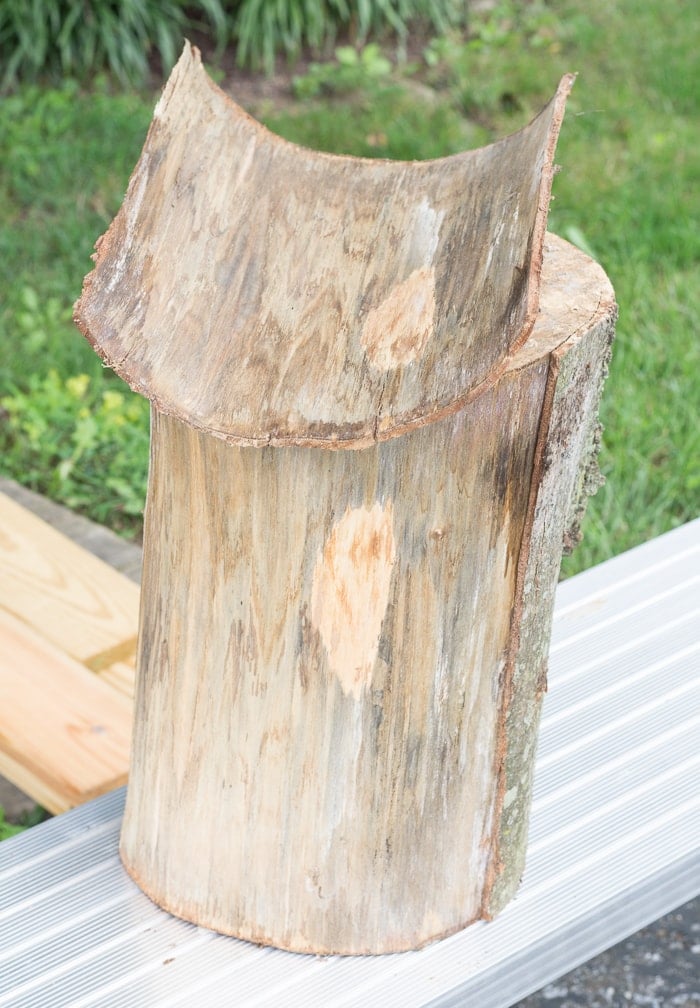
Step 1: Find a stump and peel off the bark. My parents had just taken down a tree in their backyard a few weeks before and kept it for firewood. We looked through the pile and picked the most even stump we could find.
Then I used a flat tip screwdriver to peel off the bark. This bark removal process was MUCH easier than what I had to go through when I made my DIY cat tree using real branches. I could not believe how easy this stump was!
(P.S., you can check out a detailed post I did on how to strip and finished tree branches for decor here!)
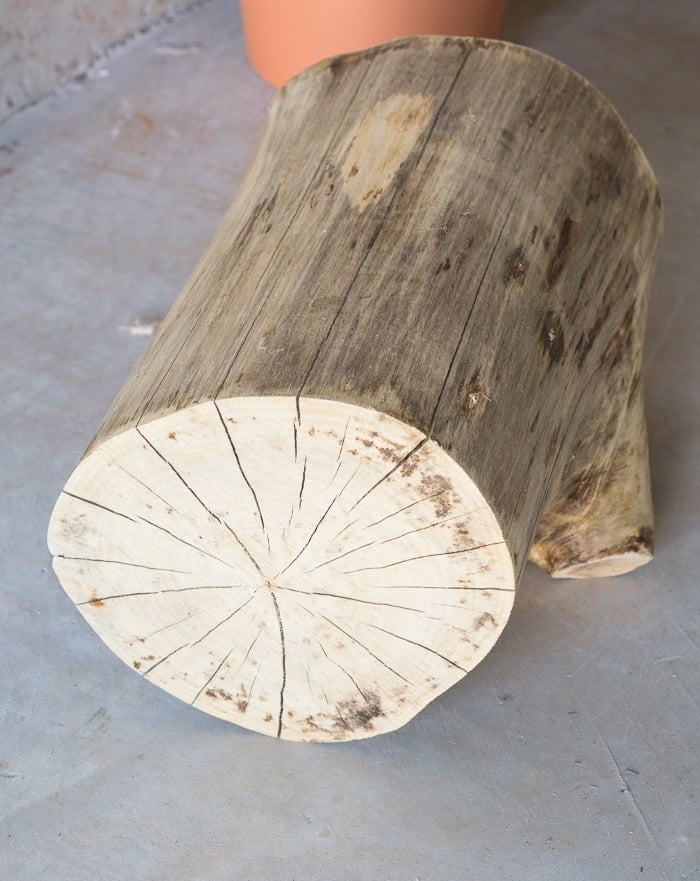
Step 2: Clean up your stump. Once I'd removed all of the bark, I had to clean it up. There was some mold growing on the stump due to some of the moisture it still had in it, so I wiped it down with a bleach and water mix at a 1:3 ratio to kill everything that was living on this bad boy. Here is pre-bleach:
Step 3: Once it's clean, it needs to dry! My stump still had quite a bit of drying to do, so we set it in my parents' basement right next to a dehumidifier to dry out for a few months. You don't need to use a dehumidifier, but it just helped to speed up the process.
You can still see some of the stains from where the mold was growing, but the mold itself is long gone. Once the stump dried out completely, it lost a few pounds, too. Here's my dry stump. You can see some of the staining on the side that I ended up making the bottom:
Step 4: Sand and stain your stump! Polish any rough spots using a 220-grit sandpaper. For the stain, you can keep it looking natural and use a light stain or go dark. I decided on something in the middle. Stain your stump just as you would any other piece of wood. (See my full post on how to stain and finish wood here!)
Step 5: Finish it off. To finish my stump, I gave it two generous coats of Minwax Polyurethane in Semigloss. Make sure to sand lightly in between the first and second coat.
And here it is, done!
This was an easy DIY...like I said, it just took a lot of patience waiting for it to dry out! There was some heated discussion in our house about which end it should stand on...I love it this way, but my husband and friend both wanted it flipped. What do you think?
LIKE THIS? PIN IT!


tracey
wow!! have asked a mate when he cuts a tree to save me some!! i think it look s fab as it is but the other way will look good too! thanks for sharing
Robert josefs
This is a wonderful article. I go hiking a lot so I'll find out if I can take wood that has been cut down. I'll start with an easy piece, but I'd like to make a headboard. I didn't know it takes months to dry.
Toni | Small Home Soul
Hi Ashley, I hopped over from Farmhouse 40 Inspre Me Monday link party. Your side table turned out beautifully, and yes way cheaper than $249 (crazy price). I didn't see what kind of tree it was that your parents cut down. I guess it doesn't really matter because any wood would look beautiful. We might have a few trees to take down soon. I'm not sure my husband would love them hanging out until they were all dry, but I'll do my best to convince him 😀
Julie
It's very cool, what a great conversation piece. I'd have to see it the other way up to see which was better, but hay - nice to have options!
Mary Denman
So cool!!
Janine
This is such a great tutorial and I love how your stump turned out! We have a ton of these, so now I will have to try it next summer! Also, wouldn't it be fun to have a piece of glass made for the top? I love your blog and this post!
Nikki
I love this! I will definitely be sharing with my friends. I hope you enjoyed our Wonderful Wednesday Blog Hop!
Stacey Keeling
Love these every time I see one. So organic and neat looking. 🙂
Pauline Molinari
Your side table is SO fab! Pinning! Thanks for sharing with us on the #MondayFundayParty!
Marie
This is gorgeous! Using a screwdriver to pry off the bark is super smart. Definitely keeping that tip in mind for all kinds of wood crafts. Thanks so much for sharing your tutorial with us at Merry Monday this week!
Mary-Louise Shimkus
Could you please tell me what sort of tree this stump was? I live in Florida and have pine tree stumps that I've been wanting to do something with, this would be ideal.
Thank you for sharing your instructions.
Kristin
About how many pounds would you say the side table is?
Angela
This is a great idea. The only problem is these can with anywhere from 20-50 lbs depending on what type of wood/tree it is. Def not something you move often.
Tammy Cleary
Do you have to remove the bark? I have 2 huge beautiful tree stumps I want to make into side tables for outdoors.
Ashley Phipps
Hi. I personally would remove the bark because I love the look of the this table. You don't have to, but it will look completely different and a totaly different project. And you would still want to find a way to clean and seal it. Best of luck!
Menna El-Sadaany
i have a stump that has parts poking out (assuming where branches were). Can I sand those off? Or how can I best smooth that area out?
Yvonne
Hi Ashley , how do you know when the stump is dried enough . I have one drying in the garage now for about a month , it seems dry to me , but someone told me it needs to be dried for a year ? Thanks, Yvonne
Kimberly Nelson
I love it! You did a good job. But I think you should flip it so the extended piece is up. That is how it would look in nature.
Joy
Hello! I came across your step-by-step process of creating your own tree stump side table. My mom wants to do something similar but for outdoor use.
Can you please elaborate on how long you waited for it to dry? And what is an alternative to drying if we don't have a humidifier or basement? Also, how would i know if it is actually dry?
Last question: My mom wants to treat the wood for anti-termite and also make it waterproof. Can you recommend any reliable method of applying such treatment, as well as good brands for the treatment solution?
I hope you can help us. I was so excited to read your post and decided to turn this into a family project. I would very much appreciate your help! Thank you!
Ashley Phipps
Hi! Thanks for reaching out.
As noted in Step 3, this will need to dry for a few months with a dehumidifier. If you don't have a dehumidifier, it will take longer. You need to make sure you get ALL the moisture out of the tree before moving onto the next step.
There are several brands of products that you can apply to wood to help deter termites. I have not used any of them, so I don't have a recommendation on brand.
To make it waterproof, I would use a stain and clear coat that is meant for outdoor use, like for a deck. These do not usually last forever, so you may need to reapply every year or so according to manufacture instructions and the type of wear and tear it is getting from your exact climate.
Best of luck!
Brock DeLaite
Great project, I found this trying to make a finished, glass top dinner table our of an actual tree stump. (Large part of the root system and first 18" of tree trunk.) In all reality, this is a finished piece of firewood, not a "stump" but same steps apply.. great job, does look marvelous.