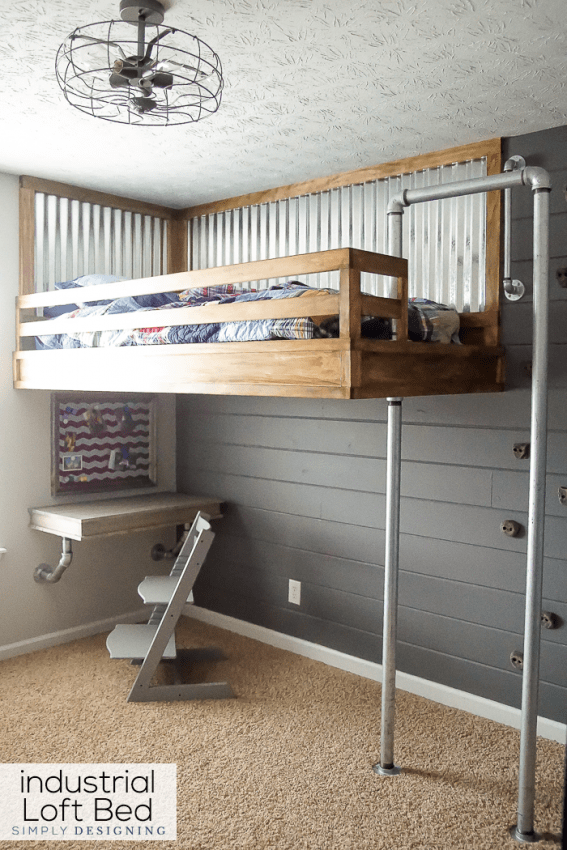
A while ago I shared our girls shared bedroom, we needed to reconfigure our daughter's room a bit so that both of our girls could sleep in there and I think the results were pretty incredible. And in the end, we built a beautiful loft bed for our daughter and a fun nursery space and you can see all the details of that post HERE! This resulted in our son (whose mattress was still on the floor...woops!) to beg and beg and beg for a loft bed of his own. He would actually whisper to my pregnant belly "You can't come out baby until mom and dad build my bed." I was 38 weeks pregnant and not at all amused. Once our little girl arrived we got to work almost immediately on his bed. My husband and I brainstormed, took baby on her first trip to the hardware store at only a few days old and began work on his fun room! And I just love love love how his Industrial Loft Bed turned out!
(I am including a few affiliate links in this post for your convenience. You never pay a penny more but it does help to support my site. Thank you for your support.)
I will truthfully admit that because I had literally given birth just days before we began this project, my husband did the majority of the heavy lifting. He was amazing at helping to bring our vision to life and I really appreciate his help with this project.
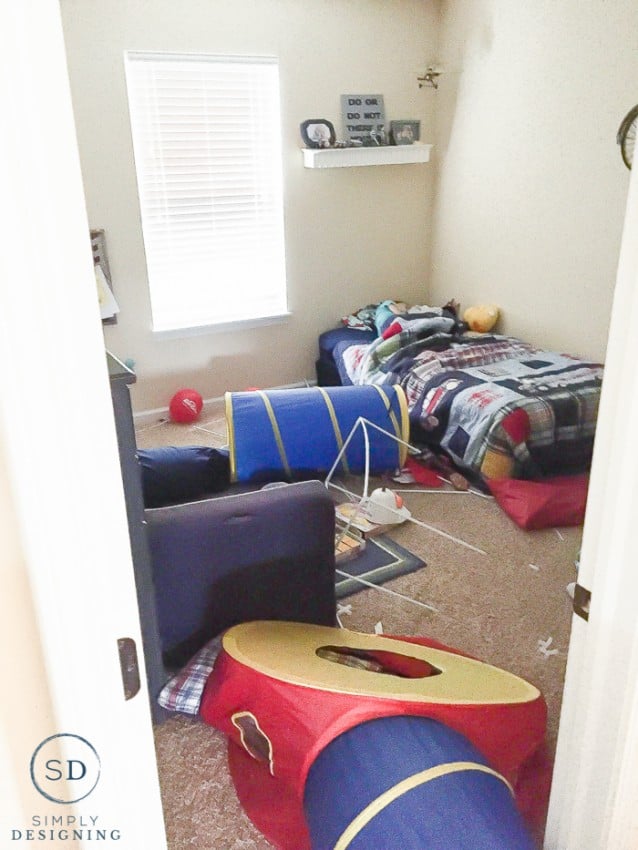
But first, the before. On any given day, there was a chance my son's room looked like this...
Embarrassing huh!? But I had grand plans for this room. A loft bed, repainted walls, a rock wall to get up into his bed, maybe a fireman's pole to get down...all with an industrial look perfect for a boy. My husband and I dreamed up a lot of different ideas, and it was so fun to see our dream (and our son's dream) become a reality!
I'm not going to give exact dimensions for this bed because we customized this to fit our space, our vision and the bed he already had. But I hope this post provides inspiration for your loft bed creation!
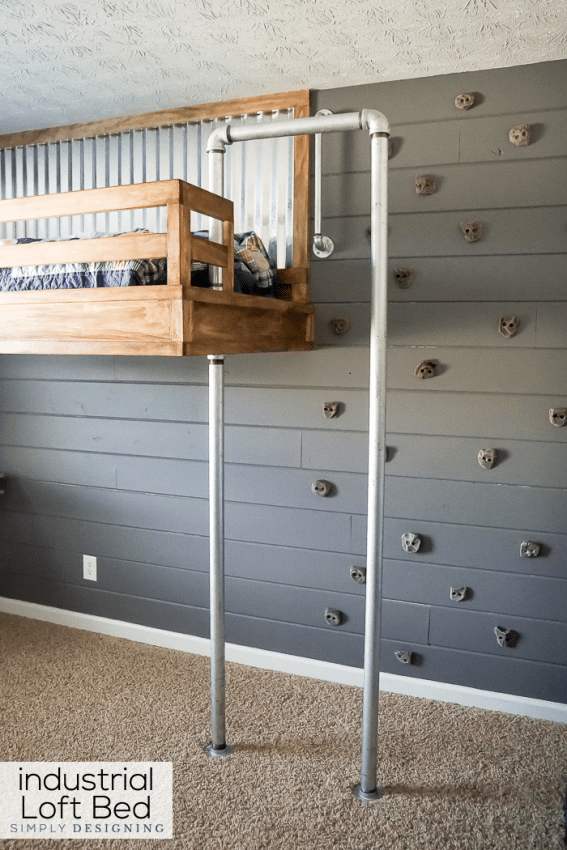
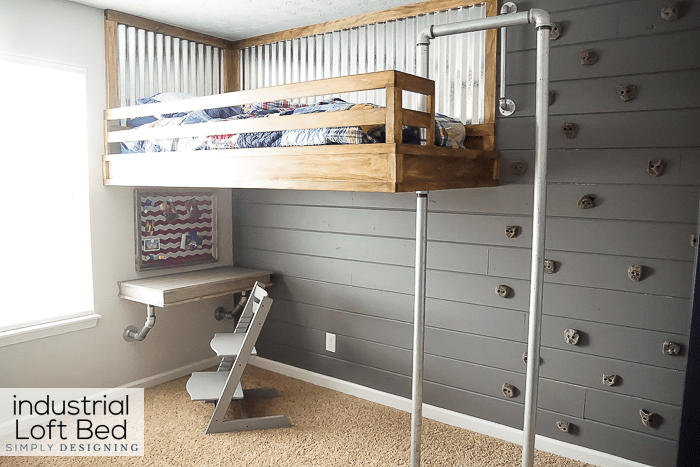
Industrial Loft Bed with Rock Wall and Fireman's Pole
We determined the height of the loft bed by figuring out where it needed to be placed so that we could put a desk under the bed and so that he could still sit up when he was in the bed.
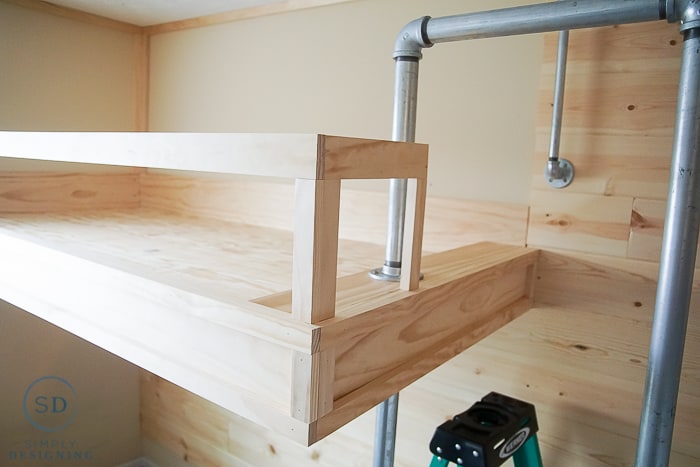
We made our platform about 8" longer than the mattress because we wanted there to be a small platform area where our son could sit to access the bed from the rock wall and to help him get on the fireman's pole. This also gave us a spot to attach the fireman's pole.
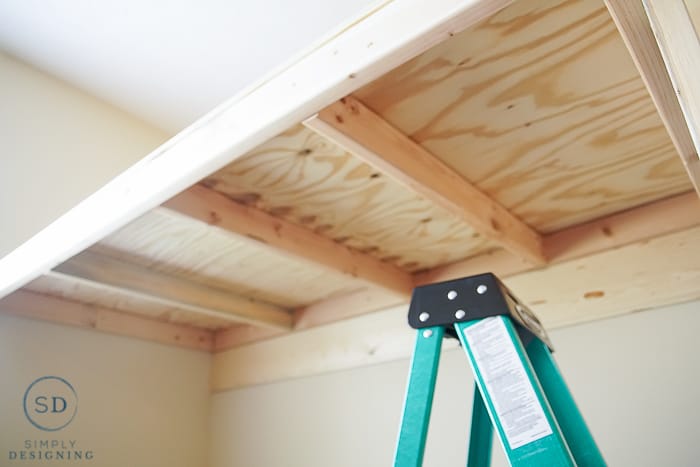
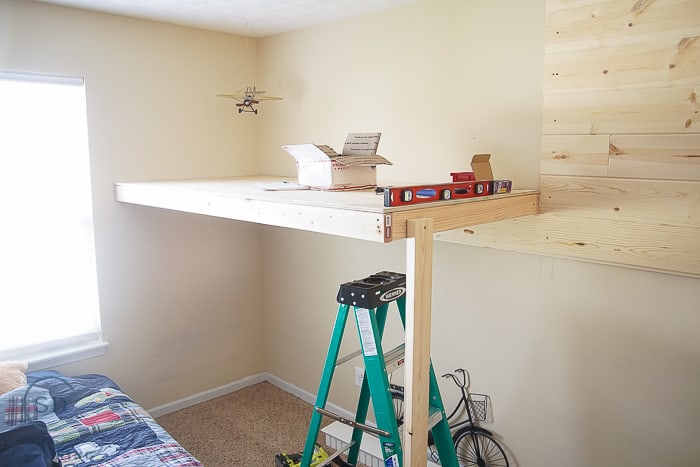
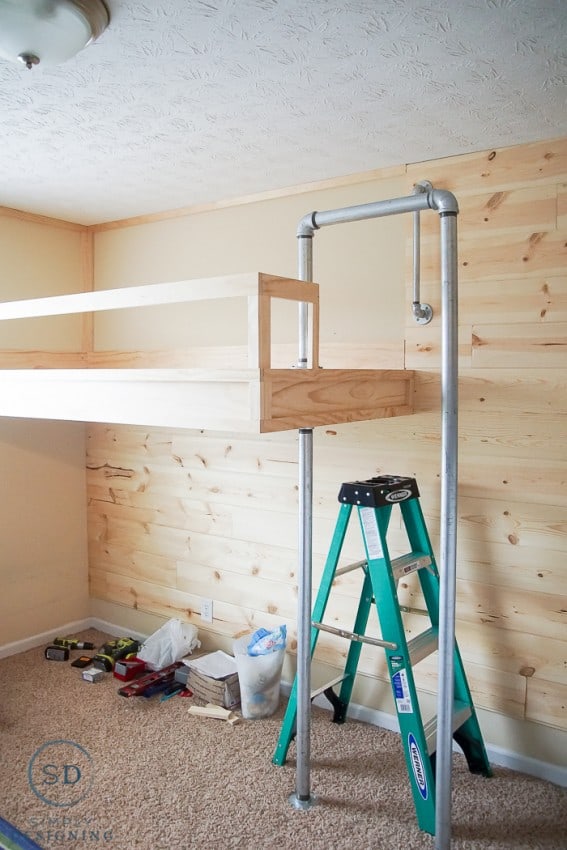
Then we began by framing out the platform for the bed to rest on. We marked all the studs on the wall and used 2" x 4" boards to frame out the platform of the loft bed. We attached the platform into the studs. This platform bares the weight of the bed so it is important to attach the frame into studs. Because we could only attach the bed into studs on two walls, we temporarily propped up the other corner (not attached to a wall) with a 2" x 4" board knowing we would later add a pole here to support the weight of the bed.
Once the platform was up, we put a piece of plywood on top of the platform that was the same size as the platform. (Our local hardware store was able to cut this to size for us when we purchased it.)
At this point we paused construction on the bed. Because we wanted to add a shiplap style wall on the same wall as the bed and we wanted the bed trim to lay on top of the shiplap, we installed the shiplap style wood at this point. I am actually sharing more on installing and painting this wall on my blog tomorrow, so be sure to stop by tomorrow to read all about it.
After the wood was on the wall, we got back to working on the industrial loft bed.
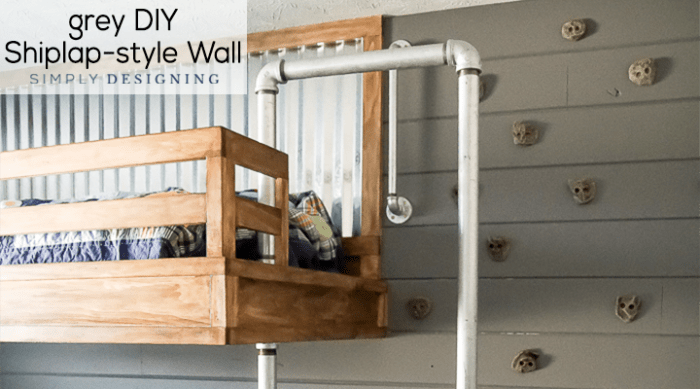
The next thing we did was install more of the shiplap style wood on the bottom of the loft bed platform. The wood we used was actually called "car siding" and had a tongue and groove joint (shiplap has a different joint) but it looked similar. So I suggest using whatever you can find and like.
Then we added trim to the outside of the bed. We used a 1" x 8" along the front of the bed. We also added 1" x 8" board on top of the platform along the wall. We used 1" x 2" to create a framed look around the outside of the 1" x 8" boards.
We used 1" x 3" boards to add a railing using pocket holes and our Kreg Jig. We also built out the small platform at the foot of the bed.
Next we created our fireman's pole. We have two sections of the pole. One section goes from the bottom of the bed to the floor; this bares the weight of the bed on that corner. Then we have a second section of pole that attaches to the end of the bed (the extended platform area) and goes up, out and down for him to slide down (or climb up). Both sections of the poles are attached to the bed using flanges. We placed the two sections directly over top one another so that they look like one pole, but it is actually two different sections.
We used 2" galvanized pipe, flanges, and corner pieces to create the fireman's pole and support pole. As a note, we needed to have the pipe trimmed to the proper length and rethreaded. Thankfully we found a hardware store that was able to do that for us because we didn't have the right tools to do that. So call around and see if you can find a store to help you with this if you need to.
We also added a grab bar using 1" galvanized pipe. This helps our son get from the rock wall to the bed.
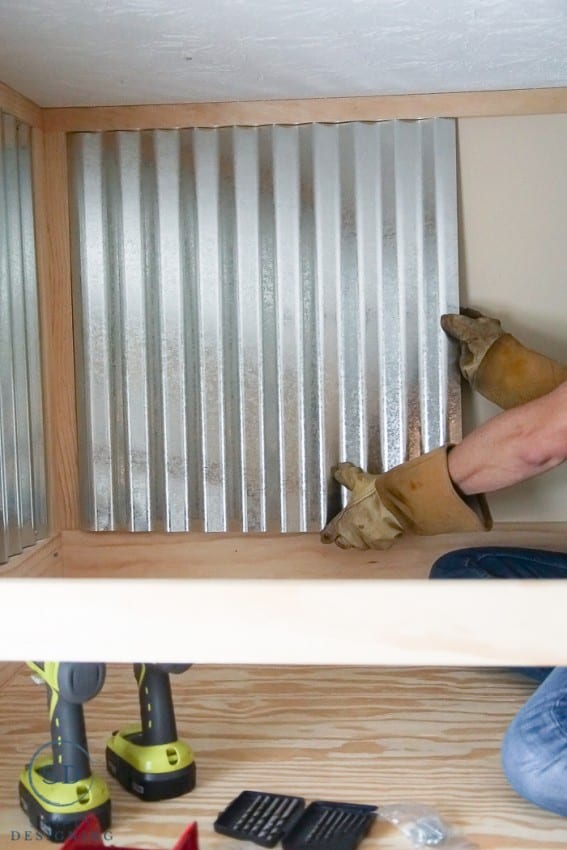
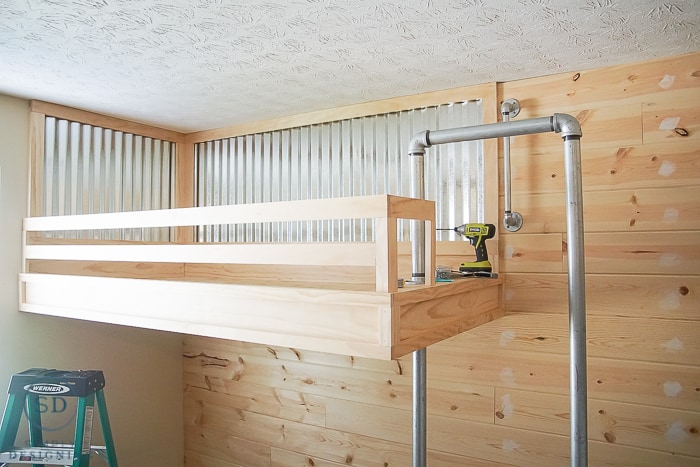
We used 1" x 2" boards to create a frame on the wall from the top of the platform to the ceiling.
We laid corrugated sheet metal inside of that frame. (We used a Dremel Saw-Max to cut the corrugated sheet metal to size and it worked really really well!) We used a drill to add small holes into the corrugated sheet metal and then used screws to attach it to the wall.
Then we overlaid 1" x 3" boards directly on top of the 1" x 2" boards to help hold the sheet metal in place and to cover all sharp edges. It also gave a nice finished look to the bed.
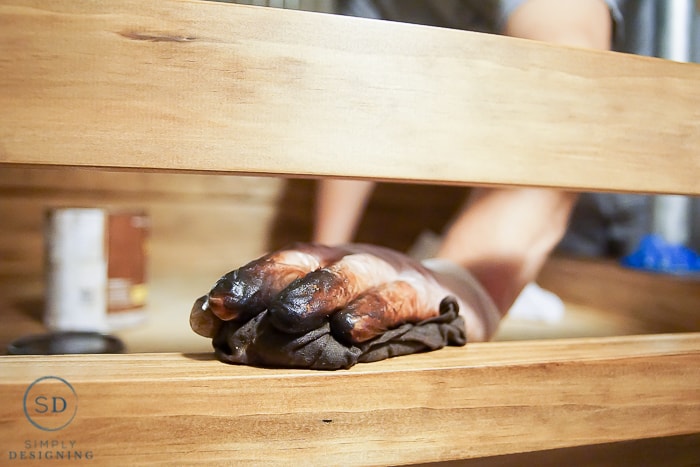
We taped off around the bed, corrugated metal and pipe with painters tape, and then we sanded the bed and stained it! After the stain was dry we were done!! Well, the bed portion of his room was done anyway.
And then later I will share more about the fun cantilever desk we built under his bed!
You might also like:




Ivory
Wow, wow, oh wow! You did an awsome job. I love it, and so would my son.
Have a happy New Year!
Condo Blues
This is such a fantastic room!
Lisa
There is not a little boy alive who would not totally love this room. Great job!
Jaxx The Bearded Hiker
I so wish I had that when I was a kid! That is awesome!
Pamela-FromMyFrontPorchToYours
What a truly fun boys room!
Jennifer
This is seriously the coolest bed. My son would go nuts over it! I love the industrial look, and also how it gives you more space underneath the bed. Perfect for a smaller room like ours!
Jessi @ Practically Functional
OMG Ashley, this is amazing! Forget my kid... I want this in my bedroom! But seriously, this is the coolest!
I just wanted to let you know that you were featured as a Rockstar at last week's Creativity Unleashed party! Congrats, and thanks for sharing at our party! http://www.practicallyfunctional.com/creativity-unleashed-182-hand-lettering-giveaway
Alexaus
This is so cool! I love it. Does the corrugated metal make a noise if your son bumps into it at night?
Andrew Morris
Do you have any problem with the sturdiness of the sliding pole?
Thanks! Looks great!
Ashley Phipps
Hi Andrew!
The sliding pole is quite sturdy. You want to have all the parts screwed into each other tightly so that everything is as tight and secure as possible. But if your child pulls it to the side, unless you have it screwed into the floor, it could tweak a bit to the side. My son is pretty hard on things and so every once in a while I just have to straighten it out. But we did not screw ours into the ground. But the sturdiness of it doesn't seem to be affected at all. My 8 year old uses it multiple times a day every day, for over a year and it is still working!
Dianna
Can I ask your approx cost for total project?
Rochele
I would love to know cost as well
Amanda
How far down from the ceiling did you put the base of the bed!?
Meryruth
Hello! Love your creation! Can you tell me how high are your ceilings? What is your bed height and desk height?
Thank you-Meryruth
[email protected]
Ashley Phipps
Hi! Our ceiling height in this house was 8'. I am so sorry though, I no longer live in the house and don't remember the exact bed height, but I believe the bottom was around 4.5'-5' off of the floor. The desk height was about the standard 29" from the ground. Have a great day!
Michaela
I love this! Where did you get the ceiling fan?
Ashley Phipps
We got it from a store called Menards. It is a midwest hardware store.
Jaimie
This is wonderful!
Did your son swing on that horizontal portion of the bar? My kids would swing and “do gymnastics” on it. Without being bolted in to the ground, do you think that would still be ok?