Need a custom DIY baby gate for your stairs because you hate the look of the ones in stores?
As many of you know, we are expecting a little girl this fall! Woot woot!
While the first part of my pregnancy had me constantly worried that something was wrong (2 miscarriages and a stillborn with Trisomy 18 will do that do you), now that I am 27 weeks I am rip-roaring ready to go.
Nesting has finally hit (sorry bank account) and I am ready to get our house prepped for a newborn again!
I have a 9-year-old and a 6-year-old, so my house hasn't been baby proofed in years.
So we have a lot of work to do before we welcome a new little one into our home.
One of my main concerns is our big, long staircase.
In the entry to our home, we have a long, straight staircase that always worries me for little ones.
Because we have hard floors, if they were to fall it would be even worse!
And because the staircase is straight, it is a long fall too.
So the first thing on our baby-proofing to-do list was to come up with a baby gate solution for this area.
Because we have a post on one side and a wall on the other, it is not very conducive to using a baby gate that relies on pressure, they never seem to work very well at this location.
And we didn't want to drill holes into our post.
We also wanted it to look amazing and go with our house.
So we decided to build our own baby gate!
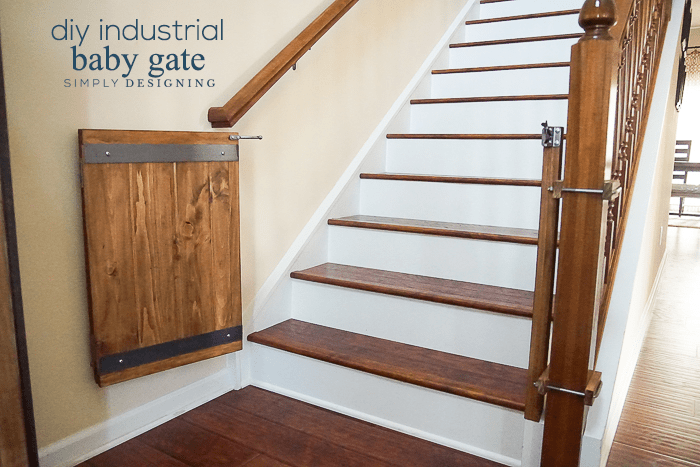
And I just love how it turned out!
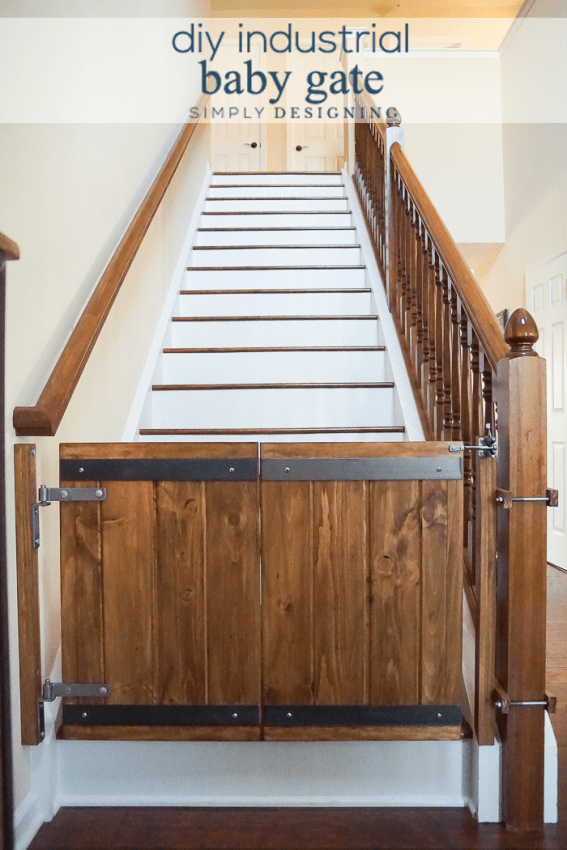
So today I am sharing all the details of how to make an industrial-style DIY Baby Gate!
A big huge thank you to Elmer's for making this post possible. All ideas, photographs, text and opinions are mine.
This custom baby gate project took a little thought and planning but in the end it turned out amazing!
Here are a few things we considered when designing and making our DIY Baby Gate:
- Our stairs are really wide, and we didn't want a baby gate to take up a huge portion of our entryway when it was open.
- We wanted it to be able to lay flat against the wall so when we didn't need it, it would be out of the way. However, we have a piece of furniture blocking a large portion of the wall so we would not be able to lay the gate flat against the wall unless it was able to fold somehow.
- We did not want to drill holes into our stair railing post.
- We wanted it to look like it belonged in our home.
- We wanted to add a unique and industrial feel to the baby gate.
All of this helped us to plan the design and execution of our custom baby gate.
You can recreate this for yourself too, but you may need to change some of the measurements to make it fit your space.
Our overall empty space from wall to post was about 44" wide.
We had to compensate for the moulding along the bottom and a railing to account for on the top, so we designed this baby gate accordingly and if you plan to recreate this yourself, you will need to take your measurements carefully and adjust your cuts, lengths, and size accordingly.
How to make a DIY Baby Gate
Here is what we used to create this (your supply list may differ):
- 6" Wood Car Siding (This is similar to shiplap except it goes together with a tongue and groove, not an overlapping design like shiplap does. The overall look is very similar though. But car siding is what was available at my local hardware store so we went with that.)
- 1" x 2" boards for the posts, the baby gate frame, and the post clamps
- (2) 5/16" x 1 ¼" Carriage Bolts
- (2) 5/16" x 1 ½" Carriage Bolts
- (4) 5/16" Hex Nuts
- (2) Wall Anchors with Screws or Bolts long enough to go through your post and into the anchor sufficiently to work properly
- (1) Gate Latch
- (2) 6" Strap Hinges
- (2) Hinge Pins
- (2) U-Bolts
- (2) 3" Door Hinges
- ⅛" x 2" Flat Iron
- Kreg Jig
- Kreg Jig Screws
- Kreg Plugs
- Drill and Driver
- Compound Miter Saw with a fine tooth blade and a metal cut-off blade
- Table Saw
- Nail Gun
- Sander, plus 80 grit and 120 (or higher) grit sandpaper
- Hammer
- Elmer's Wood Glue Max
- Stain (I used Cabot Aged Leather stain in Satin, which unfortunately is no longer carried in stock but can be special ordered.)
- Spray Clean Coat, satin finish
- Rustoleum Hammered Metal Pewter Spray Paint
- Rags for staining
- Gloves for staining
- Tack Cloth
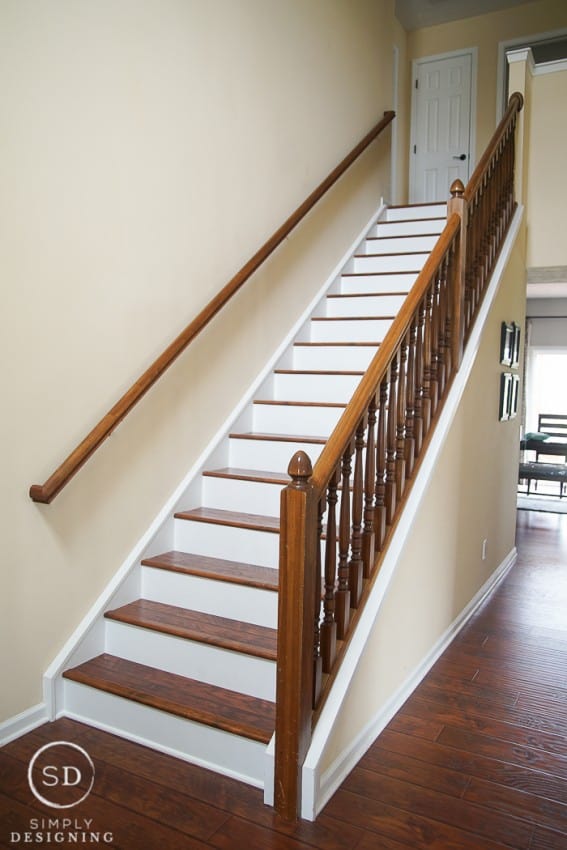
First, you want to see a before picture, right?
These are how long and straight my stairs are!
I definitely will need a baby gate at the bottom and top of these stairs.
Please note that I am sharing how we made the bottom baby gate in this blog post.
The top one is still in the works (but coming soon don't worry 🙂 but we will have to tweak it ever so slightly because the top does not have a post, but it does have a wall.
It will be basically built the same, just a few tweaks.
We had our plan in place and off to the store we went to purchase all of our supplies. When we got home we began work on our DIY baby gate!
How to Make a DIY Baby Gate:
We began by cutting (4) 1"x2" boards to about 28" long.
These boards will become our posts on either side of the baby gate.
One set of boards we cut with a flat bottom and the other we cut at an angle to match the angle of the moulding on our stairs because that set would sit on top of it.
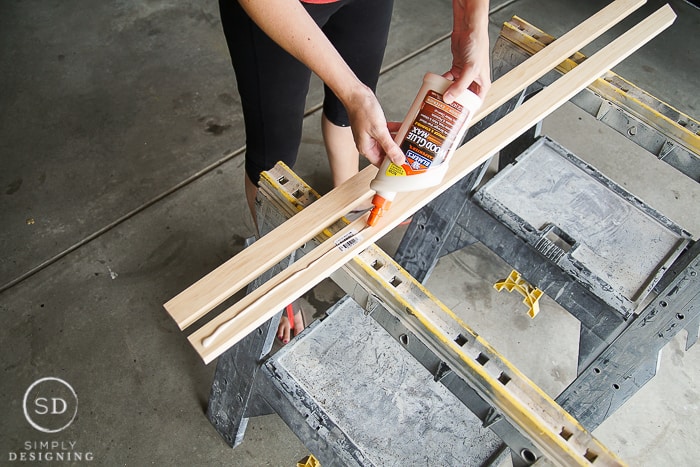
We used Elmer's Wood Glue Max and stuck the two boards together so we had an approximately 2" x 2" square post.
We did this for both sets of boards so we ended up with 2 posts total.
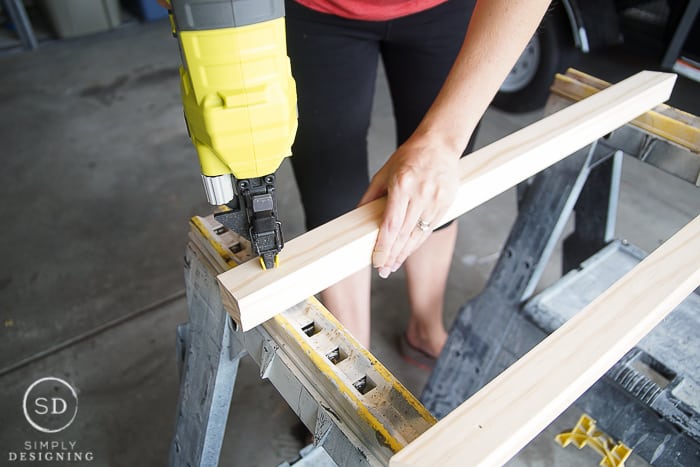
We used our Nail Gun to add a couple of brad nails to hold the post boards together as well.
Then we set these (2) posts aside.
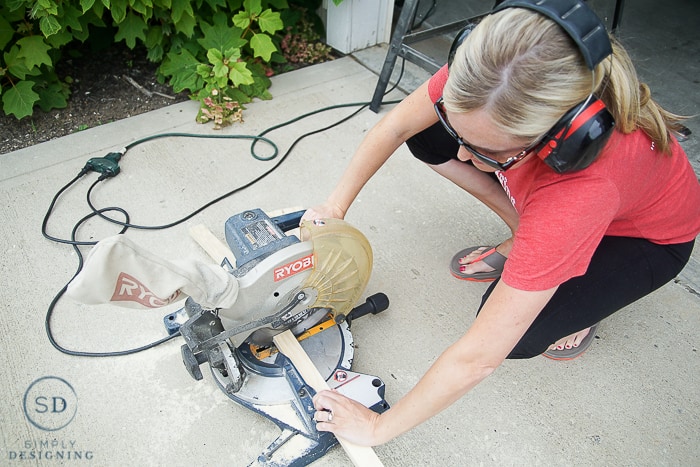
Next, we used a compound miter saw to cut the 6" car siding boards and the 1"x2" boards for the frame.
The overall height of the DIY baby gate is 28", so we cut the car siding boards to 25" lengths (we needed (7) 25" lengths of 6" car siding boards total).
One of the car siding boards we ripped down the middle (so we had a partial piece of car siding on either end of the baby gate) and another one we cut along the tongue directly in the center of all of the boards so that we could turn this into a folding baby gate.
We then cut our 1"x2" boards into the following lengths: (2) 25" lengths (for the sides) and (4) 18.5" lengths (for the top and bottom).
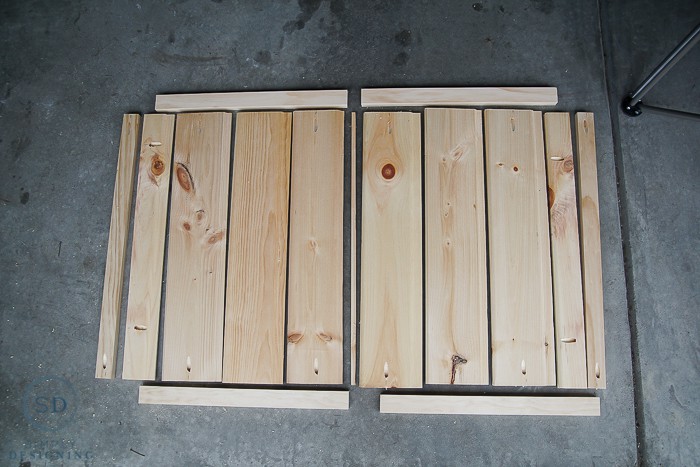
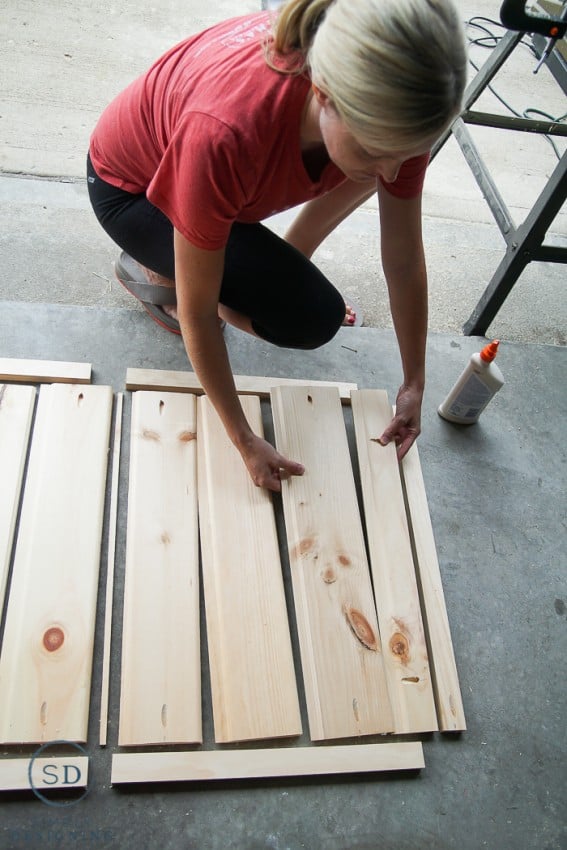
After all of the pieces of wood were cut for the DIY baby gate we laid the boards out to see what they would look like all together.
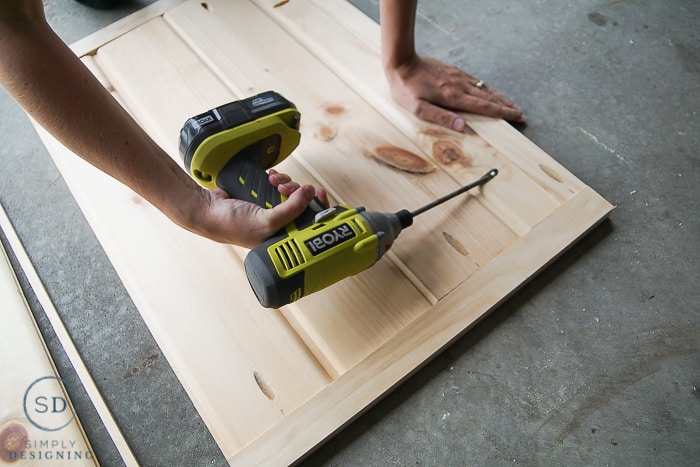
We used the Kreg Jig to create pocket holes around the outside of the boards to secure the frame and the inside boards together.
You can see where we made the pocket holes in the image below.
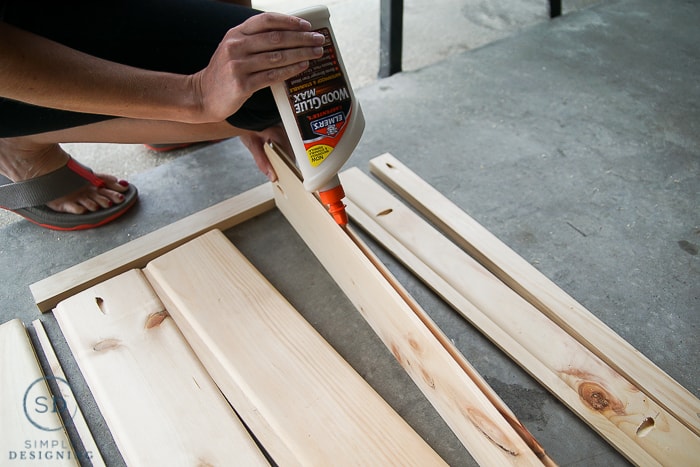
We used Elmer's Wood Glue Max to glue the car siding boards together.
And then we used the pocket holes to attach the car siding boards to the outer 1"x2" frame.
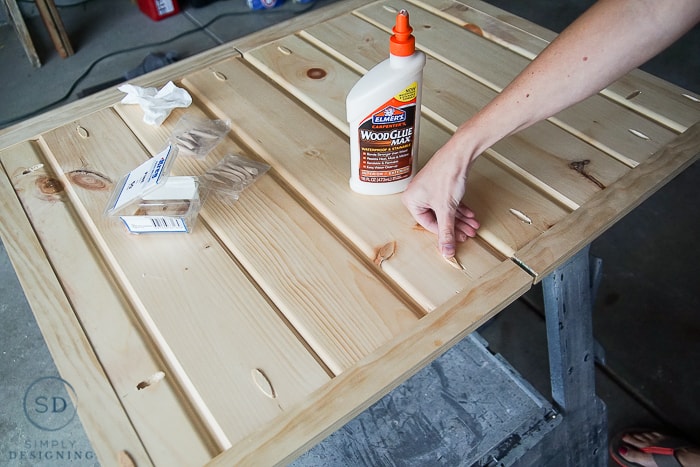
We used Elmer's Wood Glue Max to add wood plugs into the pock holes to keep the custom baby gate looking as clean as possible.
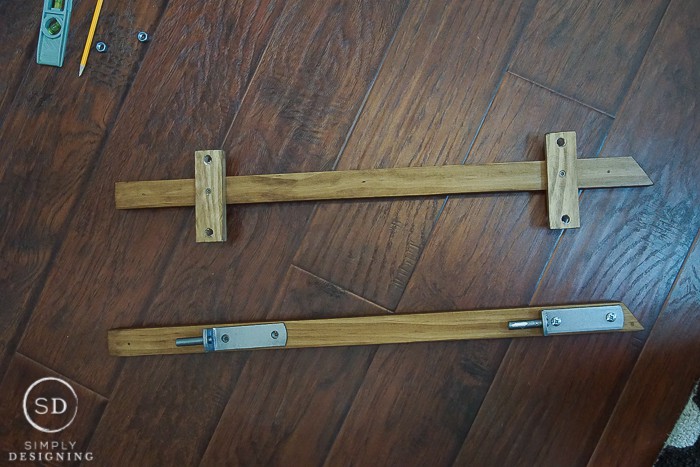
This is a good point to note that you will also want to cut your 1"x2" boards into (4) 5" lengths as well.
Then drill holes into them for where the u-bolt will go through the boards. These will become your clamps.
At this point you will have the door for the DIY baby gate completed, but still in two pieces.
That's ok, we will put it all together near the end.
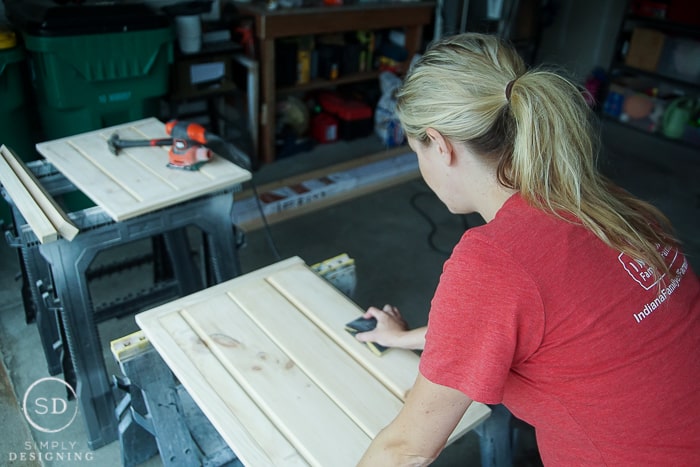
We used 80 grit and then 120 grit sandpaper (and 220 for extra good measure) to sand the doors, posts, and clamps down.
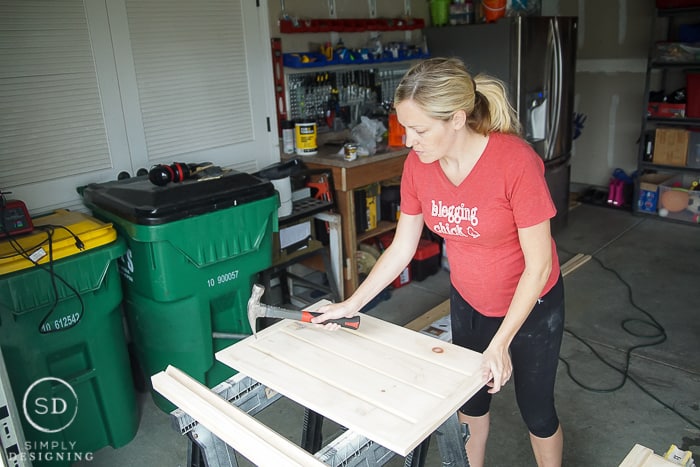
We took a hammer (both ends) to the boards to add a little bit of distressing to the boards.
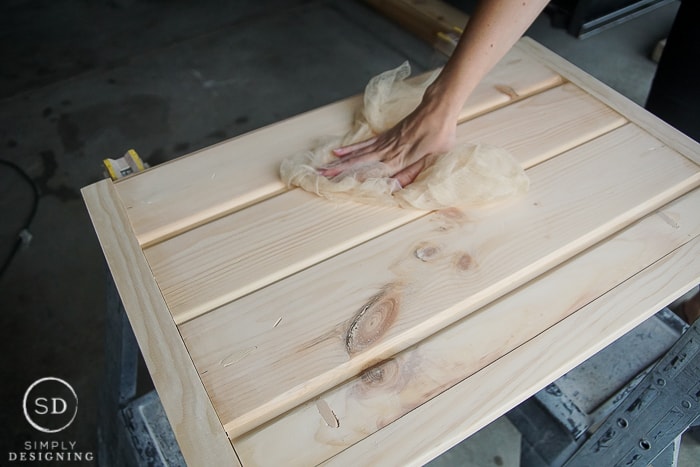
And then we used a Tack Cloth to remove all of the sawdust from all of the wood.
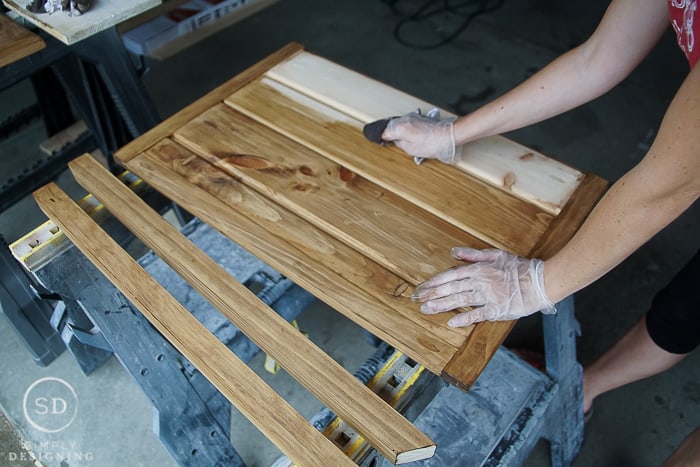
Using gloves and a rag, we stained all of the wood.
I recommend using two coats of stain for the best finish.
Because the stain I used is a 2 in 1, a stain and a sealer, we choose not to do a clear coat on top of the stain.
If you prefer or are using a different stain, you might want to add a clear coat of PolyAcrylic at this point.
While we waited for the stain to dry, we decided to use Rustoleum Hammered Metal Spray Paint in Pewter to paint all of the DIY baby gate hardware.
We wanted it to at least sort of match and we didn't want it too shiny.
So this was a great paint to use to add some texture to all our hardware.
We did not paint the flat iron but we applied a clear coat to it to help it not rust.
While we waited for the paint and stain to dry, we took the kids to go get ice cream.
No, this is not necessary, but it sure tasted yummy!!!!!!
And it sure beats watching paint and stain dry.
After everything was dry we decided to begin the installation.
How to Install a DIY Baby Gate without Drilling into your Stair Post:
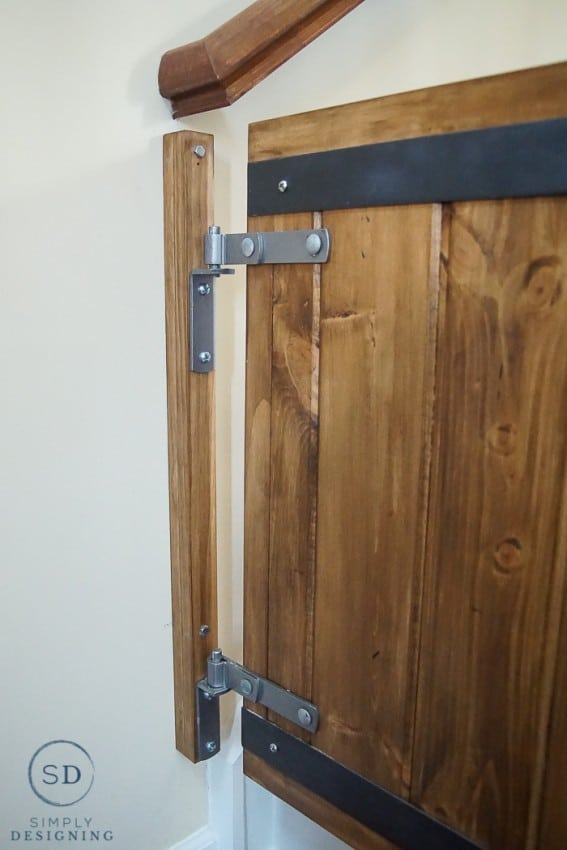
We began with our posts. In one post we screwed the hinge pins (note this angle on the bottom of this post eventually was cut off so it was flat on the bottom). And into the other post, we secured (2) of our clamp boards.
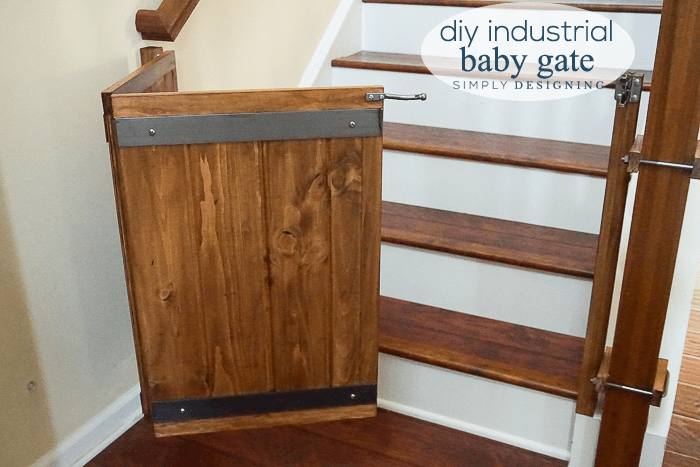
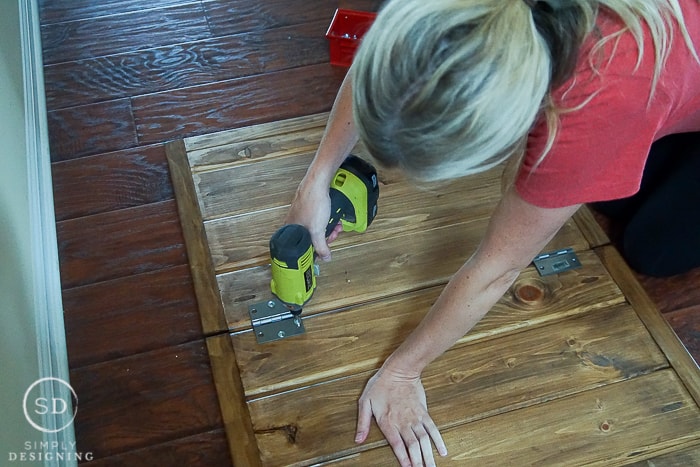
We turned our doors upside down and installed the hinges into the back of the board so that the door would fold.
We cut our flat iron to (4) 18.25"-18.5" lengths using a cut-off blade on our compound miter saw.
This is a measure first cut second thing because you want to be sure these fit exactly on the boards.
Then we drilled holes in the flat iron for the screws and screwed the flat iron pieces into the doors using self-tapping screws.
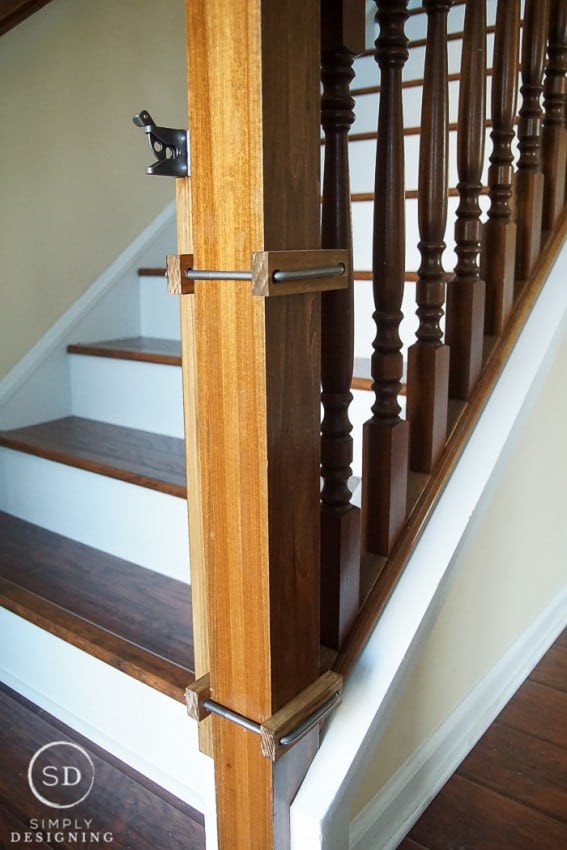
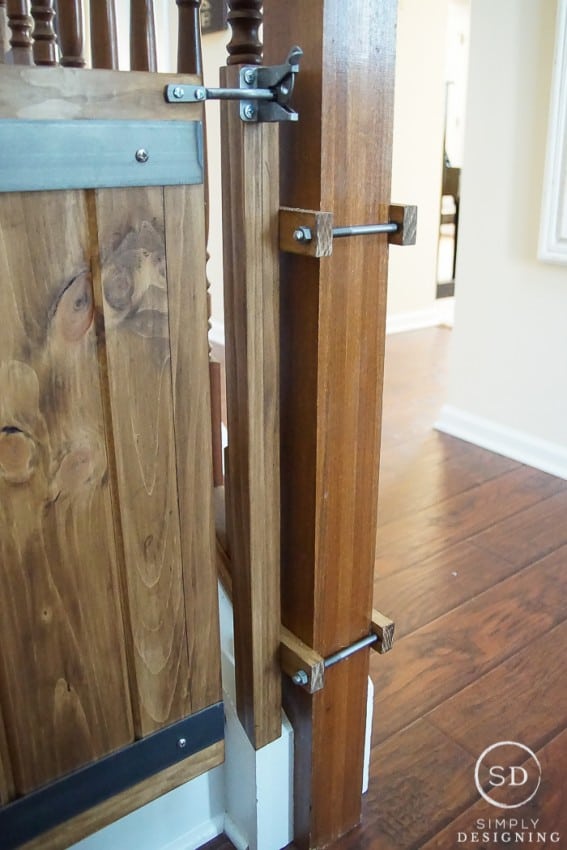
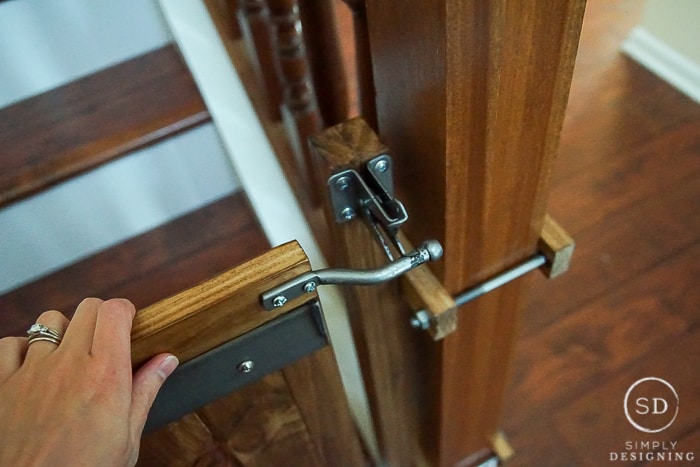
Using the U-Bolts, we attached the clamps and the bannister post to our baby gate post.
This was a great way to securely attach the door without drilling holes into our bannister post.
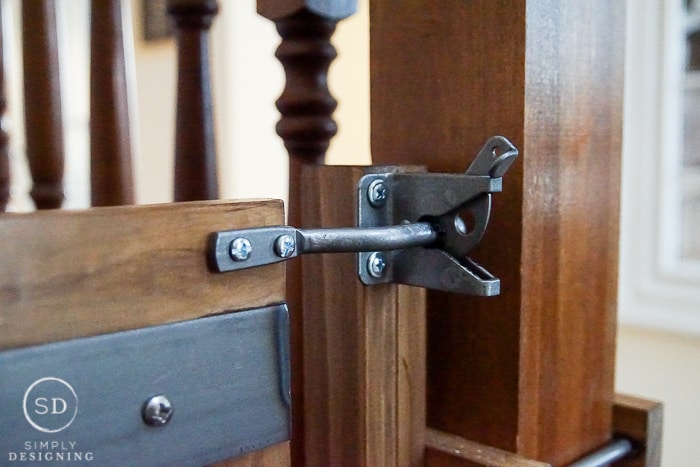
We also installed the gate latch onto the top of the baby gate post.
The other baby gate post was installed onto the wall using wall anchors and extra-long bolts.
We added the latch to the door.
Oh isn't this latch just so pretty?!
It is easy enough for my hubby, the kids and I to use, but will be difficult for a young child to use.
And then we attached strap hinges to the door where they would sit on the hinge pins using carriage bolts and hex nuts.
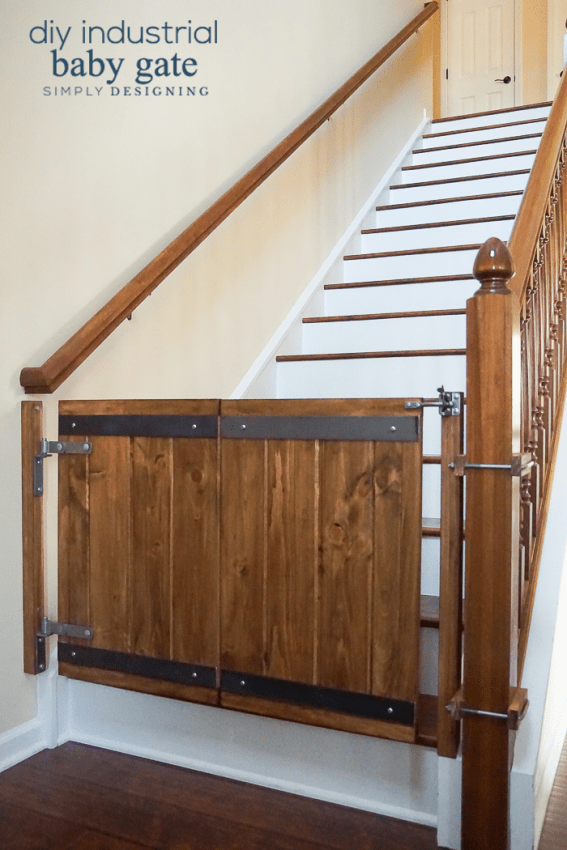
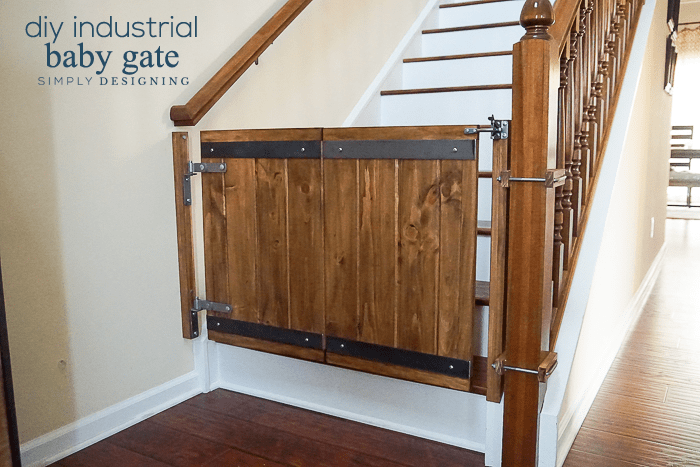
And then our industrial DIY baby gate was complete!!
This DIY baby gate is beautiful, unique, fits the space, is secure and works in our home!
I love how with a little bit of work and creativity we were able to come up with a baby gate that works in our space and is beautiful!!
My kids are already practising using it...I find it closed constantly (which is a good thing I guess to get into the habit of, but I also know we have quite a few months to go before we actually need to use this!)
And this would work PERFECTLY as a dog gate or a pet gate too if you want to restrict access to the animals in your home!
And don't worry, we have another gate coming for the top of the stairs! I promise it will be in place before the baby is born.
Ah. So pretty!
You might also enjoy these posts too:




linda smith
Congratulations on the upcoming little one! How fun! This baby gate looks AMAZING! So much better than what we did in our home..I'll have to pin this for next time! 🙂
Condo Blues
I love your gate! I want to modify it and use it as a dog gate for my condo!
Jenna
Three cheers for a pretty baby gate!
Amy Anderson
This looks awesome - and like Lisa, I want to use it as a dog gate too! There are NO good dog gates out there!
Mel | Flicker & Flock
What an amazing idea, you're so clever! Our staircase is very similar to yours + we awkwardly used the standard baby gates - which didn't look great and would sometimes slip. They're down now as my youngest is almost 3, which means we now have patches on our wall where the gate took some of the paint with it. So annoying but a good excuse to completely repaint our walls a new colour, right?! All the best for the birth of your baby girl - am sure she'll be as styley as you are! Mel x
Gabrielle Tyler
I love it! I don't even have stairs and I want one. lol I'm visiting from Wine'd Down Wednesdays, have a great day!
Stacey
This looks so much sturdier and prettier than the store bought baby gates. Nice work!
Happy Thoughts of Home. 🙂
Christine
I need to have a baby so I can make one of those. All my kids are in the their 20's. Or just hope for Grand Babies, real soon!. I am all about the rustic and industrial, so I am loving how your gate turned out. You did a great job. It's just the burst I need to finish up my hutch project this morning. Thank you!
the cape on the corner
that is so smart, and i love how it's hinged!
b
Angela
I love this! My eight month old is crawling so I need to make some gates myself. Thanks for sharing at TOHOT. Congrats on your baby girl!
Emily
I love that you designed this to fit your space & your style. It's awesome! Thanks for linking up with Merry Monday this week!
Marge
I love this, Ashley! It looks beautiful and it's so practical - a great combination. It's not going to break anytime soon, either. Pinning and sharing this post!
Marie-Helene @ Kingsbury Brook Farm
This is by far the coolest and prettiest baby gate I have ever seen.
Laura
This is amazing! It is so much better than a regular baby gate. I am done with having anymore kids but I would have loved to have something like this when my kids were younger. Thanks for linking up to The Creative Exchange. We will be featuring your project this week.
xo,
Laura
Becky
What beautiful gate!! You did an amazing job! Thanks for sharing this. #designcreateinspirelinkparty
Jessi @ Practically Functional
OMG Ashley, that gate is gorgeous!!! I love the metal with the wood, and the bi-fold part is super smart! I looked away for three seconds today and our baby ended up in the dining room, which is like at the other end of the house, so it's definitely time for us to get baby gates up on our stairs. 🙂 This project was my pick for Rockstar of the week at the Creativity Unleashed link party; thanks for sharing it over there with us! Voting is now open, so stop by and cast your vote, and I really hope you win!
Ashley ~ 3 Little Greenwoods
Whoa. Now that is what I'd call a stylish baby gate! Love the wood tone and industrial accents. Thanks so much for sharing your creativity at The DIY Collective. Hope to see your awesomeness again this Thursday!
Tony
Love the gate, but how do you keep a little one from pulling the gate in the middle and pinching there fingers?
Andrea
Do have an approx cost in materials for this project?
Michelle
Beautiful gate! Can you tell me where you purchased the strap hinges and hinge pins? I can't find them locally, and I need something similar. Thank you!
Ashley Phipps
Hi there!
I found them at a local hardware store. I honestly don't remember if it was Lowes or The Home Depot or Menards ... but I know they all carry those items! If you can't find them in store I'd ask an employee!
Ashley
Josh
Hi, we made something very similar to this. Only thing is that our toddler has discovered how to open the latch. Have you come up with a solution for this?
Bri
Hi. Do you have pics of the gate at the top of the stairs?
Brian
Hi,
My name is Brian and how would you adapted this design to a iron railing with a 1inch by 1inch bannister?
We have the iron railing that is narrower then the one in the design and not much help online. Rookie DYI guy so any help helps!
Rhonda
What size u bolt did you use?
Michelle Brown
Thank you for the great idea. I have been looking for something to keep my German Shepard out of the kitchen while I'm gone. He loves the cat food! I have looked and looked for an idea that would serve this purpose. Your gate with a little restructing worked like a charm! I would post photos but I can't figure out how! It came out great!!
Sophia
This baby gate is great. And it can prevent babies from climbing on stairs. And the folding door desgin is also impressive. I want to make one, but I am afraid I cannot DIY it. Can I buy it anywhere?
Anita Holland
Wow, This is stunning. I thought I was pretty handy but this is a whole new level. Thanks for sharing.
Ashley Phipps
Thank you!
Marie
This is one of the best DIY wooden baby gates I've come across! Well done and love that you're not damaging the stair banister. I'm definitely showing my daughter this because she is in dire need of a custom baby gate for the staircase in her new home.
Katy
This is such a great idea and tutorial! I have been looking for something like this for our home!
I co-host a weekly link up- would love if you would join us and share on there as well! http://petalspiesandotherwise.com/handmade-otherwise-weekly-link-up-week-8/
James
Great looking gate! Where did you source your Strap Hinges and Hinge Pins?
Aaron
Where did you purchase the hinge pins and the 6 inch strap hinges. I really like this particular style, but I can’t seem to find any like it anywhere. Thanks in advance!
Ashley Phipps
Hi! I believe we bought everything for this project at Menards, which is a mid-western hardware store. I would think you should be able to find something similar at Home Depot, Lowes, Harbor Freight, Tractor Supply Company or someplace similar. Good luck!
Brian
Nicely done. Great ideas and a custom fit.