Today we are so lucky to have Rebekah with us from Potholes and Pantyhose! She is a Featured Contributor here at Simply Designing and we are so luck to have her! (You can read more about her by clicking on my Featured Contributor link on my side bar.)
Anyway for those of you who don't know her, she is amazing and has a fabulous tutorial to share with us today. So hold on tight, because it's gonna be amazing!
Hello! I am Rebekah from Potholes and Pantyhose. I like to write about home remodeling how-to's, artsy stuff you can make yourself, touring with my musician hubby and different photography tips and tutorials.
I am so thankful to be here on Simply Designing today!
I have been focusing on tutorials as of late that can be utilized to make one-of-a-kind Christmas gifts. Today, I will show you how to make Fancy Homemade Stationary Sets.

This process takes less than an hour to do, plus dry time, and provides an impressive finished product. Let's get started on making some fancy stationary, shall we?

Here's what you'll need to make your very own stationary:
A picture frame (I made mine from scrap lumber)
Blender
Sponge
Window Screen as large as the frame
Recycled paper, construction paper, newspaper, etc
Dried Flowers (If desired)
Paper Towels and Hand towels
Envelopes
Staple Gun
Utility Knife
A plastic bin larger than the frame (I used my sink, instead)

Begin by stapling the screen to the backside of your picture frame. Make sure the screen is securely attached. Over-do it, I give you permission.

Tear the paper into pieces about 2" or smaller. Fill your blender with the paper, but don't compress the paper. Add water until the blender is about ⅔ full.
Press the 'pulse' button several times to get the mixture going. Then, switch to 'puree', until the mixture has almost a smoothie consistency. I did this process several times to create enough of the mixture for the amount of paper I wanted to make.

Fill your plastic bin or in my case, my sink, with the mixture, adding water until it is about 4" deep. I added enough water to my sink until the consistency resembled more of a soup like texture.

Dip your frame into the mixture, with the top of the frame facing up. Pull the frame out of the water slowly, allowing it to drain. You can even rest the frame on your bin to allow it to drain longer.
Add your dried flowers to the topside of the paper at this point.
Lay out hand towels and place several paper towels on top of them.

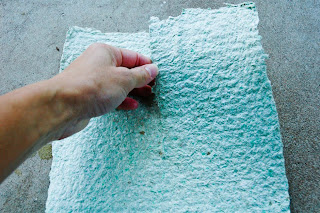
Flip your frame over on top of the paper towels. Allow the paper to release itself from the screen slowly. Use a sponge to gently remove as much excess water that you can from the paper. Allow the paper to dry for several hours.

Once the paper is dry, tear it by hand to fit the size of envelopes that you have. Save any scraps to be used as name tags for the final product.

I made a stationary 'set' out of four pieces of the homemade paper with four envelopes. I then decorated the sets with scrap ribbon and ric-rac that I had on hand, adding buttons on a couple for a little extra 'wow' factor. You can use the scrap pieces of your homemade paper as name tags to accompany these sets if you are giving them as gifts.
I hope you enjoyed this tutorial. If you have any questions or just want to see some more crafty things that I have been up to, please come and visit me at Potholes and Pantyhose.
Thanks again, Ashley for having me today! -Rebekah


Rebekah Greiman
Thanks for having me today, Ashley! You rule.