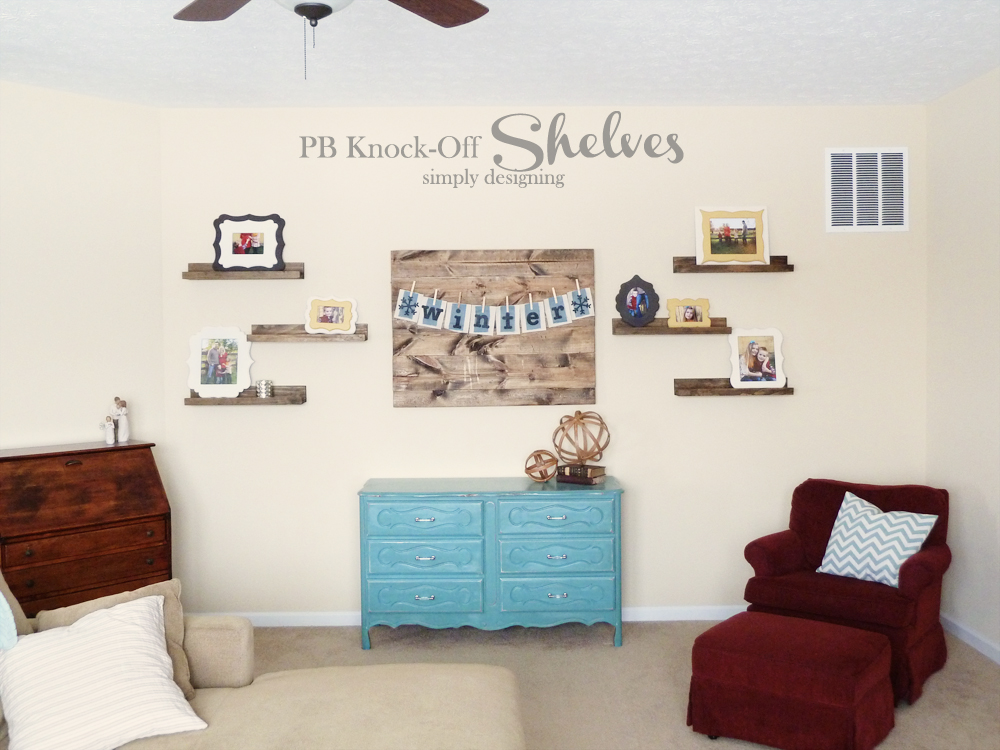
Yesterday I was thrilled to show off my huge Gallery Wall!! Be sure to check it out HERE. I should probably say we spent a ton of time on it, but in all honesty, we painted all the frames, built the pallet board and built the shelves and installed it all in one day. One very long day. But. One day. So this is totally doable and easy to recreate!
Today, the long awaited moment when I show you, step by step, how to create my DIY PB Knock-Off Shelves!! (with a Kreg Jig and a few of my favorite Ryobi tools)
These are really quite simple to make, and you don't need many tools. But you will want a Kreg Jig to build these shelves if possible! It will make your job a TON easier!
I ended up building (6) 2' long shelves for my Gallery Wall.
I will give you the supply list for making (1) 2' long shelf, you can adjust as necessary to fit your home. Here we go:
DIY PB Knock-Off Shelves
2' long shelf
Supplies:
- (2) 1" x 4" wood, cut to 2' length each (I used a nice select grade wood for these shelves)
- (1) 1" x 2" wood, cut to 2' length
- (4) 1 ¼" Kreg Screws
- (4) Kreg Stainable Wood Plugs
- Wood Glue
- (3) 2" brad nails
- Stain (Minwax Dark Walnut or your preference)
- Rag for staining
- Gloves for staining (optional)
- Kreg Jig
- Ryobi Drill and Driver Set (or other drill)
- Electric Sander
- AirStrike Nail Gun
- Compound Miter Saw
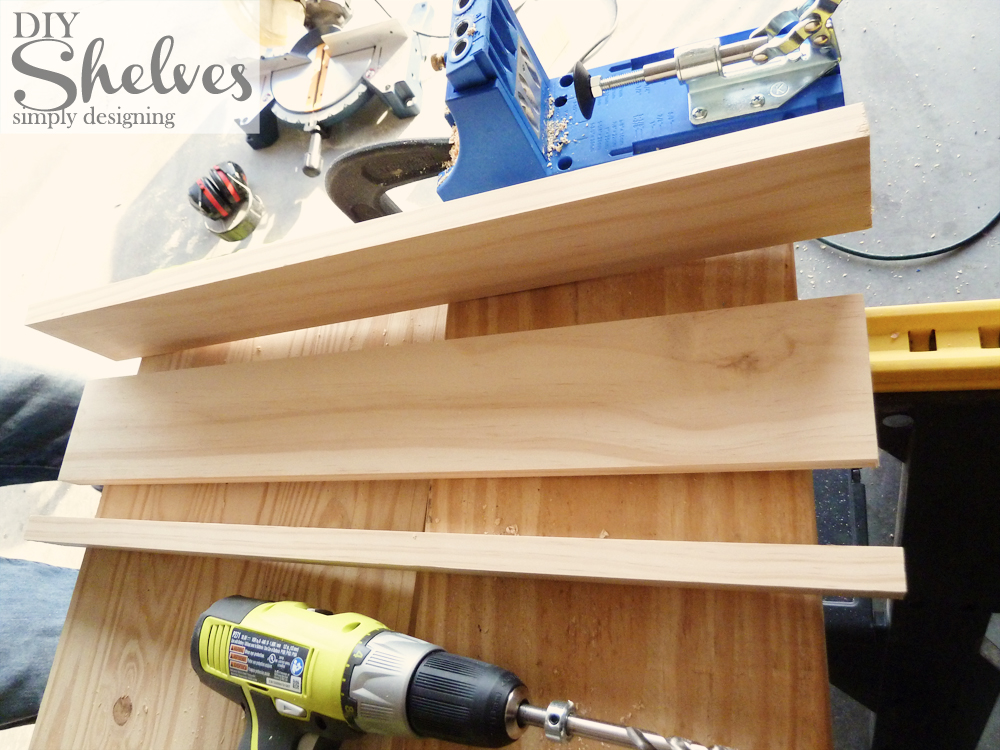
First I used my compound miter saw to cut all of my wood pieces to the correct length. Be sure that all three pieces are as close to the same length as possible.
You will end up using (1) 1x4 as your back piece, (1) 1x4 as your bottom piece, and (1) 1x2 as your front lip piece.
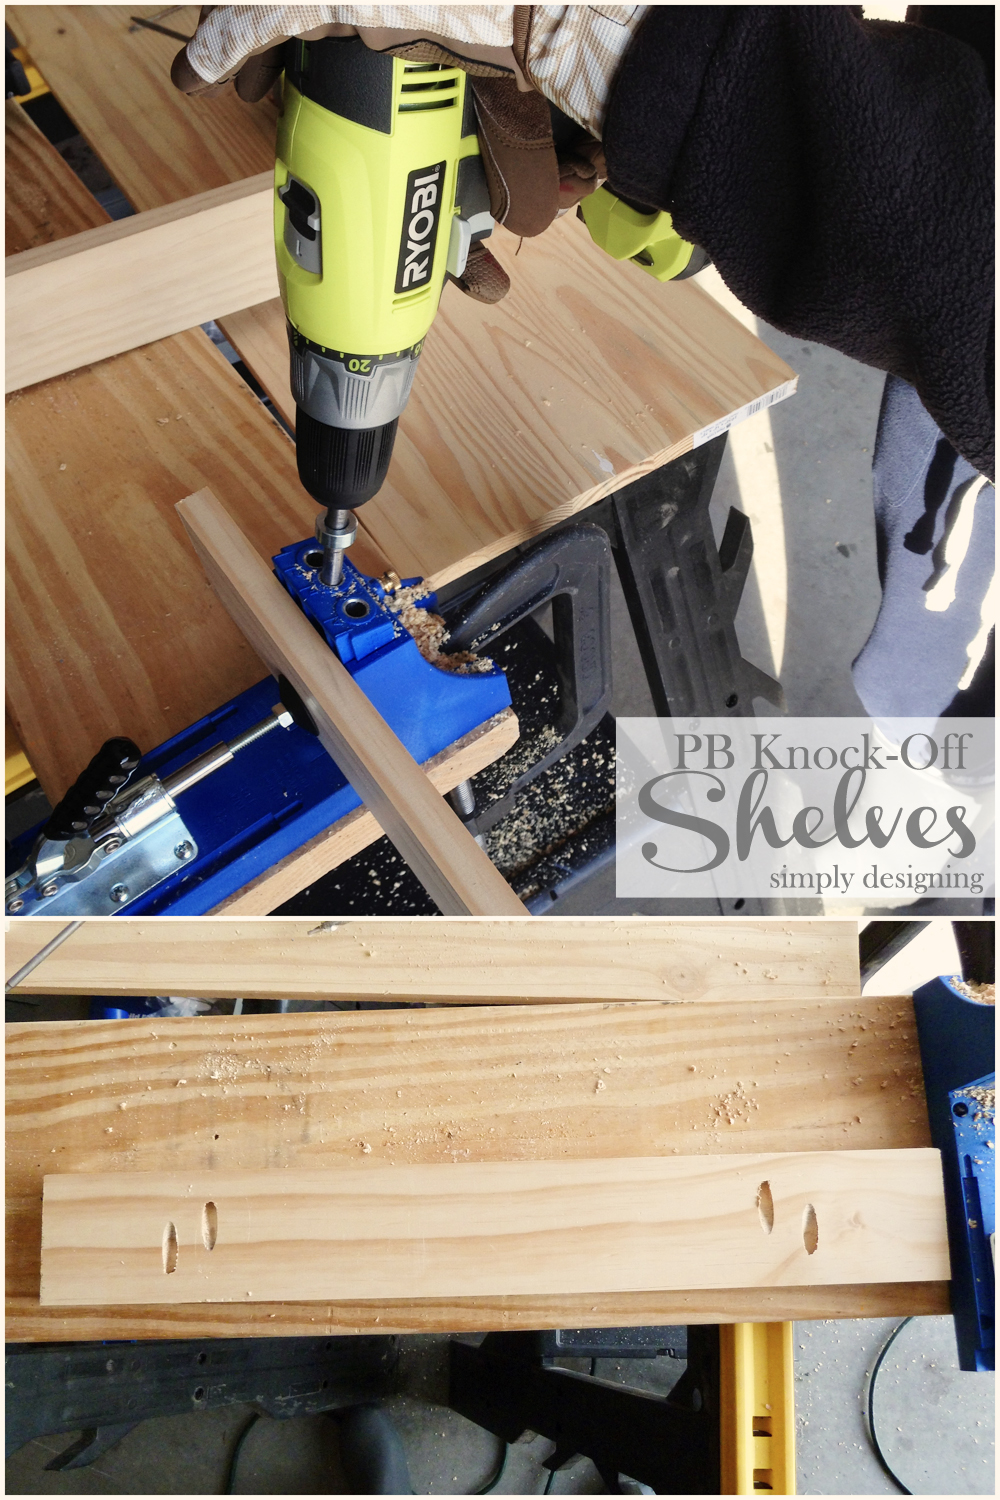
You will want to be sure to set your Kreg drill bit collar to the correct setting (¾" for 1x wood) and your Kreg Jig to the right height (¾" for 1x wood).
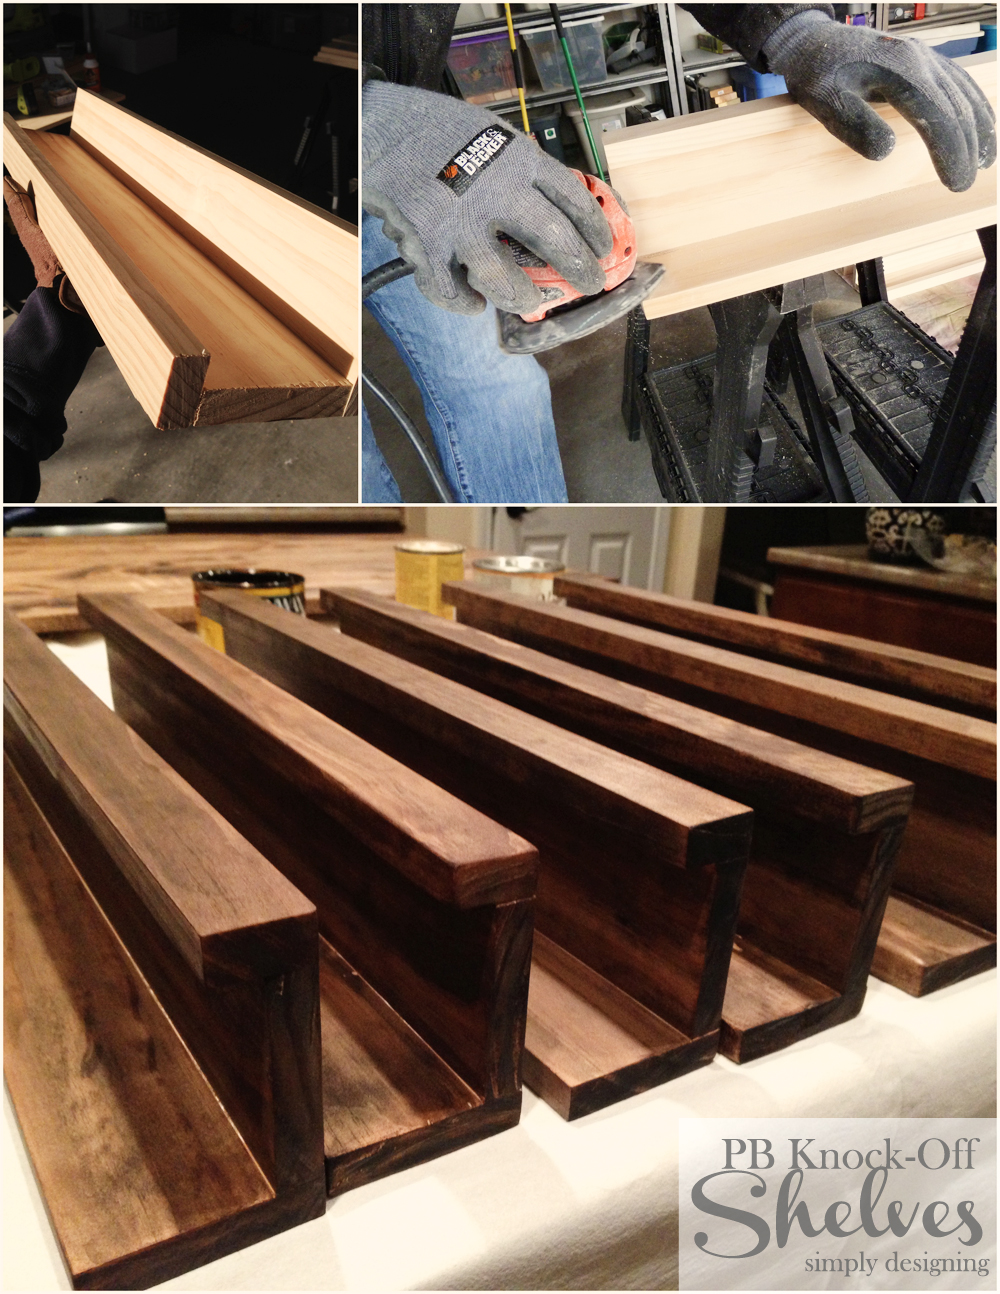
Taking your bottom 1x4 piece of wood, drill two pocket holes along one long side of the wood. Flip your wood, and drill two pocket holes along the other length of your wood. See the photo below, but you will basically end up with 4 pocket holes, two in each direction. This will be the bottom of your bottom board.
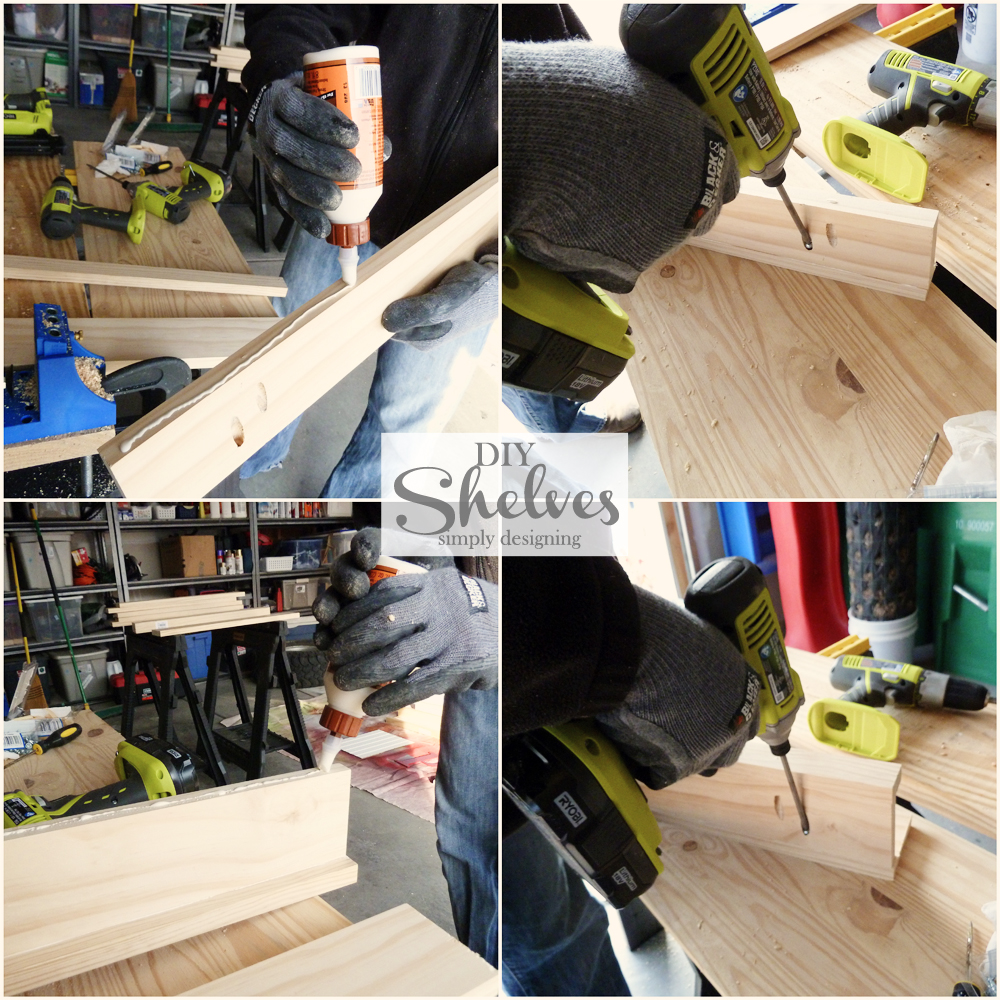
For added security, place a little wood glue long the front side of your bottom board. Then place the 1x2 piece of wood against it, as a lip, and using your 1 ¼" Kreg screws, screw the bottom piece of wood to your front lip. This is easier if you use a right-angle clamp or have a second set of hands to help you hold this together while you screw it together.
Then repeat with the back 1x4 piece of wood, screwing your bottom piece into your back 1x4 piece of wood.
Next you will take (4) Kreg wood plugs, place a little wood glue on them and fit them into the pocket holes. If they are too long (mine were) you can either carefully trim them with your miter saw or sand them. Be sure they fit nice and snug though for the best finished look.
Once your shelf is assembled, sand it really well with your electric sander! Then wipe it down (I use baby wipes) and stain the wood.
I used 2 coats of my favorite, Minwax Dark Walnut stain for these shelves.
We went back and forth as to how to actually attach our shelves to our wall. We thought about buying a key hole rotary bit and looked into many other complex ways of attaching these shelves to the wall so you wouldn't see the hardware but so they could sit flush against the wall.
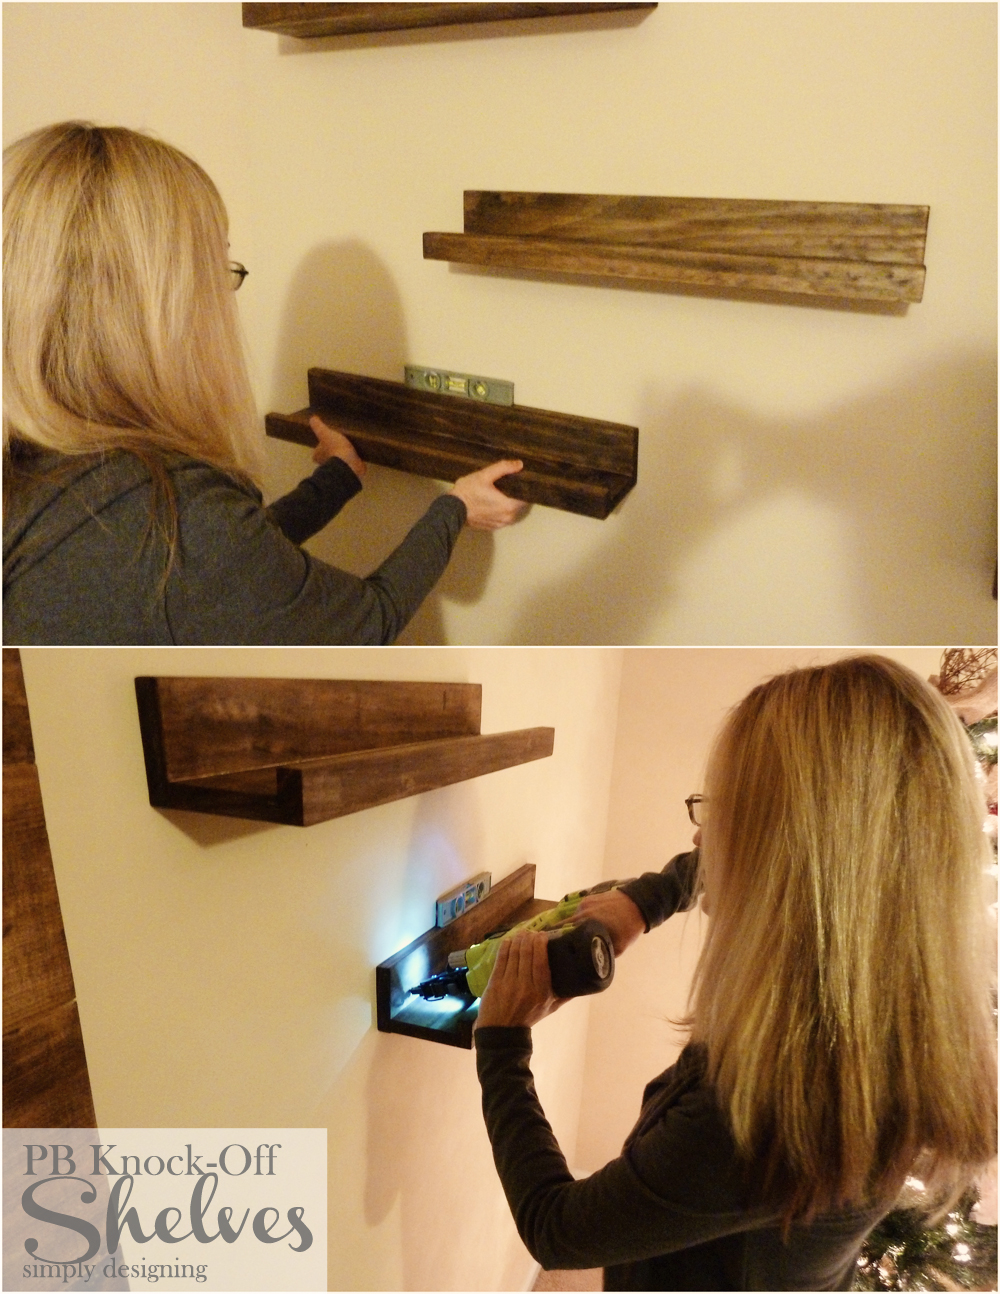
In the end, we decided to grab some 2" brad nails and use our AirStrike to attach the shelves to the wall!
Yes, we literally just nail gun-ed our shelves to the wall. Anticlimatic? Maybe, but all of the other options were too complicated or costly. This was simple, easy, inexpensive and these shelves are sturdy!
After placing the shelf where we wanted it, we nailed 1 nail into the middle of the back of the shelf, near the bottom. We made sure the shelf was level and then added one more nail on each side of the shelf!
So easy! And they are very sturdy! (Have I mentioned how much I love my AirStrike!?!)
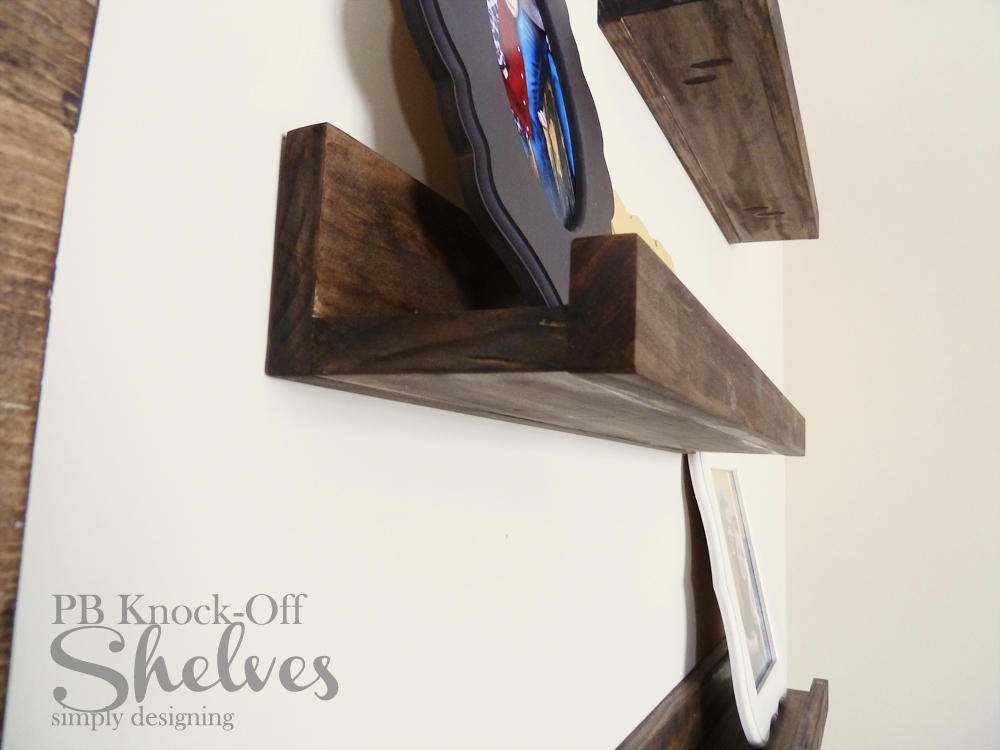
After adding the DIY Shelves we made using our Kreg Jig to the wall next to our Pallet Board we were able to add our pretty frames on the shelves and enjoy our newly finishes beautiful gallery wall!
I was inspired to create these from Pottery Barn's Holman Shelf:
I wanted mine to be a bit less wide, so I modified them a bit, but here are mine:
Not a bad knock-off huh!? And at about $5 a shelf, these are WAY cheaper then PB's shelves (which start at $59 ouch!)
Check out the other blog posts about this wall:
DIY Gallery Wall Reveal
Shabby Chic Frames for Gallery Wall





Laura Silva
I think it is time for me to get a Kreg jig. I don't do a ton of DIY, but it sure does make everything look so much more finished and professional. Love that you just nailed the shelves right to the wall! Did you worry about finding a stud at all?
Ashley Phipps
No, I did not worry about finding a stud when nailing the shelves into the wall but only because I knew they would never be baring very much weight. And since they are only 2' long, they don't weigh much themselves. They've actually been up a month or so and they are holding up great!!
Colleen
I love your shelves as well as your wall décor.<br />I have lots of decorative plates so if I can talk my dear hubby into making me something like this, only I would have him use his router and router a slit down the center for my plates to sit in and have them as plate shelves.<br />Thanks for the wonderful instructions<br />ColleenB.<br />Texas
Ashley Phipps
Thank you so much Colleen! I love your idea to modify them to be plate shelves!! How fun!
Katie @ Addicted 2 DIY
I LOVE these shelves! I built a 4' long shelf like this over my entry console table, but we have a large canvas picture in our den and I can totally see myself building these for each side of it like you did in your room. Thanks so much for this great idea!
Ashley Phipps
You are welcome Katie! Thanks so much for stopping by!
Emily Glover
I love these!! Pinning now! I'd love for you to link these up at my weekly link party, The Wednesday Round Up- http://lovepastatoolbelt.com/?p=2946<br /><br /><br />
Ashley Phipps
Thanks so much Emily!
Morgan
I LOVE these shelves. They turned out really well and I think your gallery wall looks fabulous! I have been thinking about doing something like this to one of my walls in my living room but I don't know how my landlord would feel about nail gunning anything into the wall. He might frown on that. Haha great work though and I think they turned out wonderful!
Ashley Phipps
Thank you so much Morgan!
Shanty 2 Chic
Wow these are amazing! Great minds;) http://www.shanty-2-chic.com/2012/01/20-shelves-anyone-can-build.html
tom
what is a kreg jig?
Ashley Phipps
It is a tool that I use all the time to build that helps you create pocket holes! Pocket holes help you to join two pieces of wood together in a very strong manner while also giving a nice, beautiful, clean look. It is seriously one of my favorite tools ever. Here is an affiliate link to purchase it: https://amzn.to/3yzRRrj