Occasionally a crazy idea hits me like we need to rip up part of our nice deck and build a swing!
We have a beautiful deck that we spent a lot of time building and staining and re-staining!
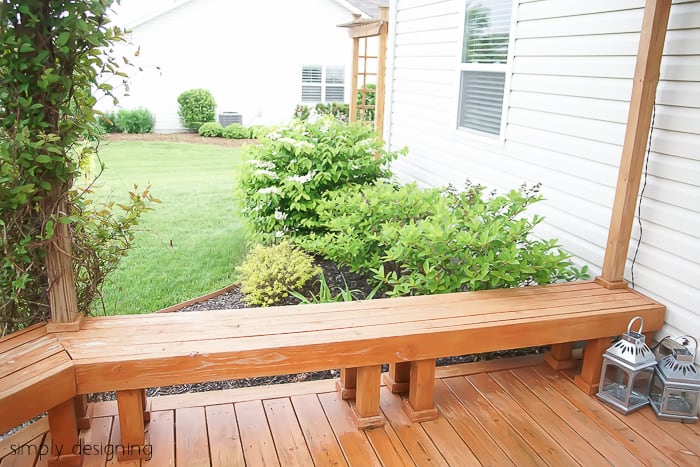
It has gorgeous landscaping thanks to my husband and the deck has pretty built-in benches too.
Unfortunately, we rarely use the benches.
So today it hit us to rip out one of the benches (ie take apart half of the deck) and build a porch swing instead!
My whole family LOVES porch swings!
I don't know why we didn't think of this sooner!
So today, I am going to show you how to Build a Porch Swing.

Oh, and the best part is that I only needed to purchase (1) 2x4 for my swing, rope and a few pieces of hardware to make this work.
That's because we were able to re-use the wood from our bench and our deck to create this beautiful porch swing! Isn't that the best!?
So today I am sharing my tutorial as well as my plans on how to build a porch swing!
Yes, plans! I finally took the plunge and decided to start learning SketchUp!
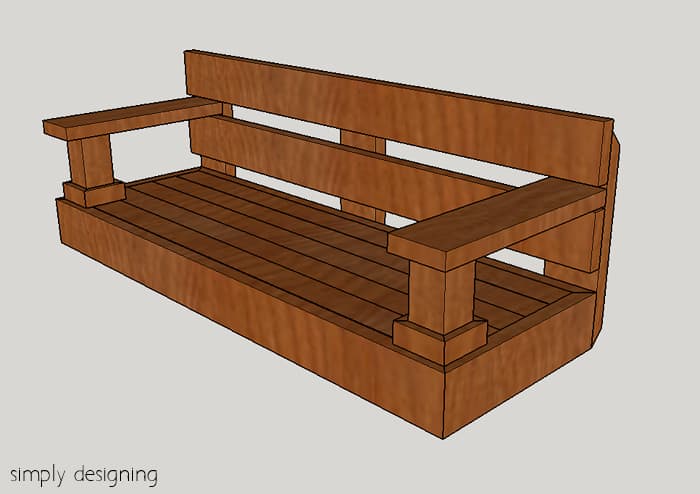
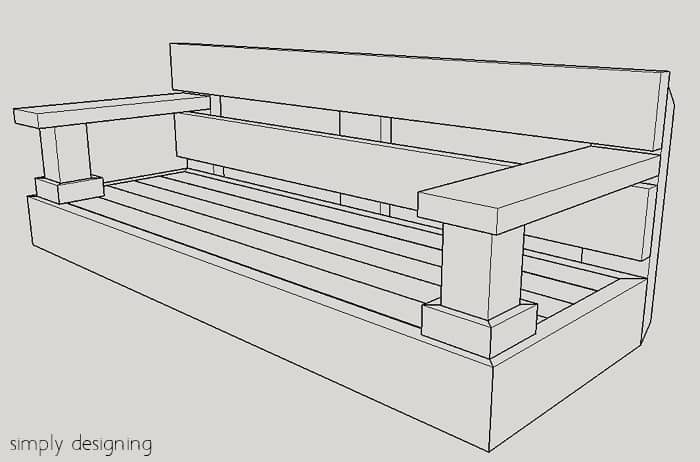
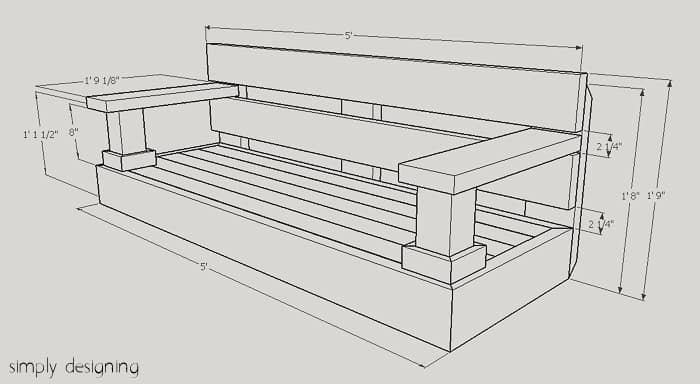
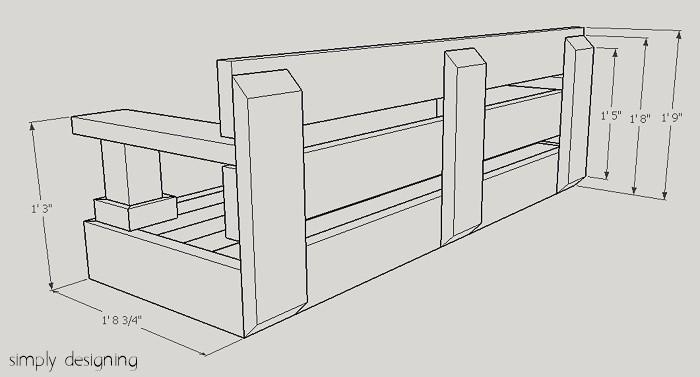
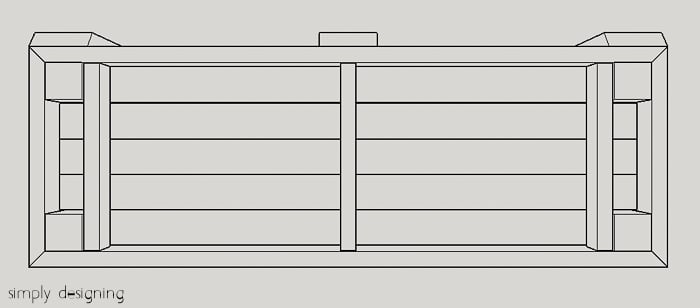
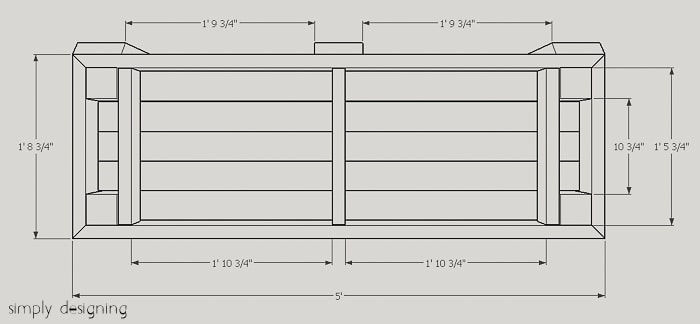
So this is my first attempt at a 3D furniture plan in SketchUp and it should help you build your own porch swing a little more simply than only written instructions I hope.
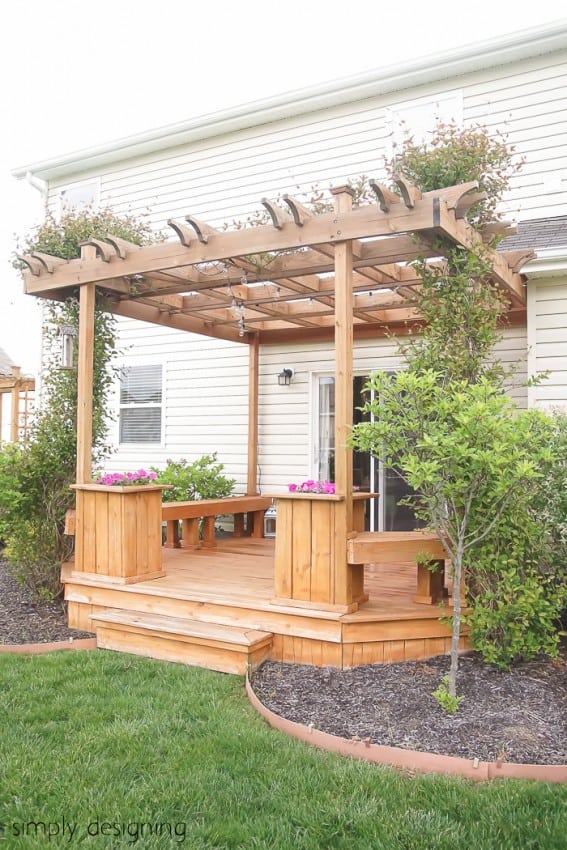
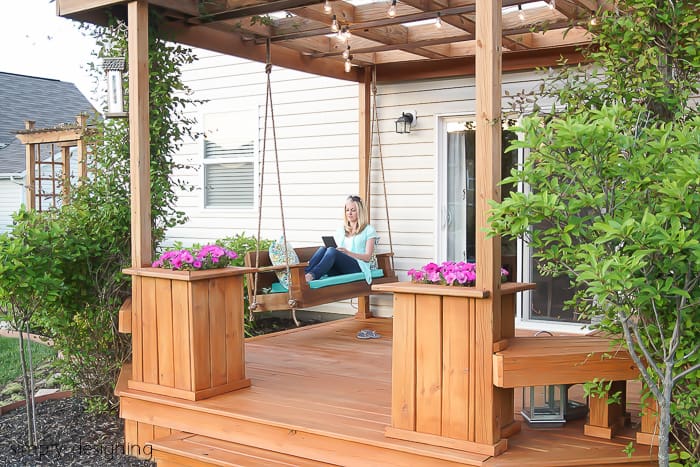
Here is what our patio looked like BEFORE we built the porch swing:
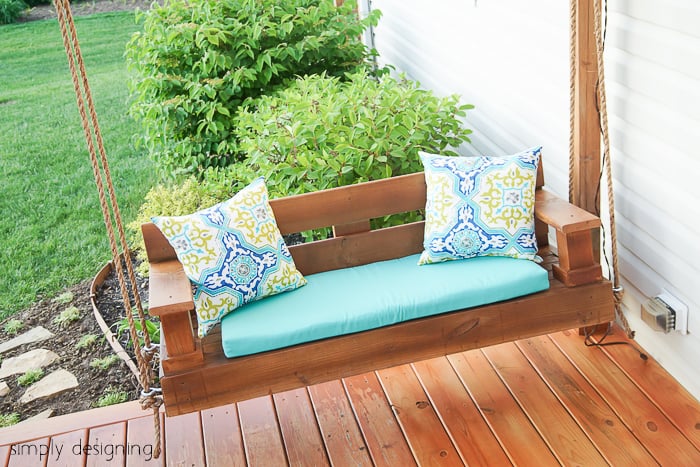
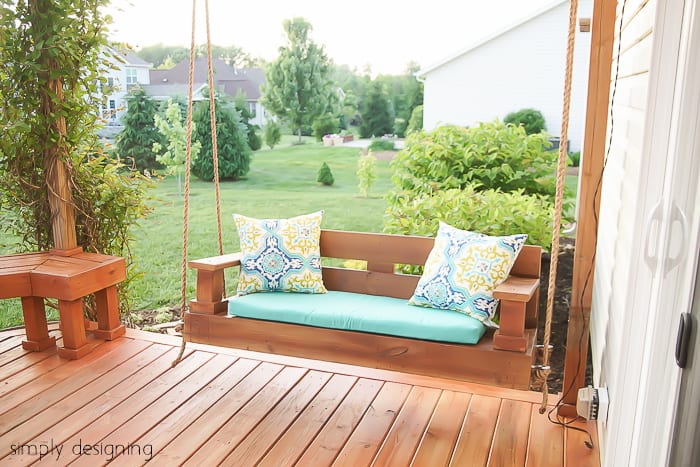
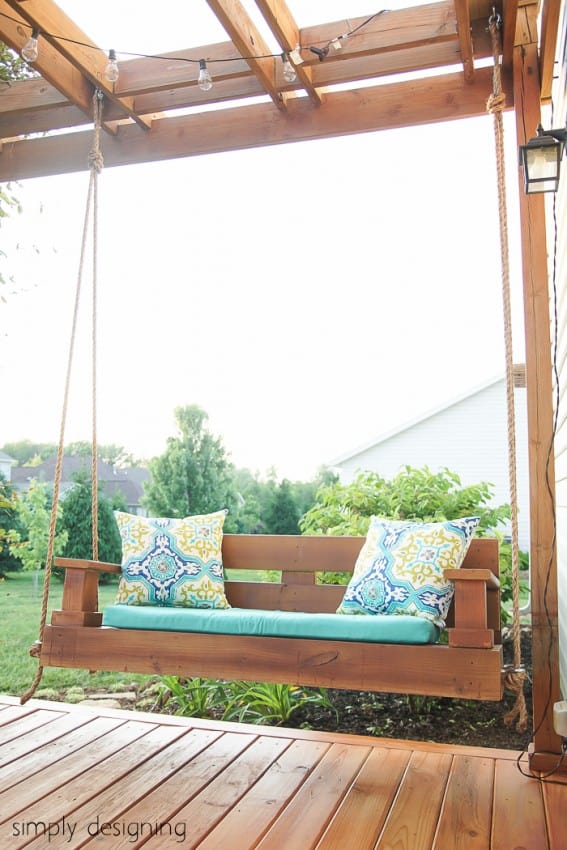
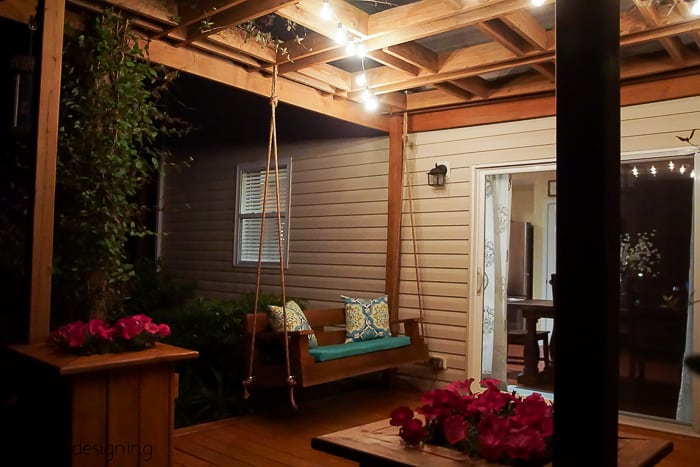
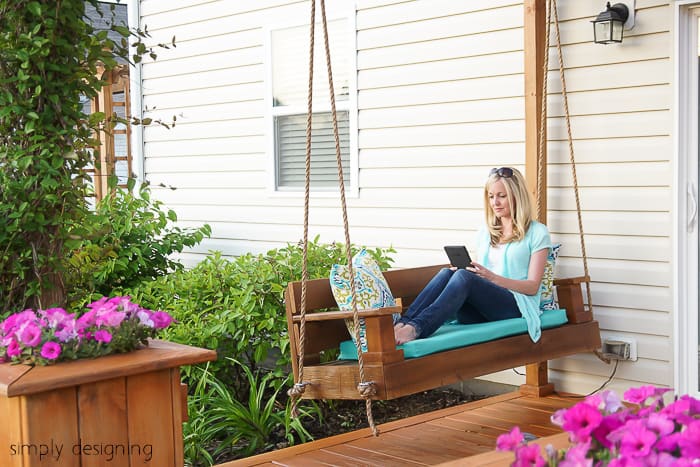
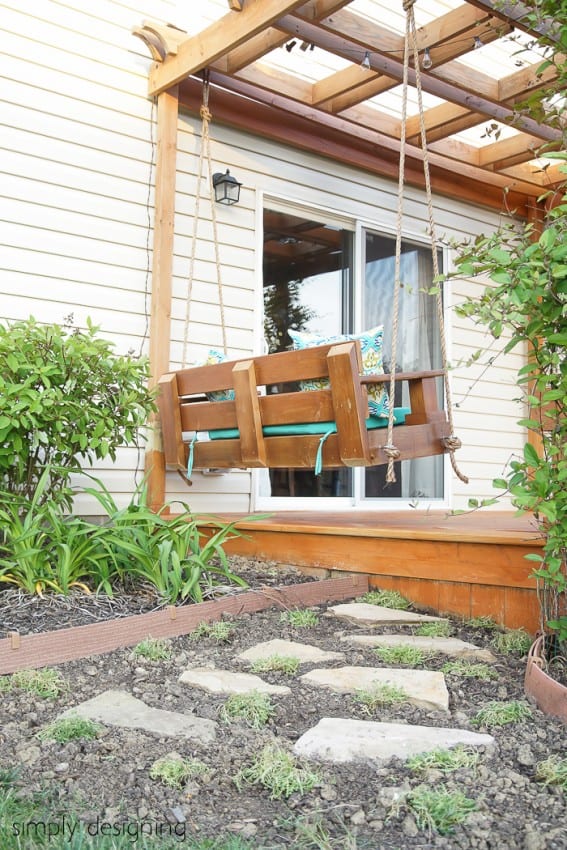
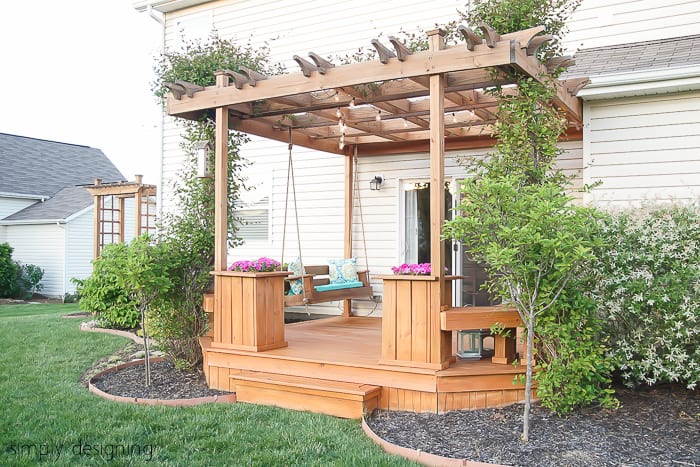
And here is AFTER we hung the porch swing:
Isn't that so much fun!?!?! I am in love with our new Porch Swing!
Here is what you will need to Build a Porch Swing
- Wood Boards and Cuts to build a porch swing
- Frame Boards
- (2) 2" x 6" x 60" bevel cut
- (2) 2" x 6" x 20.75" bevel cut
- Corner Posts
- (2) 4" x 4" x 13.5"
- (2) 4" x 4" x 4"
- Seat Boards
- (5) 2" x 4" x 57"
- Vertical Back Support
- (3) 2" x 6" x 20"
- Horizontal Back Boards
- (2) 2" x 6" x 60" (we used deck boards for this, but regular boards would work too)
- Arm Rests
- (2) 2" x 6" x 21.125" (we used deck boards for this, but regular boards would work too)
- Cross Beams
- (3) 2" x 4" x 17.75"
- Trim
- (8) 1" x 2" x 4.5"
- Frame Boards
- 37' Manila Natural Rope, ¾" thick
- (4) Eye Screws, ½" thick
- (2) Eye Bolts, ½" thick
- (2) Large Washers to go with eye bolts
- (2) ⅜" Anchor Shackle
- 1 Box 2 ½" Wood Screws (approximately 72 screws)
- Deck Stain (Behr, Chocolate)
- HomeRight FinishMax Fine Finish Sprayer
- Drill & Driver
- Kreg Jig
- Nail Gun and 2" Brad Nails
- Compound Miter Saw
- Electric Sander
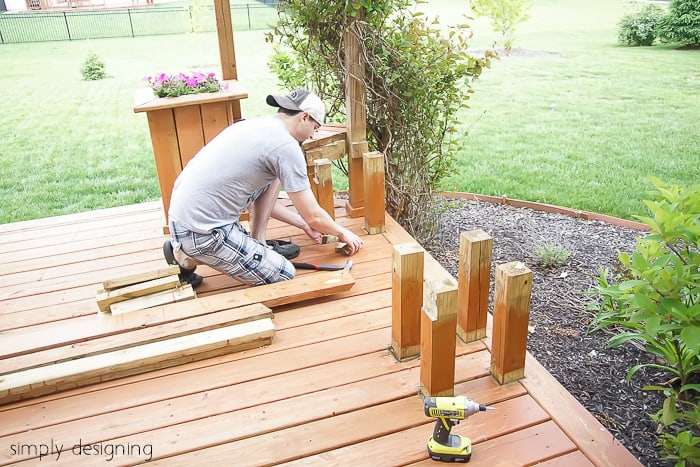
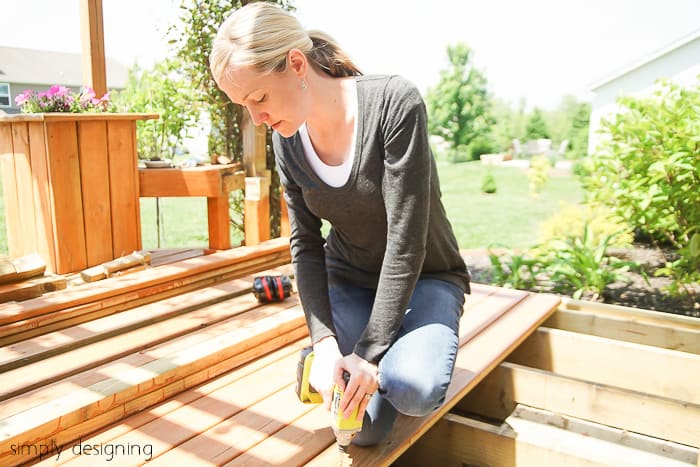
Because we already had a bench on our patio, the first thing we did was to remove the top of the bench.
This was easily done by unscrewing the boards and carefully laying the wood off to the side.
We wanted to reuse most of this wood so we were careful when removing it.
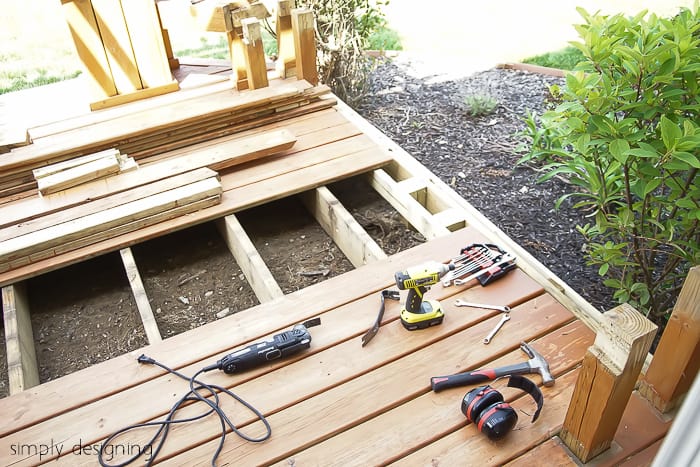
Our bench legs were bolted into the deck support boards that ran under our deck top.
So in order to remove the bench legs, we needed to remove several deck boards.
Once the bench was completely removed, we installed new deck boards.
We ended up rearranging the boards so that all the new boards were next to each other.
This is not necessary, but it was our personal preference.
After our deck was put back together, we were ready to build a porch swing!
Most of the boards we used for our porch swing were boards that came from the bench and deck that we removed.
You can use new boards instead.
Cut the boards according to the cuts mentioned above.
Note that this swing was custom designed to fit the space that we have but it builds a 5' long bench which is a pretty standard size.
You may need to adjust the sizing of your materials to fit the space you have.
After our boards were cut, we began assembling it in the following manner.
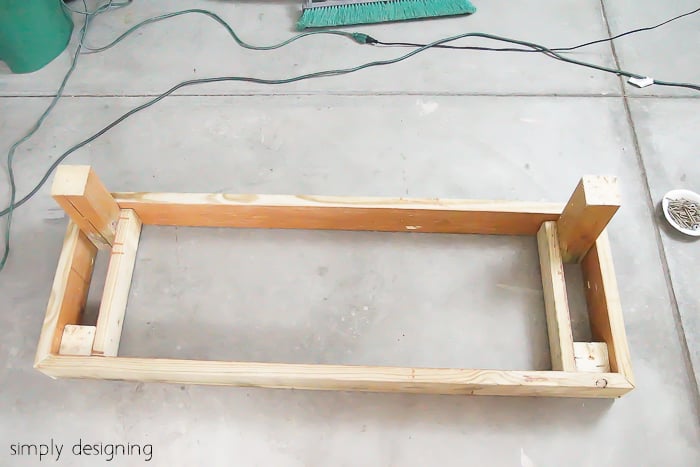
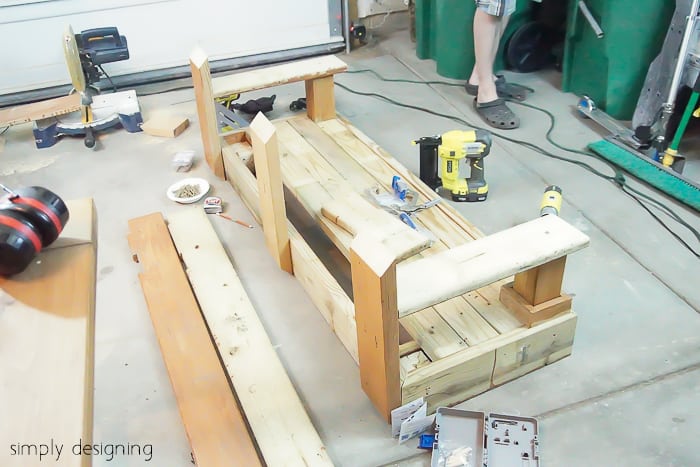
First, we used the 2" x 6" frame boards to build the bottom frame with the 4" x 4" corner post in each corner.
We used screws to attach the 2" x 6" directly into the 4" x 4" corner posts.
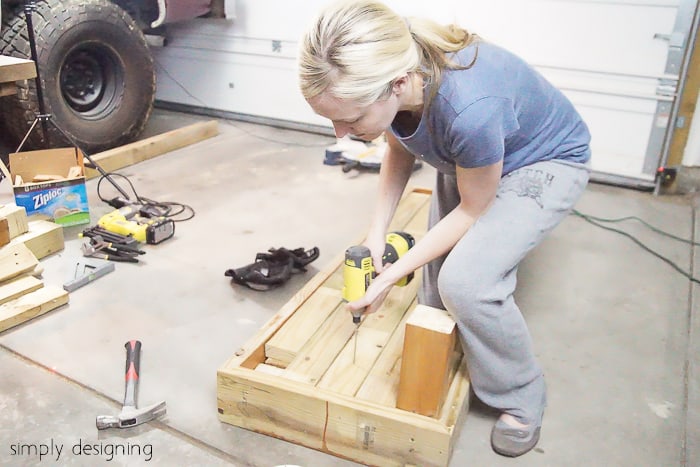
Then we used 2" x 4" boards to build cross beams that the seat top will rest on.
Next, we assembled the seat top using the remaining 2" x 4" pieces and screwed them into the cross beams.
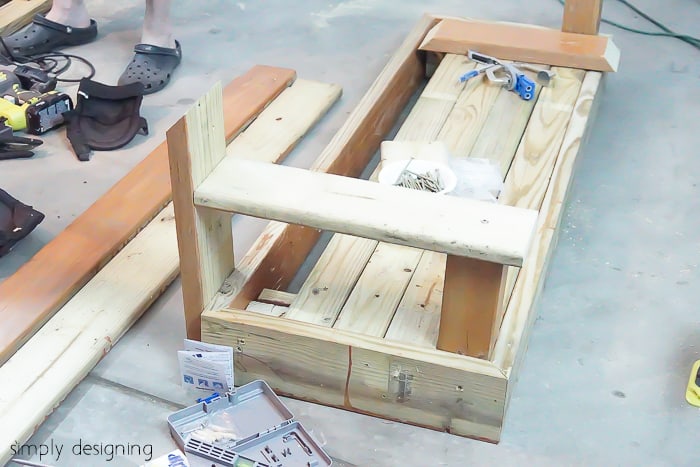
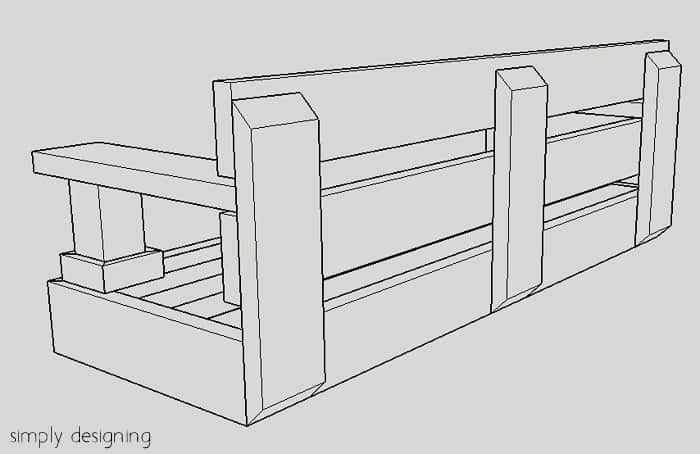
Then we attached the three 2" x 6" vertical back support boards onto the frame with screws.
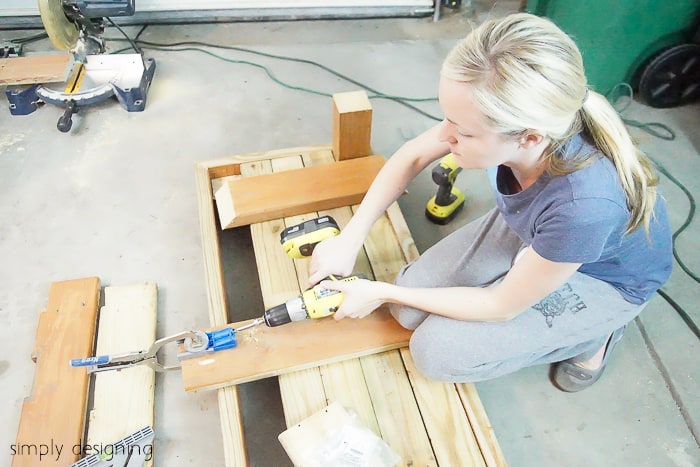
Then we used our Kreg Jig to place pocket holes into the bottom of the 2" x 6" armrest pieces and attached those to the vertical back support boards.
We also screwed the armrest straight down into the 4" x 4".
After that, we attached the 2 horizontal back support boards by screwing them into the vertical back support boards.
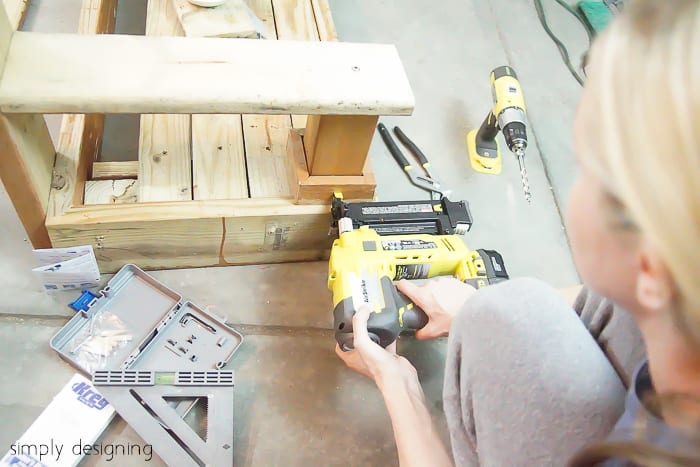
Then we added the trim around the bottom of the 4" x 4" armrest supports using a nail gun. (I know I am missing one seat board in this photo...I was working late at night and ran out of boards, so I bought a new board the next day and installed it in place.)
After the swing was assembled we sanded it down well.
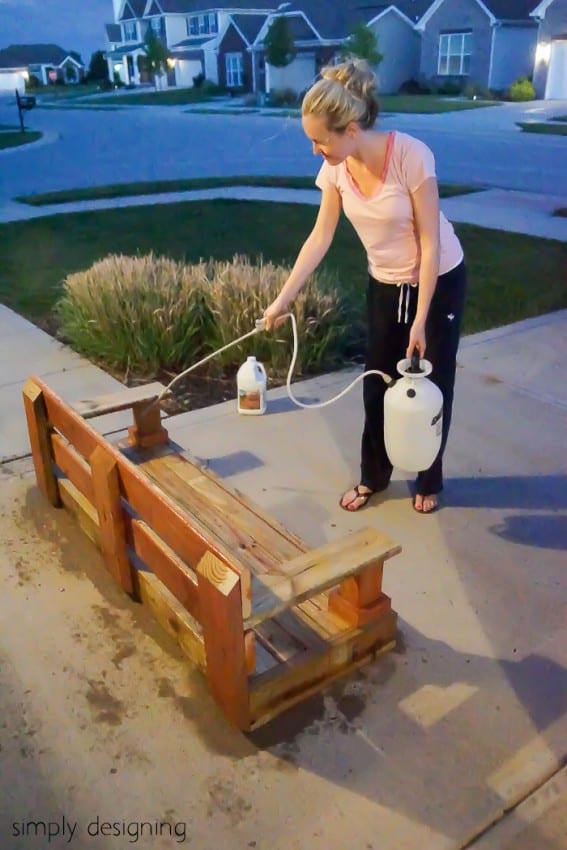
Because our boards were previously used, we sprayed it with deck cleaner and let it dry completely before proceeding.
Next comes the fun part!! Because I am a HomeRight Ambassador I have the privilege of using many of their amazing products! So a big huge thank you to HomeRight for helping to make this post possible!
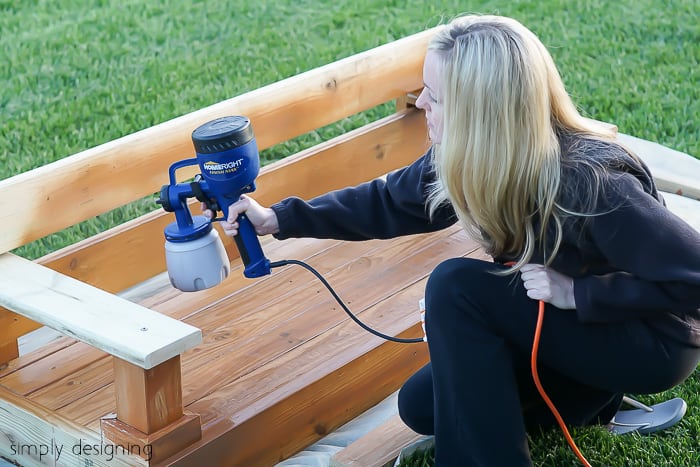
I love my FinishMax for painting projects but had really wanted to use it for staining something. And I finally got my chance!
I simply filled my FinishMax with stain (no need to thin stain) and went to work staining my bench!
The FinishMax did an AMAZING job coating the swing in an even coat of stain and I love how fast it is!
I am now addicted to using my FinishMax to stain things!
After my swing was stained I let it dry completely.
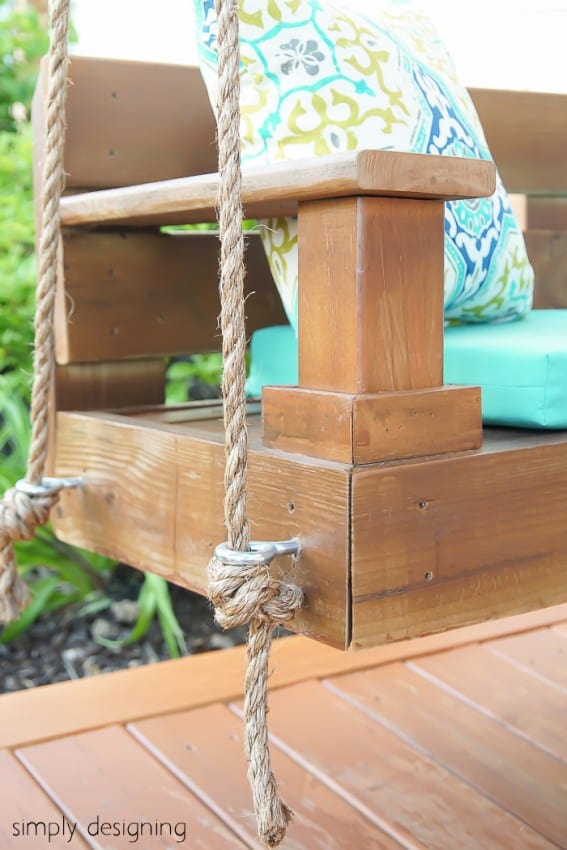
Then we drilled pilot holes into each of the sides of the frame and into the 4" x 4". We screwed the Eye Screws into the pilot holes.
We needed to create a support system to hang our swing.
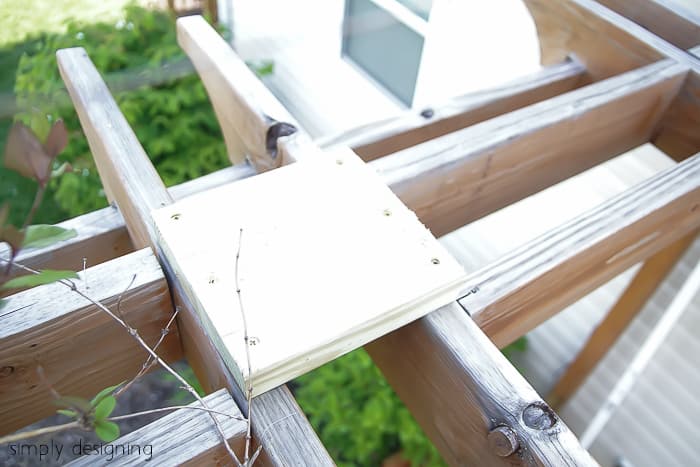
Since we already had an existing pergola, we simply screwed pieces of 2" x 8" board into the cross beams of the pergola where we wanted the porch swing to hang from.
Then we drilled a ½" hole into the 2" x 8" and put the eye bolt through the hole and attached it to the board using a washer and the nut on top of the board.
We were sure to tighten this well.
Then we cut the rope into 2 equal pieces and tied a loop in the middle of each piece.
We used the anchor shackles to connect the rope to the eye bolt.
Now comes the final step!
Simply run your rope through the eye screws in the bench and tie two knots to keep the bench in place.
We tied the rope so that the swing tilted back ever so slightly and so that it was at a comfortable height.
And that's it!! We chose to add an outdoor cushion and cute pillows from World Market to our cute porch swing, but that's completely up to you! (We bought this Bench Cushion and these Outdoor Pillows.)
Isn't that so beautiful! We really do love our swing!
And I am so glad that we have an outdoor space that my family will enjoy using more.
This is a favorite spot for my husband and I to go and sit on at night after the kids are in bed.
We turn our Edison Patio Lighting on and sit and talk.
And in the day it is a perfect spot to enjoy the sunshine and read!
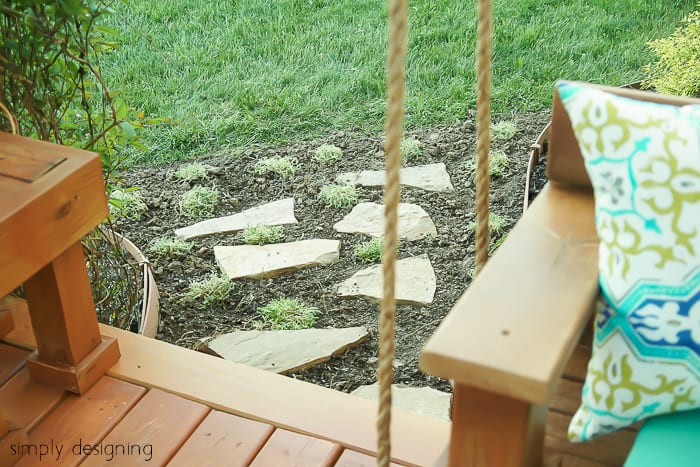
And if you notice, we now have a little walkway to the side of our patio too! Our children always climb through the bushes and on to the deck this way, so now they have a designated path. Plus we are hoping to one day put a lower patio space here. But until then, it will keep my bushes from being stepped on!
Isn't this so much fun!?
Here are detailed porch swing building plans to help get your dimensions and layout right.
I really hope these help! I'd love to know if they do!




Rebekah Miller
Love the swing and the pillows. The Finish Max makes it look so easy and beautiful.
Virginia Fynes
Genius idea!! I love porch swings too, can't help but smile. A big job you guys got yourself into but it looks rewarding! I really have to get myself a paint sprayer, makes for light work!!
beverly e
I have a lattice screen that needs staining... this would be a great halp!
Mary Beth|Cupcakes and Crinoline
First off, your swing is absolutely beautiful! Secondly 😉 If I won I would stain first. I have a cedar sunroom and it is due to be stained this year....that baby usually takes me most of the day to do and using the HomeRight spray painter would make my job SO MUCH EASIER! Thanks for sharing your awesome idea and instructions.
mysweetiepiepie
The first thing I'd paint would be our picnic table and the matching benches.
Leanne
You did such a great job on the swing! The whole deck looks great too. I would paint my outdoor furniture.
Debbie
Great job, love it and the rope detail is awesome!
Aubrey Claybrook
I love this look! I'd love to have a beautiful patio like this!
Vanessa
I would love to do some home projects using a HomeRight Sprayer! I am also interested in being a HomeRight Ambassador! 🙂 I'll have to check into that..
Adelina Priddis
I don't know yet, but something! Maybe our kitchen table!!
Wendy N
We have a deck that is dire need of a new stain! I would love to have this sprayer so that we could get that done!
Wendy N
We have a deck that is dire need of a new stain! I would love to have this sprayer so that we could get that done!
Dawn Monroe
I would paint our picnic table. Its old but I think a new paint job would perk it up.
DJohnson
I would stain my deck.
amy tolley
i have a bench i would love to restain another color
Keri Lee Sereika
I love your swing! What a great project and yeah - that sprayer - sigh...so fab!
Kaye Newman
I would paint my patio furniture first!.
tsmith
I am getting ready to paint cabinets and this would come in very handy!
Raina DelRio
I would paint a dining set and china cabinet that my grandmother gave me. It needs a little refreshing 🙂
michelle smith
I have a bench that I'd stain. It needs to be redone.
Kirsten T
I have so much that needs paint/stain I wouldn't know where to start, but it would be fun to have!
Donna
LOVE this! Looks awesome!
Renee Smason
I would paint my dining room table.
Sarah Palmer
WOW!!! I would love to have a porch swing, but we don't really even have a porch. 🙁 This is gorgeous! Pinning!! Thanks for linking to Tips & Tricks. We can't wait to see what you link up next. 🙂
Michelle James
I love your swing. When we looked at our house to purchase there was a porch swing but when we went to move in it was gone. I was so sad. I know where it is because they moved nnot too far away (same town) and it hangs in a.tree in their front yard. Anyway...yours is beautiful.
Maicon
Genius idea!! I love porch swings too, can’t help but smile. A big job you guys got yourself into but it looks rewarding! I really have to get myself a paint sprayer, makes for light work!!
Robin
This is fantastic! A swing is on my to-do list for this summer so thank you! And thanks for linking to Monday Funday xo
kristi@ishouldbemoppingthefloor
Be still, my heart! This bench would be my happy place! Gorgeous! Thanks for linking it up to the party this week, Ashley!
Sara
I love this! What a great porch swing. I have one we built a few years ago and it is my favorite place to relax. Thanks for sharing at Merry Monday!
Lauren @ Mom Home Guide
Great project! Thanks for sharing it at Motivation Monday at Mom Home Guide!
Marie, The Interior Frugalista
I would love to have a porch swing! Thanks for such a great tutorial - pinning to share.
Shirley Wood
I'm convinced our life is not complete without a paint sprayer. Your swing is awesome! So glad you shared with us at Merry Monday.
ashley@biggerthanthethreeofus
This turned out amazing! Seriously, love it. Thanks for linking up to the Creative Gallery link-up.
simple nature decor blog
I have always wanted to put a swing in my back yard, I have a pretty big back yard and we do have the space! I will save this post for reference and help, if i end of making one! Thanks for sharing this on Dream Create and inspire we love it! Hope to see you at my blog, love your input.
Hugs
Maria
Jenna @ A Savory Feast
Your whole porch is so cute, especially the swing! I've been thinking that a swing would be perfect on my front porch, so I'm pinning this to show my husband. Thanks for the tutorial!
Jennifer
I like your design of the rope connecting through eye bolts on the side of the bench, rather than through the arm rest -- which is what you see most of the time.
heather
Ashley I LOVE it!! And your whole pergola is gorgeous! We just did one this year, and I'm dying to plant some vines like you guys have. What are yours? Do you like them?
Ashley Phipps
Thank you! We have honeysuckle in several places around our home and it grows really well here!
Karen Marie Kedzuch
Ashley,
I love your pour swing and the simple to follow directions. I can see this project in my future. When I build it I will share a picture on your Facebook page. You are amazing darlin'!
Happy Creating,
Karen Marie
Doug
I like the design and am going to build one but using 2x6's, 2x4's for seat slats and 4x4's the swing must weigh a ton.I will attempt it using 5/4 x6 for the frame , 2x4's for inner supports and 5/4x4's for the seat slats.the back supports may be 5/4 also . Will see when I get there.
Quangminhhanoi
I love this! What a great porch swing. I have one we built a few years ago and it is my favorite place to relax. Thanks for sharing at Merry Monday!
giamsat24hvn
Wow!!!!!!!!!!!!!!!! I would love to have a porch swing! Thanks for such a great tutorial – pinning to share
Rob M Davenport
i like the porch swing by simply designing. however, i signed up for your printables and i'll be darned if i can figure out how to print the plans!
Betty Goodwin
I love the swing! The entire porch is so cute! How pleased are you with those outdoor pillows? Are they OK when the weather is hot? I'm afraid that they will not be breathable enough.
Ashley Phipps
The pillows have been find for my family and I 🙂
FS
It’s awesome design. Seems like it’s heavy. Can we hang this swing on 8x8 joist in my patio? Using side eye screws on both side of the joist.
M T
Eye bolts should not be used as you have them in the bottom of the swing, holding it up. They should be tensioned in lined with the threads' axis, like this:
<-- pull O===
A bent eyebolt is unsafe.
Sylvia | Grace for a Gypsy
Wow! Great job! Love that swing. My daughter is building a house with a wrap around porch, Im showing her this post!
Sarah @ The DIY Mommy
Wow! This looks like the perfect place to relax with a good book - Thanks for sharing!
Anita Holland
Brilliant project, well done Pinned
Linda
Love your new porch swing. It is a lovely addition. Thank you for sharing at "Love Your Creativity." I am happy to feature your porch swing today.
Richella J Parham
Your swing looks great! And the plans make it very doable for a DIY enthusiast.
Thanks for joining the Grace at Home party at Imparting Grace. I'm featuring you this week!
Pepe
I'm in the process of building this porch swing but I noticed after cutting 16 of the 1x2 trim pieces (as stated on materials list), that I only used 8. Am I missing anything? Looked at design and only see 8 pieces in the front 4x4 arm rest column. Thanks.
Ashley Phipps
Hi!
Oh goodness, I am so sorry! Yes, you will only need 8 pieces. I needed an additional 8 to replace some of my trim for the deck when we changed the bench size...but you won't need that! I changed my post to reflect that only 8 are needed. Again, my apologies.