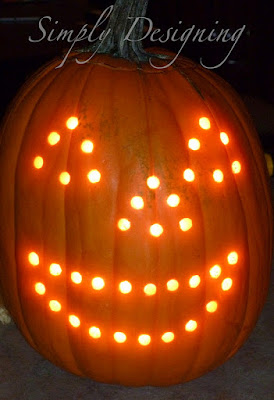
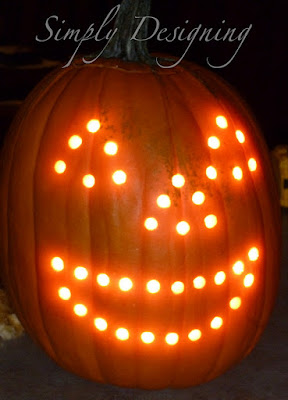
This poor pumpkin also received laser eye surgery, lip injections, a lobotomy and...well...some unmentionable surgery as well...
It was quite the fun night!
We decided to carve pumpkins a bit differently this year. No more kitchen knife. No more cheap pumpkin carving kit. We decided to break out the power tools and boy was it a lot of fun!
So we got out our power tools and practiced our surgery skills. (I watch Gray's Anatomy so I'm pretty sure I am perfectly qualified to do this 🙂
And I LOVE our end result.
Pumpkin #1: Carved using a Drill and lighted with Christmas lights
Step 1: The Lobotomy
Cut the top of the pumpkin off around the stem. We always cut ours at an angle so that the part attached to the stem looks like a cone. This helps keep the top from falling inside the pumpkin.
If you remember, it is helpful to add a notch at the back of this so that you can easily know how the lid fits back on the pumpkin.
Clean out the insides of the pumpkin.
Step 2: Marking for surgery
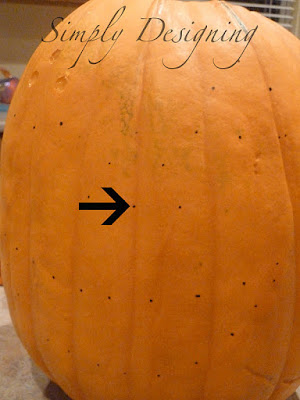
Decide on your design for the pumpkin. For this one, we chose to do a traditional pumpkin face, but get creative with this!
Using a sharpie marker, mark the areas to be drilled. You can see our little black dots on the pumpkin below.
Step 3: The Rhinoplasty, Laser Eye Surgery and the Lip Injections
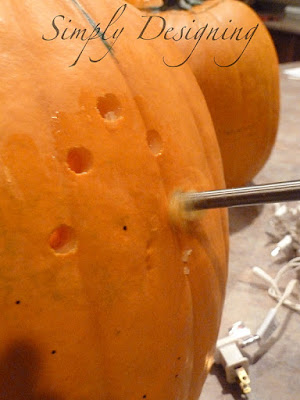
Using a drill bit that is similar in size to your Christmas light bulbs, drill holes all the way through the marked areas. In our case, the eyes, the nose and the mouth.
Step 4: Admire your excellent surgery skills!
Isn't he just the cutest pumpkin ever!?
Step 5: The Unmentionables
I won't tell you the comments my husband may or may not have made while I was drilling the hole in the back of the pumpkin for the Christmas light cord to go through. He was trying to figure out what kind of surgery this would be. Yeah. He's a boy...what can I say.
But notice...POWER TOOLS ARE FOR GIRLS TOO! Yeah. This was a lot of fun!
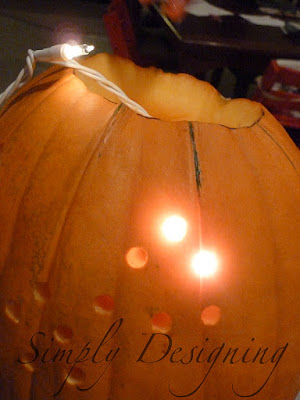
Step 6: Reconstruct the face to give it a glowing appearance
Insert the Christmas light bulbs through each drilled hole in the pumpkin.
Admire your cute pumpkin!
This was honestly a LOT of fun to do! And it was so simple!
However the best part might be the fact that this was QUICKER then any other way I have ever carved a pumpkin! It went so fast and was so fun. Plus the result was super cute.
I am hooked on carving pumpkins with power tools!
So I want to know, when carving your pumpkin, do you tend to stick with traditional pumpkin faces or do you carve something else?
I participate in the link parties found here.
Subscribe to Simply Designing by Email








Richard Robertson
Very informative and great idea. I wanna share your idea with my wife.