We are about to embark on a huge master bathroom remodel! Woot woot! But before we delve into the world of making our bathroom completely unusable for weeks or months at a time, we decided to tackle a bit of a smaller project to update and upgrade our master bathroom: DIY Board and Batten (without replacing your baseboards!)
Yes, you read that right.
We did NOT replace our baseboards.
I will show you how to make this work without that added work and expense!
It's a pretty awesome little trick.
Also, I am super thrilled to be able to work with both The Home Depot and ScotchBlue™ Painters Tape to bring you this post today and to be a part of their amazing Blog Hop! Woot woot!
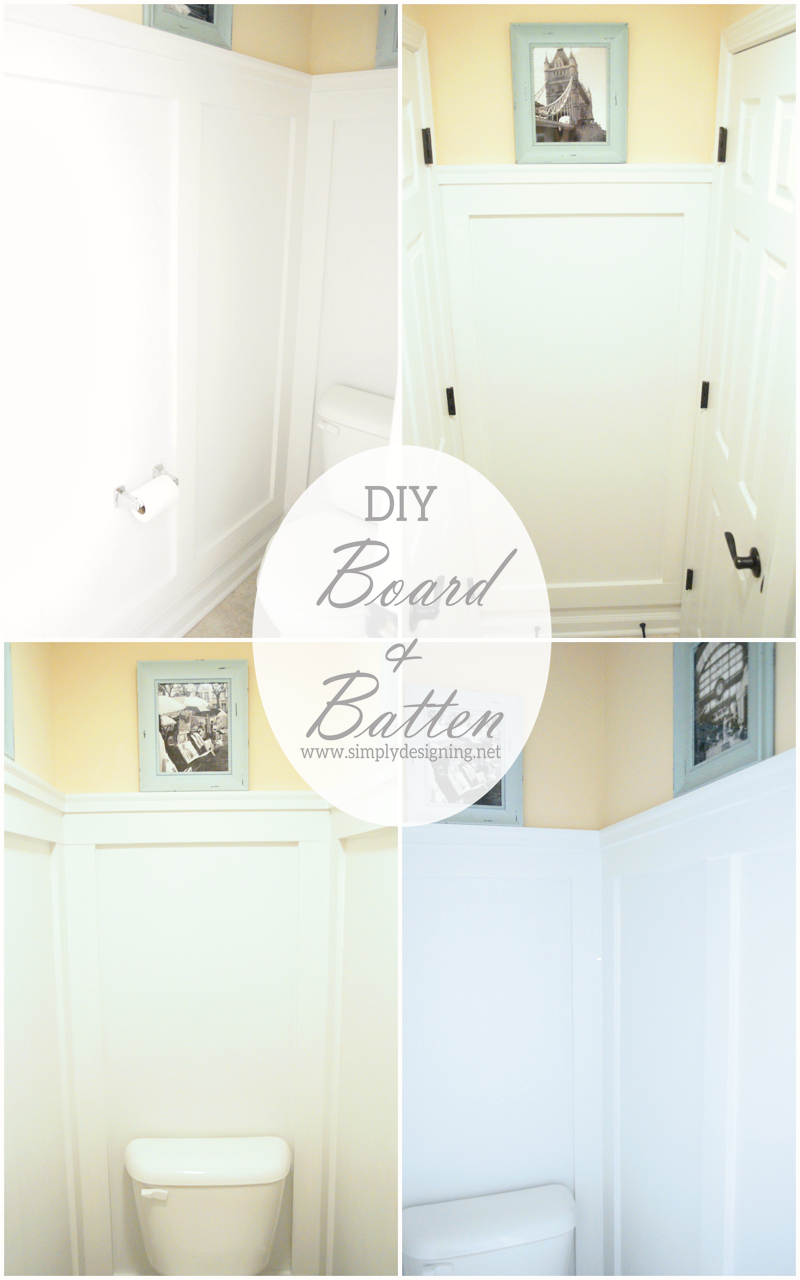
 So back to my project of the day...we did not do this Board and Batten throughout our master bathroom, just in the toilet room.
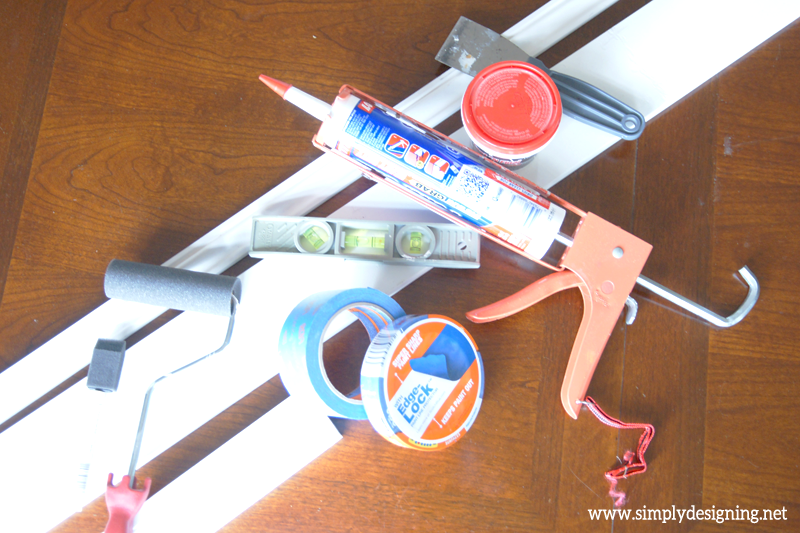
 Supplies for installing board and batten without removing baseboards:
- 1" x 4" primed wood (these will become your vertical and horizontal board and batten pieces)
- Decorative Trim for the Top, primed (be sure that the bottom of the trim is at least ¾" thick)
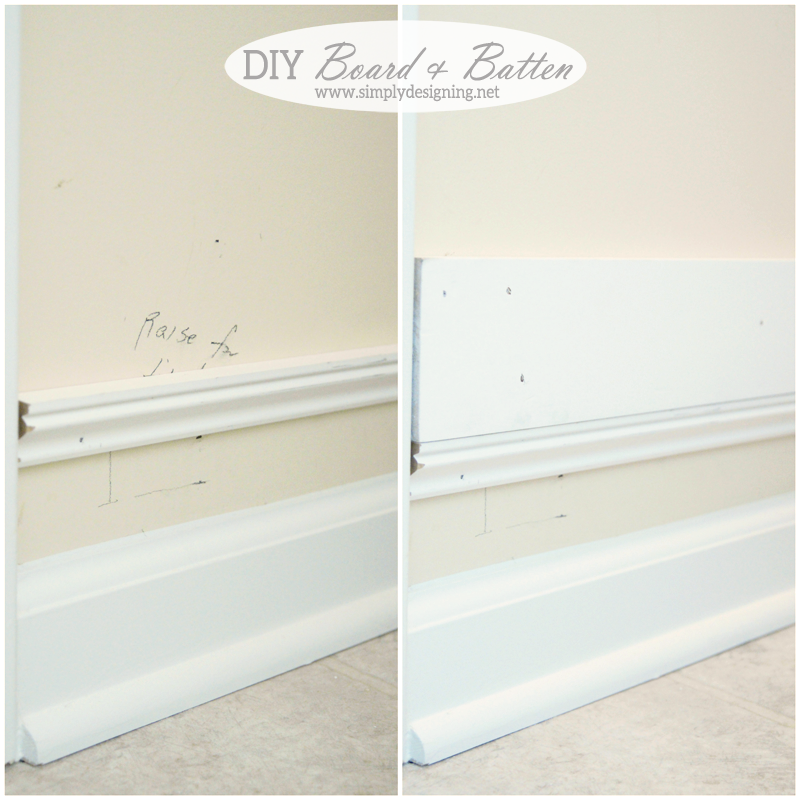
- Smaller Decorative Trim for the Bottom, primed (this will "extend" your baseboards, be sure one side it at least ¾" thick)
- Semi-Gloss White Paint (we use Porter Cliff White as it matches our existing molding)
- Paint Roller (4" - 6" in size)
- Paint Tray
- Foam Paint Brush
- Level
- Ryobi® AirStrike Cordless Brad Nailer (or similar)
- 2" Brad Nails
- Compound Miter Saw
- Electric Sander
- 120 Grit Sandpaper
- Caulk
- Paintable Wood Putty
- ScotchBlue™ Painter’s Tape for Delicate Surfaces with Edge-Lock™ Paint Line Protector 2080EL
- 1" x 4" will be used for a top and bottom horizontal border and your vertical pieces, so get enough to be able to horizontally go around the room, twice. Plus enough for all of your vertical pieces. Be sure to add a bit extra for your cuts and just in case.
- Get enough top and bottom decorative trim to go around the room horizontally. Be sure to add a bit extra for your beveled cuts and "just in case".
- You do not have to buy pre-primed wood. However, The Home Depot had a great selection and we knew it would save us a ton of time and money since we wouldn't need to prime the wood ourselves prior to painting! So consider buying primed wood if possible.
Steps for installing board and batten.
- The first step was to determine the height we wanted our board and batten to be. We decided that we wanted our 1" x 4" top horizontal piece to be equal to a horizontal piece found on our doors so we began there.
- We first installed our top horizontal 1" x 4" piece by lining the height up with a particular piece in our door and then used the nail gun to adhere it in place. There is no need to bevel the corner cuts on this piece of wood, but you can if you like. Be sure to use a level during this step!
- Next, we placed our top decorative trim on top of the 1" x 4" top piece and nail-gunned that into place. We cut all of these corners at a 45-degree bevelled edge so that they fit together well.
We had one "tricky" wall where the trim would sit very snugly between two door frames that met where the trim would go at a 90-degree angle.
Because of how thick our trim was, we needed to notch out a bit on the top of our trim to fit underneath the door frame.
Then we worked on our bottom moulding.
How to increase the size of your baseboards without replacing them when your installing board and batten walls
- We wanted to have a board extending out from either side of each corner, and at every door jamb. So we started there.
- In theory, you should have vertical boards equidistant from each other.
- However, due to wall size and variation, this isn't always possible.
- Wour eye won't notice a slight difference when the walls are perpendicular or parallel to each other. So you can actually get away with a bit of fudging here and no one (except you) will know!
We ended up placing a board in each corner and every place our wall ended (like into a door jamb).
We left the two smallest walls alone at that point.
Putting another board in between them would have made the board and batten pattern too busy.
Then we caulked around every single edge and joint.
This is what gives you your nice, finished, professional look!
So take your time to caulk well.
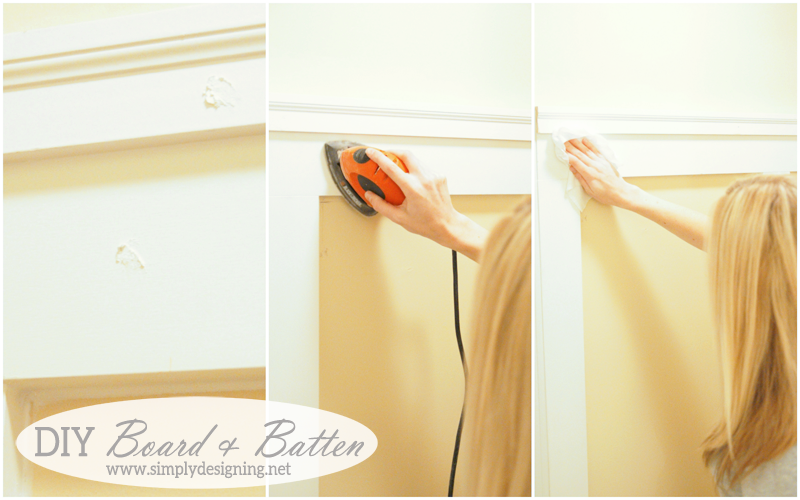
Then we applied wood putty to every nail hole. Again, this will give you a nice, finished look so be sure to do this.
Then we let it all dry completely. In fact, we took the rest of the night off and went to bed!
Next comes my least favorite part.
There is always one part of DIY-ing that isn't anyone's favorite.
And mine is sanding.
It just makes such a mess.
So for whatever reason, it is my least favorite part!
But it is desperately important!
So even if you don't like it, you can not skip this step!
So I sanded it well, and then I wiped it all clean!
I love to use baby wipes to clean sawdust off of surfaces, but a tack cloth or clean rag will work well too.
Finally, it was time to paint!
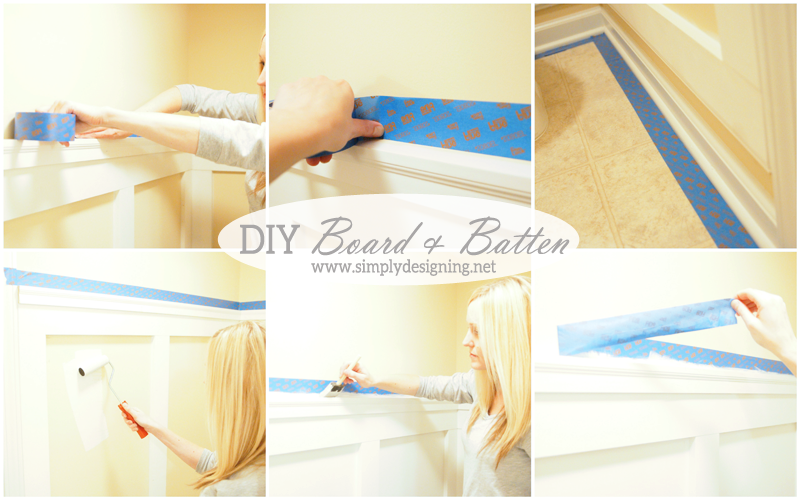
We used ScotchBlue™ Painters Tape for Delicate Surfaces with Edge-Lock™ Paint Line Protector.
We simply ran this along the top of our trim and along the bottom trim near the floor to protect our walls and our floors while painting.
I love their Delicate Surfaces tape because it is perfect for use on delicate surfaces including painted walls!
And I hate it when I tape and paint an area, only to remove the tape to have it take off paint! That is the worst!
And ScotchBlue™ Painter's Tape went on simply, and came off without a single hitch! It was perfect!
So we taped, painted (several coats) and then took the tape off.
The next day I was ready to style my new board and batten bathroom!
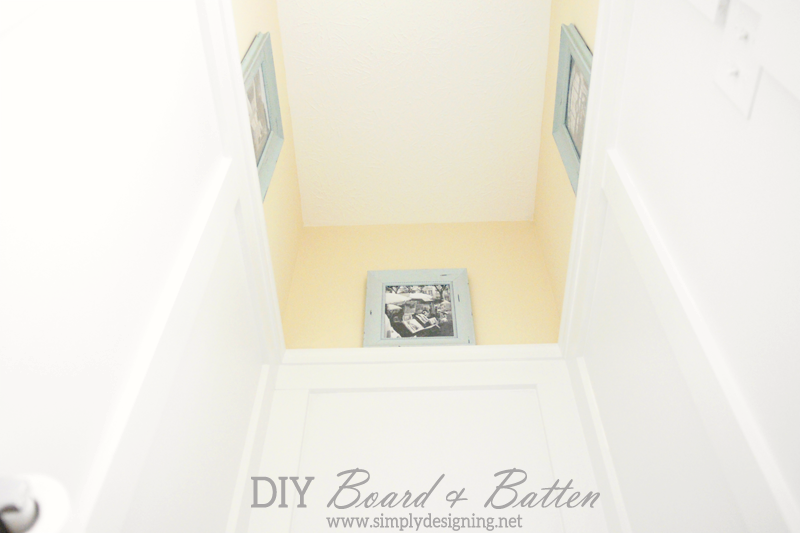
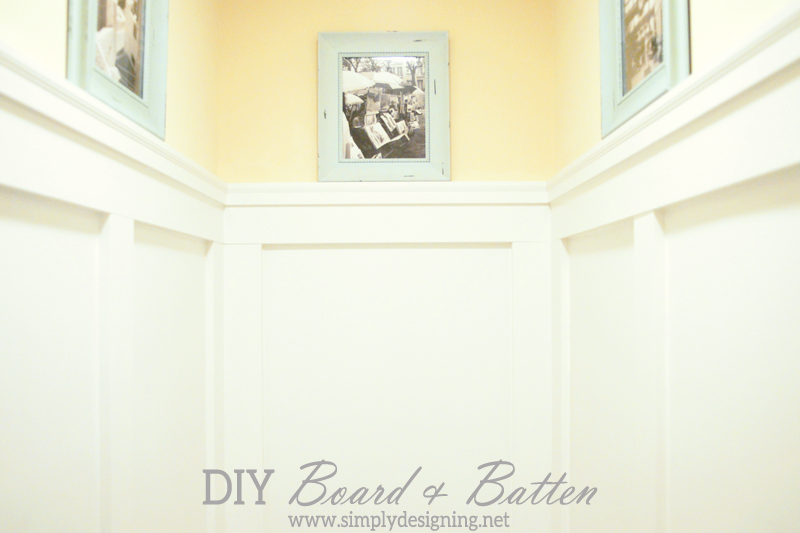
After talking with my husband and doing a little shopping at the local craft store, I found the most beautiful, aqua, distressed frames!
And I knew these would look really nice in the bathroom!
They gave it a perfect pop of color without being overpowering and I honestly just loved the frames!!
So I took to Facebook to try to figure out what to put in the frames!
You guys gave me some of the most amazing suggestions of places to look for prints!!
I found some really pretty ideas, but nothing spoke to me.
I also didn't want to use photos of my family in the toilet room...I didn't want to feel like I was being watched while in there!
So after hours of searching through all your suggestions and not finding anything that truly spoke to me, I decided to use a few photos we took while vacationing in fun locations over the years!
I turned them black and white, sent them off to be printed, and LOVE how they look in there! Especially with the aqua frames!

You Might Also Enjoy:
Check Out Our Master Bathroom Remodel Series:
Part 1: Master Bathroom Inspiration
Part 6: Installing Moen Posi-Temp® Shower Fixtures
Part 7: How to Install Radiant Heated Tile Floors
Part 8: Install New Tile Counter Tops
Part 9: Install a Tile Accent Wall
How to Install a new Shower Door
How to Install new Bathroom Mirror Frames (in about 10 minutes!)
DIY Framed Mirror with Hidden Jewelry Organization
Please note that I am not a professional. I am just sharing what worked for us. As always please use all proper safety precautions and read and follow all manufacturer instructions. Please note that I am not responsible in any way for any outcome if you try this yourself. I am not liable for any injury or additional cost or expense incurred. I always recommend consulting and hiring a professional if needed. And always be sure to check with local building codes to obtain all permits needed for any DIY project.







heatherp626
We are in the process of finishing our basement, so I could put this towards paint. I am also in need of some more plants for my flower beds.<br /><br />[email protected]
Deb (dubbage42)
I would put it towards our (pending) project to re-screen in our back porch.
Natalie G
Plants for our new patio!
momof2girls
I would put it towards paint.<br />[email protected]
Chrissy Boerman
I would buy subway tile for my kitchen backsplash!
Karen
Arborvitae or fencing. Karen. Hillukka@ gmail.com
Rosemary Shannon
white wood blinds for my bedroom.
the cape on the corner
that looks great, and i agree, the aqua frames really make them stand out. i would totally buy more pots and plants-since we put in our little patio, i'm spending a lot more time outdoors. thanks.
Heather R
this would make a little chunk in all of the many things we plan on doing after our October wedding is done - we've asked for home depot cards instead of registering so we can rehaul the entire kitchen (trust me...it really needs it)
SalBug
I would buy a closet organizing system.
Corinna Bennett
I would purchase plants or paint. 🙂
Skyann Smith
paint and boards for a project
JC
I would get bathtub faucet heads and tiles.
Julie Workman
Hmmm. I need some dropcloths, rods and rings for curtains in my great room. Or paint for that room (or any other in my house for that matter!)
Mami2jcn
I would buy plants!
freebiequeen15
I really need a new ladder and some lightbulbs
Carly
I would buy new decorations/plants for my patio!
Christine West
Paint for our kitchen cabinets. 🙂
Cheryl @ Sew Can Do
Wood trims for sprucing up a bathroom.
amkj2002
I would use it to buy paint for our new house!
Shelley
I would put it towards garden supplies!
Atta Girl Amy
I'd spend it on outdoor furniture!
Lisa Brown
i would buy paint to repaint my dark bathroom
toplesshotdog
I think I would buy some nice hanging baskets for the front porch.
Kristin @ My Uncommon Slice of Suburbia
It looks fabulous!! I would by a backsplash for the kitchen!
Michelle J.
I would put it towards a lawn mower!
Ashley T.
I'd use it towards gettting my new kitchen floors.
TXsunlover
We're updating our entry so I'd buy paint.
Amy Anderson
I want some plants!
Jennifer Schmitz
I would buy a nail gun and miter saw!
Eva Scott
new paint for my living room!!!
Traci Hutton
Paint & a sprayer!!<br />
Ashley
I'd put it towards paint for our new house<br /><br />demureprincess7(at)gmail(dot)com
Amanda
I would give it to my husband!
Erin Mollie Rasmussen
I would purchase paint and paint the outside of my art shack/studio. May I add it desperately needs it!
kidzanangel7
I would probably put it towards a paint sprayer so I can refinish my kitchen cabinets this summer 🙂
Angela Botello
We are turning 4 year-old twin boys' bedroom into a real boys room for upcoming double 5 birthday!!! So paint, and fun!
kristynmay
i would love to redo my bathroom<br />or maybe a ceiling fan for my room!
Jessica
we are saving up for a kreg jig<br /><br />jessicarwarfield at gmail dot com
Linh C.
I would use it towards new plants for my backyard.
Katie
Love your project! We did board and batten earlier this year in our home. It makes so much impact to a room!
Donna O'Neil
Flowers for my garden.
Mary
I'm trying to redecorate our condo so it looks/feels like home. Home Depot is my latest best friend. Haha
Susan Christy
I would buy some hanging baskets for my back patio.
The Causal Craftlete
Paint. I have lived in my house for 8 years and have never changed the decor. It's totally out of date.
Peggy Johnson
I would buy some plants for the yard
Kim F
I think I would buy some concrete sealer.
Mpls_Me
Would love to try the board and batten idea I saw. It utilizes paint to create the idea of paneling. Very nice. I need to paint several rooms, so I can use all the great ideas I get from Home Depot.
Connie
I need to make curtains out of canvases for my patio. Would buy those!! 🙂
Kari Crum
We are slowly trying to finish our basement. We would use the gift card toward something for that...maybe drywall or paint.
Rebecca
I would buy stuff for my patio...flowers, a chair, maybe a few do oration pots.
Cindy Trobaugh
Martha Stewart Paint ..Thanks for the Chance!
Kim F
I would give it to my husband and let him pick out some tools. He really would like that.
LauraJJ
I would love to put it towards a new front door to our home! Ours is old and we get such cold air coming thru in the winter! Have to put blankets around it!
Vannessa Leppek
You have the cutest little bathroom!!
Amy Orvin
I'd buy flowers for my garden.
Nicole Millheim
I would put it toward a cordless drill
JACLYN
I would buy paint and some painting supplies!
SVillalon
I'd put it towards supplies to build my daughter a window seat in her room.<br />ginger _ rose @ hotmail .com
Danielle Meek
I would probably spend it on patio furniture.
sarah_cc
Nice project! Looks very upscale
dawn keenan
We are repainting most rooms in our house. This would go for paint!
♡♥♬ Carolsue ♡♥♬
I would buy a wheelbarrow!<br />Digicats {at} Sbcglobal {dot} Net
Gina Wildorchid
I would buy mulch for my front yard!<br /><br />Entered the rafflecopter form as "Wild Orchid"<br /><br />Thanks for the chance to win!<br />wildorchid985 at gmail dot com
Gina @ Kleinworth & Co.
OOOOOOhhhhhhhhhhh - I love this. Being that we are just about ready to get our keys for our house being built - I am sure I could find all sorts of things to pick up at Home Depot. The yard will probably be our first thing - but I have 2 water closets that I would love to do this to. So I'll be back to double check instructions again. Thanks!!!
reFresh reStyle
I love your makeover, thanks for sharing at Inspiration Monday!<br />Debbie
Vivacious Ramsey
put it toward a new vanity- livivua
Ellen
Paint for our master bath.
cyndi-lou-who:.
probably tools for my hubby! 🙂
Julie
Paint and some new flowers for our garden!
kellyr78
I would buy shelving for our garage.<br />kellywcu8888ATgmailDOTcom
jenmalonee
I would probably get paint.<br /><br />Jennifer Marie
Cori Westphal
I'd get some chalkboard paint and a few other supplies for some projects I have in mind!<br /><br />coriwestphal at msn dot com
amanda whitley
i would buy shelves
Amanda Sakovitz
I would buy paint!
Brooke
Rain guards for our gutters...boring but so neccessary!
creativeandcompletelycrazy
I need a little of everything! !
Alene Nielsen
I would buy paint and shrubs
Thomas Murphy
I would buy some tools.<br /><br />rounder9834 @yahoo.com
Jeanna
Nice article on board and batten wainscoting. However your topic is how to the b&b without removing your baseboard. Unfortunately you failed to show pictures of your baseboard, the intermediate trim you used and the end result of not removing your baseboard. Your article would have been better pitched as aqua frames bring color to small.space.
Ashley Phipps
Hi there. Thank you for taking time to comment. If you scroll down, under the heading of STEPS FOR INSTALLING BOARD AND BATTEN I do show our existing trim (the bottom trim portion), the space of blank wall, and the new trim added above. Hope that helps! Best of luck.