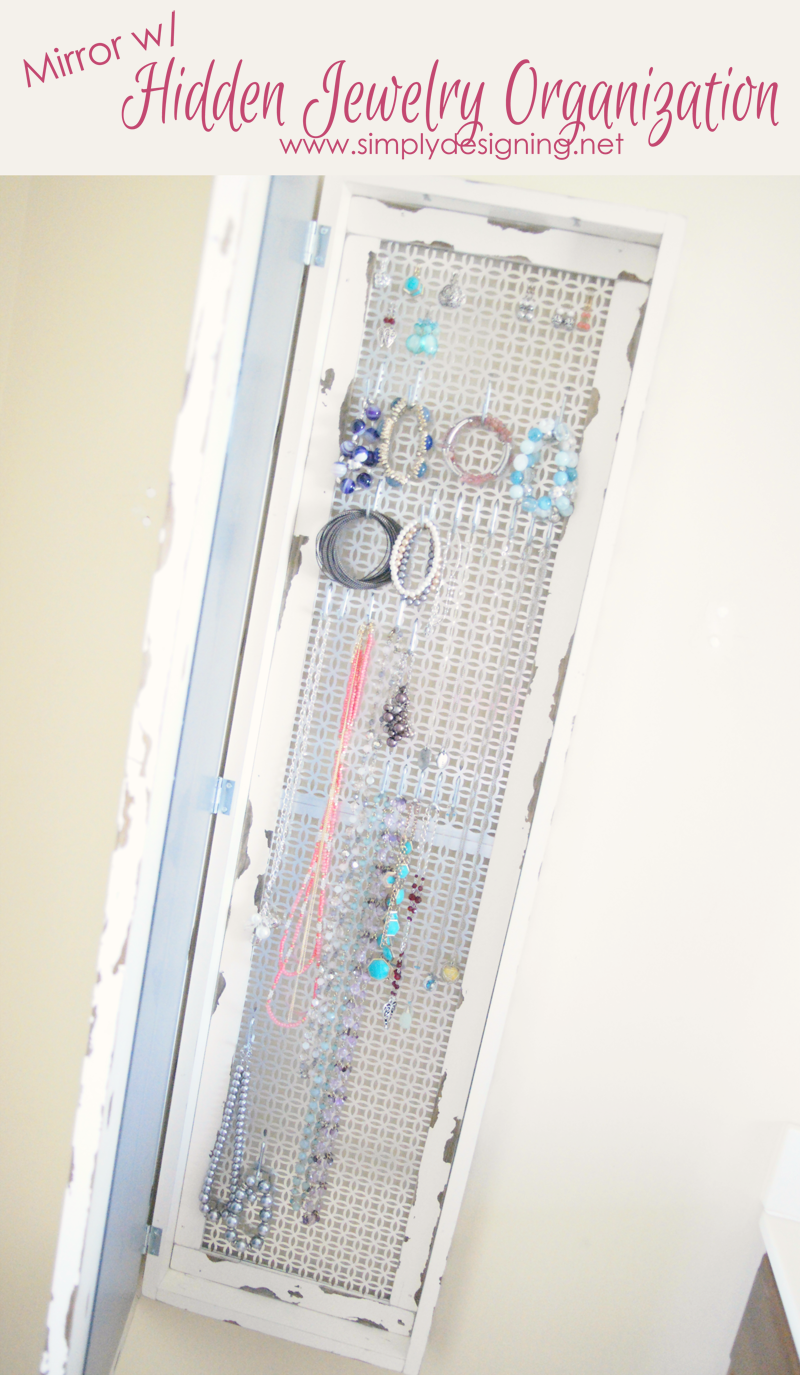
This mirror with hidden jewelry storage is something I have been hard at work on, a really fun and functional project. I am thrilled to show it to you today! This project is one I have been dreaming of for over a year and finally the timing was right for me to build this project! So come and see what is behind this really fun chippy paint door I built...

Ta da!!! It's basically the coolest thing ever! It is a really pretty chippy paint framed-out full-length mirror that opens to reveal...
A hidden jewelry organizational area! Woot woot! I call it my DIY Mirror with Hidden Jewelry Storage!
(or should it be a Chippy Paint DIY Framed Mirror with Hidden Jewelry Organization...ha! No...way too long! 🙂 Anyway, it's my latest obsession and I love love love it!
I have long since needed a full-length mirror! Yes, I leave my house in the morning without actually looking in a full-length mirror...who knows what I look like!? It's a risk I have been taken for far too long! And let's be honest, my jewelry has simply been thrown in a drawer...it's a total and complete mess! So I have been needing a way to organize my jewelry too!
Over a year ago, I found a similar jewelry holder for sale and am thrilled that I finally had the chance to create my own mirror with hidden Jewelry storage that is so pretty and definitely my own style! The best part is that this cost less than half (closer to ⅓) of the cost of the one for sale.
Anyway, back to my really cool DIY Mirror with Hidden Jewelry Storage...here is what you will need to make your own!
Mirror with hidden jewelry storage shopping list:
- (2) 8' 1"x4" wood
- 8' 1"x3" wood
- 4' 1"x3" wood
- 8' 1"x1" wood molding
- 4' 1"x1" wood molding
- 12' of decorative molding approximately 1" - 2" wide (ours was a flat piece of wood, about 1 ½" wide and ¼" thick)
- (4) 1 ½" Screws
- (4) Drywall Anchors
- Kreg Jig
- (16) 1 ¼" Kreg Jig Screws
- (16) Kreg Wood Plugs
- (3) Hinges
- (1) Magnetic Closure
- Painter's Tape (optional)
- (1) 12"x48" Mirror (I purchased mine from Target for $15)
- (2) 12"x24" Decorative Metal Sheets or Pegboard
- Stain (Minwax Dark Walnut)
- Cotton Rag
- Gloves
- 3 cans of Spray Paint (Rustoleum Heirloom White)
- Vaseline
- Metal Paint Scrapper
- Paper Towels
- Baby Wipes (optional...but really they are fabulous for a project like this!)
- Level
- Peg Board Hooks
- Drill (I love my Ryobi Drill and Driver Set when using the Kreg Jig so I don't have to switch my drill bits out)
- Compound Miter Saw (I also love my Ryobi saw too)
- Ryobi AirStrike (or other nail gun)
- Electric Sander
- 120 Grit Sand Paper
- 1" - 1 ¼" Brad Nails
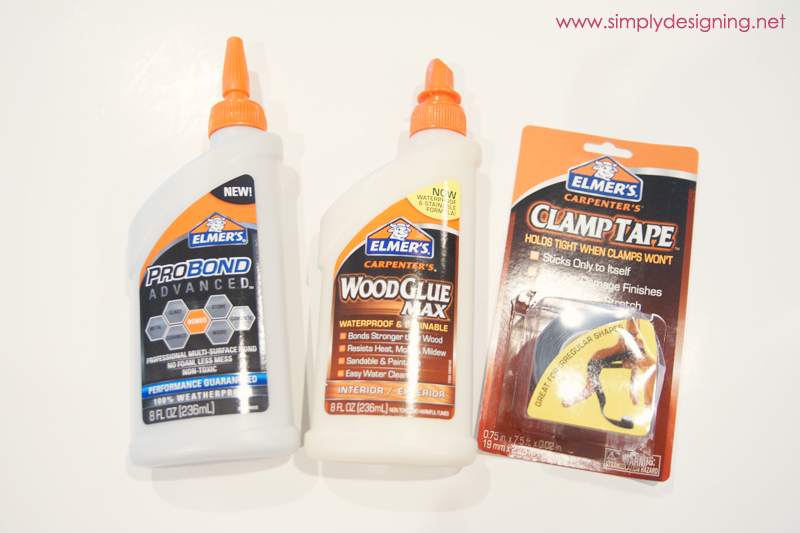
- Elmer's Wood Glue
- Elmer's ProBond Advanced Glue
- Elmer's Clamp Tape
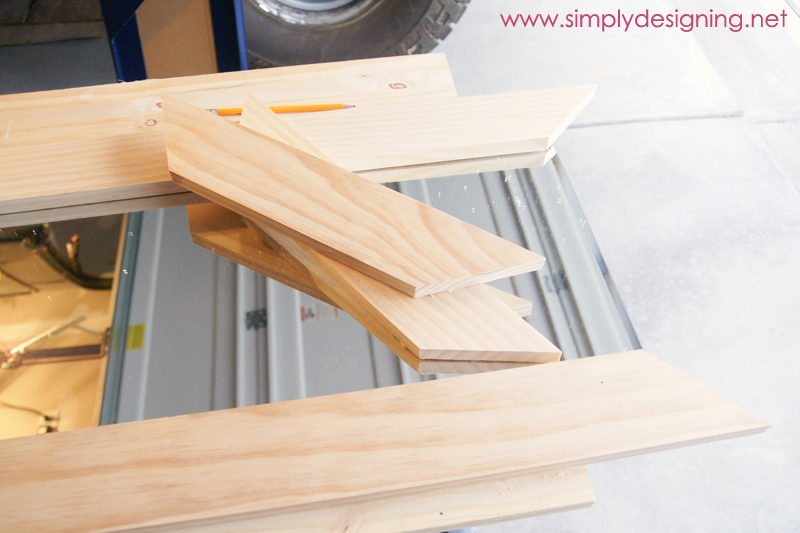
To make this as simple as possible, here is my cut list. These are approximate sizes based on my mirror size! If your mirror is a different size you will need to change your cut sizes accordingly. It is always best to measure your own items to ensure the best fit.
Mirror with Hidden Jewelry Storage Cut List
(Use your compound miter saw to make all your cuts. Remember to measure twice and cut once.)
- (2) 8' 1"x4" wood
- (2) 48" long pieces (inside dimension) cut with a bevel going outwards (so the outside length will be longer than 48")
- (2) 12" long pieces (inside dimension) cut with a bevel going outwards (so the outside length will be longer than 12")
- 8' 1"x3" wood
- (2) 48" long pieces
- 4' 1"x3" wood
- (2) 13.5" approx. long pieces
- 8' 1"x1" wood molding
- (2) 45" long pieces
- 4' 1"x1" wood molding
- (3) 10.5" long pieces
- 12' of decorative molding
- (2) 45" long pieces
- (2) 10.5" long pieces
*Again, before cutting please check these measurements against your actual mirror. These are just meant as a guide, not a replacement for your own measurements 🙂
How to make a Framed Mirror with Hidden Jewelry Storage with steps and photos.
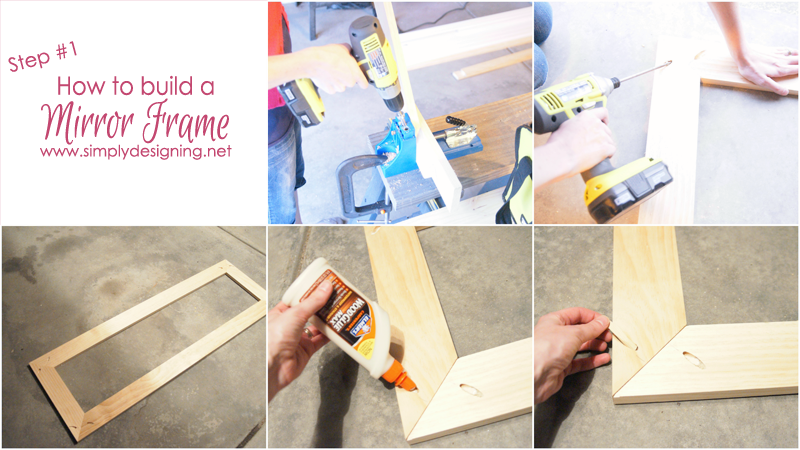
Step 1: Build Your Mirror Frame
You Will Need:
- (2) 48" 1"x4" beveled edge pieces of wood
- (2) 12" 1"x4" beveled edge pieces of wood
- (8) 1 ¼" Kreg Screws
- (8) Kreg Wood Plugs
- Kreg Jig
- Drill
- Electric Sander
- Elmer's Wood Glue
Use your Kreg Jig to drill one pocket holes into each of the ends of the wood. Set your collar and your pocket hole depth to ¾" since that is the actual thickness of the wood you are using.
Secure your boards together in a frame shape using your Kreg Screws. You will either need a right-angle clamp to help hold these pieces of wood together while you screw them together or a second set of hands.
You will want one screw going into one board, and one going into the other at each corner. This will create counter pressure and help secure the frame together very nicely and will help prevent warping or tweaking.
Next, add a little Elmer's Wood Glue into each of the pocket holes and insert a Kreg Wood Plug. These will probably extend a little bit beyond the opening. That's ok because your next step is to sand your frame well using your electric sander!
After you are done, you have built your Frame for the mirror with hidden jewelry storage!! Wahoo!
Step 2: Build A Shadow Box
Your "shadow box" is the outside box of the jewelry organizer that will contain your jewelry. This is again really simple to build. Because of the size of my mirror and my metal, I wanted my inside dimensions to be 48" x 12" clear so that the mirror would sit slightly inside this shadow box and so that my decorative metal would sit nicely inside it too.
You Will Need:
- (2) 48" 1"x3" pieces of wood
- (2) 13.5" 1"x4" pieces of wood
- (8) 1 ¼" Kreg Screws
- (8) Kreg Wood Plugs
- Kreg Jig
- Drill
- Electric Sander
- Elmer's Wood Glue
Again you will build your shadow box portion of this project by first drilling pocket holes into your boards, and then securing them together with Kreg Screws. (Your collar setting and pocket hole depth will still be set at ¾".)
Once that is complete, add a bit of Elmer's Wood Glue into the holes and insert your Kreg Wood Plug into the opening.
Finally, sand the shadow box really well.
Step 3: Build An Inside Ledge in the mirror with hidden jewelry storage
The trick to building a successful jewelry holder is having the decorative metal where your jewelry will hang from not be completely flush against the wall and also having enough room between the decorative metal and your framed mirror door so that there is room for your jewelry. Without buying an expensive router or getting too complicated, we decided that if we built a simple ledge on the inside back of the shadow box to adhere the metal too, it would give enough room behind it for hooks to be hung, and enough room in front of it to accommodate jewelry. If this doesn't make sense now...it will soon! I promise!
You Will Need:
- (2) 45" 1"x1" pieces of wood
- (3) 10.5" 1"x1" pieces of wood
- AirStrike (or other nail gun)
- Brad Nails
As you can see above, this ledge will sit INSIDE your shadow box. The inside of your shadow box should be 48" x 12" clear so these dimensions should fit snugly in there. But please please please measure before you cut as there is always a bit of variation in every build.
Once you have the pieces cut, set them inside your shadowbox and nail gun the ledge to your shadow box. Super simple and easy step! You will have a frame around the inside edge PLUS one piece exactly in the middle. This middle piece is where your two pieces of metal will meet and you will want the extra support here for that.
Step 4: Stain and Prep the mirror frame and shadow box for a chippy paint finish
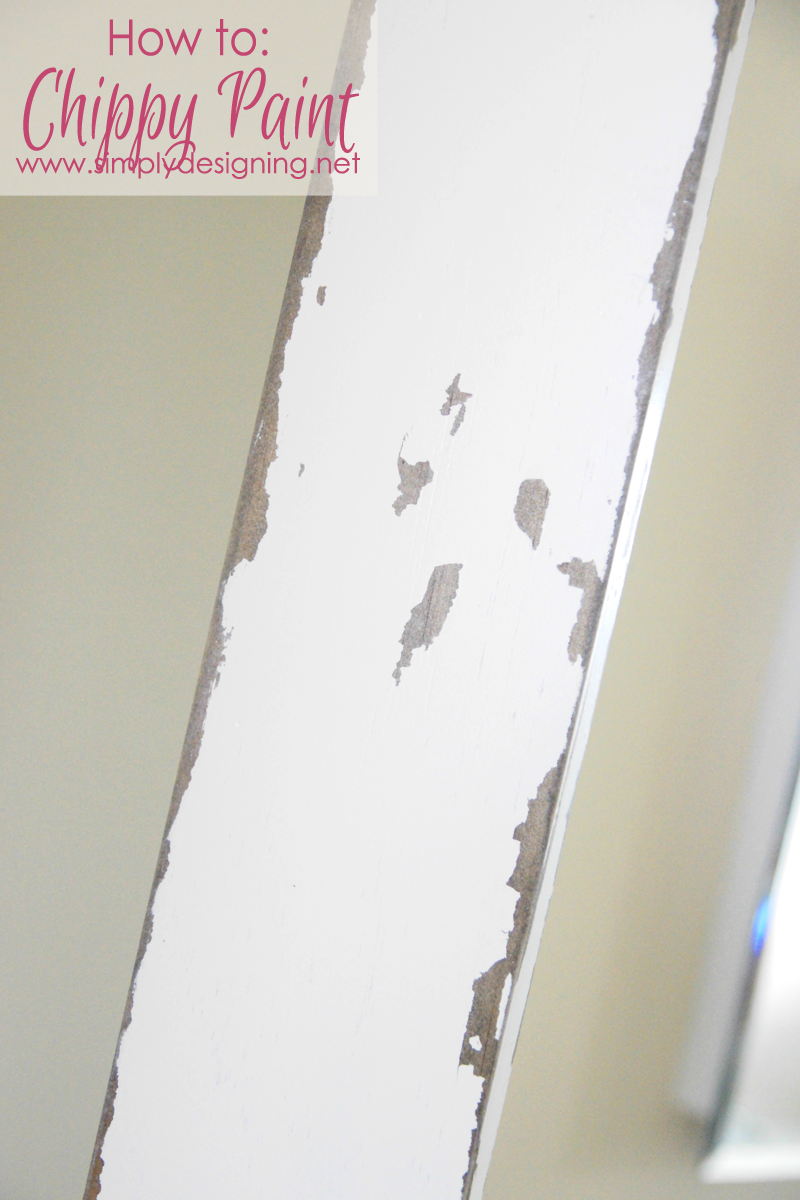
I love the chippy paint look but I have never done it before. So this was a bit of a leap in faith that I would love the DIY result. I based my method off of this tutorial here.
You Will Need:
- Stain
- Rag
- Gloves
- Vaseline
First, you will use a rag to stain all of your pieces. You will stain the Mirror Frame, your Shadow Box with BBuilt-InLedge, and your Decorative Trim (which will eventually become an interior frame for your metal pieces.) Let it all dry.
Then apply Vaseline anywhere where you want your paint to "chip" off of the item. The areas where you put Vaseline, the paint will not dry and you will be able to take the paint off to achieve a chippy look. So focus this on areas that would naturally receive wear like corners and edges, but do a few other random spots too.
Don't think too hard about this. The more random and sloppy the better the outcome!
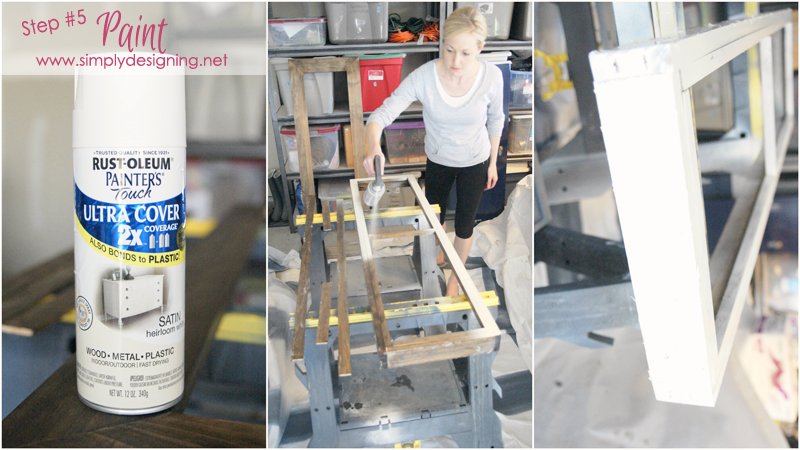
Step 5: Paint the mirror frame
- Spray Paint
Liberally apply spray paint to all pieces. Coat the fronts and the backs and be sure that you do several coats. Let dry.
- Metal Paint Scrapper
- Paper Towels
- Baby Wipes
- Electric Sander
Use your paint scrapper to scrape off the areas where the Vaseline has been placed. It comes off really easily, but leaves a greasy, sticky mess. So wipe your boards down with a paper towel and then a baby wipe to get any residue off. Then sand lightly with an electric sander for a bit more of a distressed look if you'd like.
Step 7: Secure the Mirror to Your Frame of the hidden jewelry storage
After everything is to this point you are ready to begin assembling your project! Woot woot!
You Will Need:
- Wood Mirror Frame
- Mirror
- Sand Paper
- Elmer's ProBond Glue
- Elmer's Clamp Tape
- An extra set of hands
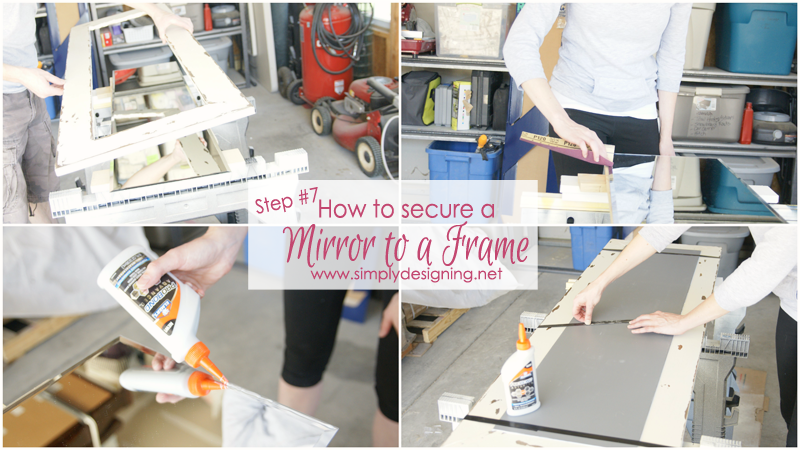
You will want to follow the instructions on the back of the ProBond glue bottle, but here are the basics! You will want to sand all of your edges. I had just sanded my wood so I decided to give the edges of my mirror a quick sanding by hand.
Next, you will apply a bead of the glue to your mirror. Then carefully set your frame on top of your mirror. I wanted to be sure that no glue ran onto my mirror, so once I knew it was ok, with a second set of hands we flipped the mirror and frame over so that the weight of the mirror would help secure it to the frame.
You will want to hold the pieces of the mirror with hidden jewelry storage together in place for a few minutes. Again, a second set of hands is really helpful here! Then use Elmer's Clamp Tape to secure the mirror to the frame and let it sit for several hours until completely set!
Elmer's ProBond takes about 2 hours to set, and up to 24 hours to completely harden. So be sure to allow enough time for this to set completely before moving on to the next step.
ProBond is an amazing glue that allows you to bond porous surfaces to non-porous surfaces and other Mixed Materials. So something like wood to a mirror or wood to metal is a perfect example! And there is no foam residue.
I've read all about it and it seemed like an AMAZING product! But to be honest, I was a little worried that this wouldn't hold the weight of the mirror! (I am a worrier like that!)
The longer the mirror set, the more worried I became! The last thing I wanted was a shattered mirror all over my garage.
But I waited patiently until the glue was completely set, took the clamp tape off and amazingly, the mirror has solidly adhered to the frame! Seriously, this mirror isn't going anywhere! It is so incredibly sturdy!
I am so amazed that a simple bead of ProBond can hold the weight of a mirror to the wood so well! This stuff is truly amazing!! I will definitely be using this again in upcoming projects because it honestly performs just as well as they say it will! (I love it when a product does that!!)
Seriously, this stuff is one of my new favorite finds!
Step 8: Attach Metal jewelry holder to the Shadow Box
In this next step, you will attach your metal to the shadow box and prep your box to be hung.
You Will Need:
- Shadow Box with Built-In Ledge
- Decorative Metal
- Drill with small drill bit
- Elmer's ProBond Glue
- Painters Tape or Elmer's Clamp Tape
First, simply place your metal into your shadow box so that it sits on top of your ledge. If it doesn't quite fit, you can use tin snips to trim the edges a bit. The two metal pieces should meet in the middle where your middle 1"x1" support board is.
Next, you will prep your box for hanging. Because this is a heavy item and you don't want your jewelry to fall down every time you open and shut it, and because a mirror hanging at an angle can make you look distorted, you will want to screw this box directly into your wall.
In order to prep this, use your drill to pre-drill holes through the metal and into the 1"x1" ledge on the top and bottom of your shadow box. Place two holes in the top and two in the bottom.
Next, you will use a bit of Elmer's ProBond Glue to glue the Decorative Metal to the Ledge. Because of how this was built, I was not able to use Clamp Tape to hold this together, so I used painter's tape around all of the edges and in the middle to secure this in place while it dried.
- Shadowbox with attached metal
- Decorative wood pieces
- (4) 1 ½" Screws
- (4) Drywall Anchors if needed
- Drill
- AirStrike or Nail Gun with Brad Nails
- Hinges
- Magnetic closure
- Mirror with Frame
- Second set of hands
- Level
First, place your drywall anchors if needed. This box is heavy, so unless you are securing this into a stud, you will want to use these!
Check Out Our Master Bathroom Remodel Series:
Part 1: Master Bathroom Inspiration
Part 6: Installing Moen Posi-Temp® Shower Fixtures
Part 7: How to Install Radiant Heated Tile Floors
Part 8: Install New Tile Counter Tops
How to Install a new Shower Door
How to Install new Bathroom Mirror Frames (in about 10 minutes!)
DIY Framed Mirror with Hidden Jewelry Organization
Please note that I am not a professional. I am just sharing what worked for us. As always please use all proper safety precautions and read and follow all manufacturer instructions. Please note that I am not responsible in any way for any outcome if you try this yourself. I am not liable for any injury or additional cost or expense incurred. I always recommend consulting and hiring a professional if needed. And always be sure to check with local building codes to obtain all permits needed for any DIY project.








Britni Vigil
Wow this is awesome Ashley, are you sure you don't want to come to my house and build one for me?
Ashley Phipps
Aw thanks so much Britni! And I would LOVE to come to your house and build you one 🙂
Brad & Kimber
Love this! I have a little one but it is so stuffed it will barely close. Maybe I need to make a big one!
Ashley Phipps
Thank you so much! You definitely need a bigger one 🙂
Jennifer West
OK, WOW. Just WOW. You are totally my new hero Ashley. I LOVE this project. I may have to make one this summer! PINNED!
Ashley Phipps
Oh thank you so much Jennifer! You are the sweetest! You should definitely make on this summer! Thanks so much for pinning!
Kelly @ Here Comes the Sun
This is amazing! I just finished my own jewelry organizer and now wish I had thought of something like this!
Ashley Phipps
Thank you Kelly! Oh I can't wait to go and see yours too! Thanks so much for stopping by!
Carrie @ lovely etc.
Super cool! The mirror with the chippy frame looks gorgeous - throw in the hidden jewelry and it is amazing!
Ashley Phipps
Thank you so much Carrie! You are so sweet 🙂 Thanks for stopping by!
Meredith @ Wait Til Your Father Gets Home
This turned out AWESOME and your tutorial is amazing girl! Pinning this for sure 🙂
Ashley Phipps
Thank you so much Meredith!! You are the sweetest! And thanks for pinning 🙂
reFresh reStyle
Love it! It's a great addition and I need extra jewelry storage!
Ashley Phipps
Thank you so much!! And thanks for stopping by!
kristi dominguez
It's just BEAUTIFUL...just like YOU! 🙂 Super clever piece. And I'm totes jealous of your Airstrike. Ever since Snap, I've been wanting one so bad!! 🙂
Ashley Phipps
Kristi you are too sweet 🙂 You are absolutely beautiful too! You definitely need to get your hands on an AirStrike! They are amazing!
The Real Thing with the Coake Family
Brillliant! I so need to organize my jewelry. Pinning this for future ideas. Thanks!
Ashley Phipps
Thank you so much and thanks for pinning! 🙂
SheilaG @ Plum Doodles
Wow, that is one beautiful jewelry organizer! I love that it doesn't take up floor/counter space!
Ashley Phipps
Oh thank you so much! And thanks for stopping by!
Jessi @ Practically Functional
I love this idea, it's so clever!!!
Ashley Phipps
Thank you Jessi! You are so sweet.
queenofgems
love it! My only suggestion is that you shouldn't store your jewelry in your bathroom. I sell a line of jewelry thru home shows...and we try to teach that moisture = bad for your jewelry. It will make your silver jewelry tarnish quicker! LOVE the idea though!
Ashley Phipps
That's great to keep in mind! Thanks
Shannah @ Just Us Four
This is such a great idea. My jewelry is absolutely everywhere in the house right now.
Ashley Phipps
Thank you! And that used to totally be me! Jewelry everywhere! haha
Marie Blackburn
Ashley you just rocked my world! We are building a custom bookcase/window seat/jewelry built-ins in our master bedroom. I've been playing around with idea on how to incorporate a small cabinet for jewlery into the plans and you just gave me the answer. I love that you incorporated a full length mirror into the mix and a mess insert for hanging earings - brilliant! I'm so doing this
Ashley Phipps
Marie you are so sweet!! I am so glad that this gave you a good idea! Thanks so much for stopping by! I can't wait to see what you come up with!
Erlene A
Great tutorial for a something that we could all use. Pinned. Thanks for sharing.
Jen
This is beautiful Ashley! I can't wait to make one! Where did you get the decorative metal sheet?
Ashley Phipps
Hi Jen! Thanks so much! I found the metal sheet at Hobby Lobby actually! But I seen similar things at other craft stores too.
sabina edwards
love it, I want to do a mirror cover in a between the studs thing in the bathroom for extra storage and have the frame custom made by the husband!! (he's got a cnc router)