Always wanted a herringbone tile floor but thought it might be too difficult to do yourself or too expensive to get someone else to do it?
I have anxiously been awaiting this day!!
The project I am showing you today was a little bit labor-intensive and it took a bit of time.
But in the end, this project was 100% completely worth it! Today I am thrilled to show off our bathroom's herringbone tile floor!
This might just be one of my favorite projects to date!
And I was thrilled to have the opportunity to work with The Tile Shop to help us complete this project.
You see, when we installed laminate wood flooring throughout our home we did not install it in our bathrooms.
I was worried that with two small children if we ever had an "overflow situation" in the bathroom, it could ruin our floors.
It's happened to friends of ours, and I just didn't want to chance it.
So for several months our bathroom floor remained linoleum and looked like this:
Now, I'm not complaining. It was decent linoleum.
But next to our pretty wood floors, it didn't look that great! So we were thrilled to be able to do a little tile work and spruce up our downstairs half bath!
We had a blast shopping and looking for tile at The Tile Shop.
Their store was filled with bathroom and kitchen displays that were a wonderful inspiration!
There were many options that I really liked, but in the end, I decided that I wanted a custom design. I wanted a Herringbone Tile Floor!
We found the perfect rectangular travertine and were thrilled to get working!
Supplies you'll need to install a herringbone tile floor
- Tile: Bucak Lt Walnut H/F 5x20cm, 657571 (see how to find your quantity below)
- Grout: Desert Sand, Unsanded
- Flexible Grout Admixture
- Epoxy Film Grout Remover
- Proflex Thinset (aka mortar)
- Travertine Sealer
- Trowel
- Notched Trowel
- Grout Float Tool
- Mortar Mixing Paddle (for use with a power drill)
- Large Sponge
- Sealer Sponge
- Bristle Brush
- 1/16" Spacers
- Eye Protection
- Ear Protection
-
3+ Buckets (one for mortar, grout and water)
-
Caulk
-
Touch-Up Paint and Foam Brush
-
Items to re-install toilet and sink if necessary
-
If you are laying on a wood subfloor, you will need to purchase and install concrete backer board prior to installation
How to install a herringbone tile floor - demo, prep and installation instructions.
1. How to calculate how many tiles you'll need to install a herringbone tile floor?
To figure out the correct tile amount, you will take the square footage of your room (length by width) and add 10%.
Then round up to the next full box size and order that many boxes.
You need to account for a bit of breakage as well as cuts, and mistakes and this formula does just that.
2. Demo and Prepping to install a tile floor
First, you will need to un-install any fixtures you have in the room.
We removed our pedestal sink and our toilet from the bathroom.
Next, you will need to demo your existing flooring.
We had linoleum so it pulled right up.
Make sure your concrete is in good condition prior to continuing.
You may need to do repairs if it is really damaged.
Then use a multi-tool to trim your door frames.
We set a piece of tile on the ground and added a piece of thin cardboard underneath it.
This gave us an approximate height of the tile plus the thinset.
We placed the multi-tool on top of it, and trimmed our door frames to the right height.
You can remove your molding, or leave your molding and plan to attach quarter-round after.
We also marked the middle of the room so that we would know about where to begin tiling.
3. How to cut tile to install a herringbone tile floor
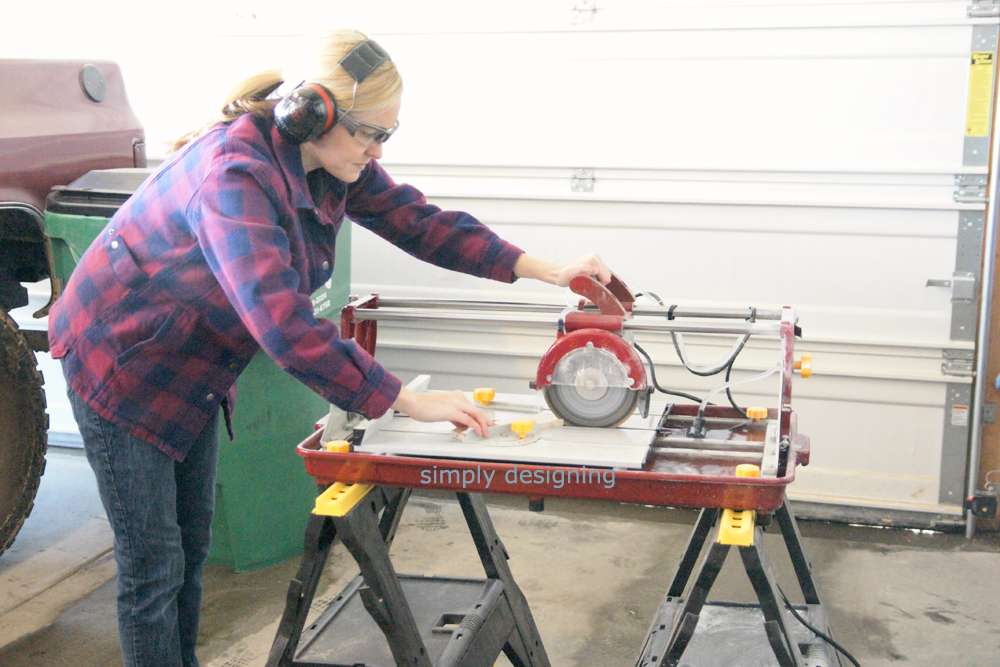
Me in my Duluth Jacket, the tile saw, my eye protection and ear protection spent a lot of time in the garage during the bitterly cold weather cutting tile. (And my husband helped too because he is amazing like that!)
But my point is, don't let the worry of using a tile saw scare you away from tiling.
It is really easy to use!
Just use precautions and follow all safety guidelines!
Generally, you will want to measure and cut each piece individually. So take your time, measure twice and cut once.
4. How to install thinset when installing a tile floor
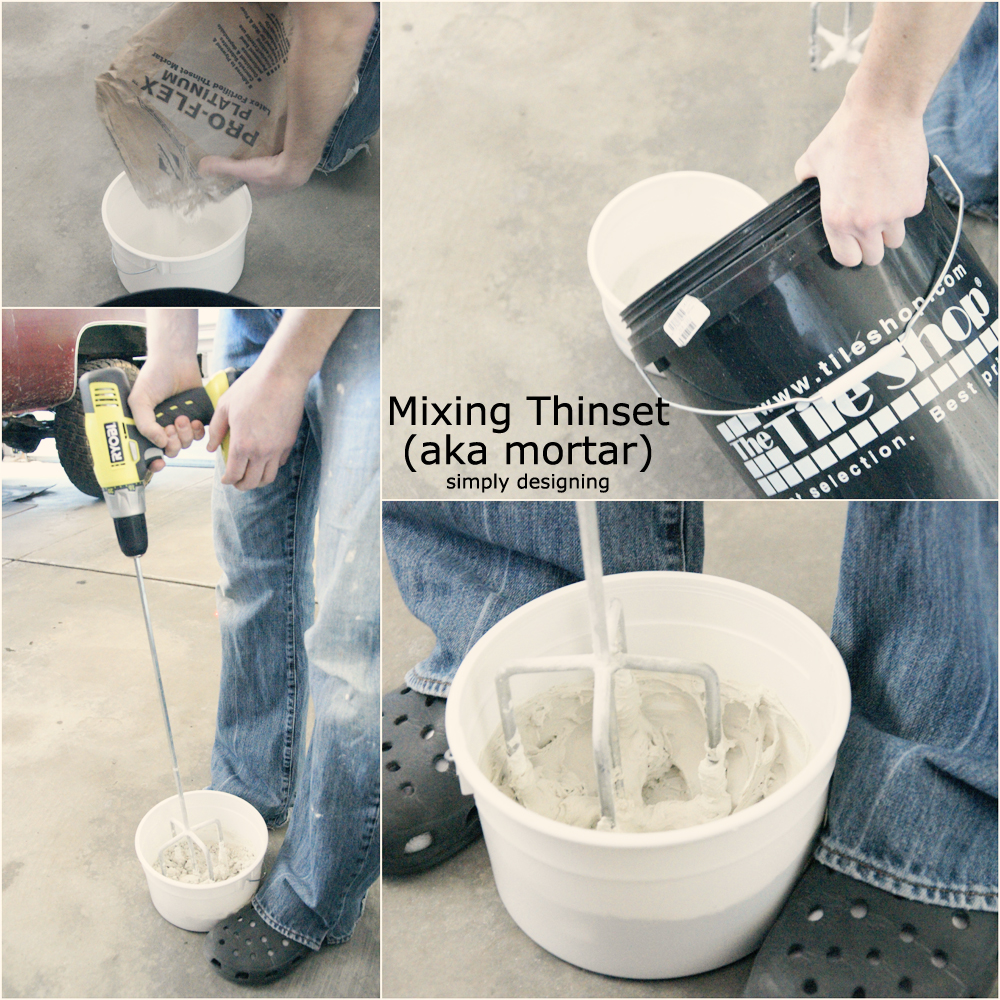
You will mix your thinset (mortar) mixture with water until it is a toothpaste-like consistency.
We used a mortar mixing paddle that attaches to a drill and it mixed it right up!
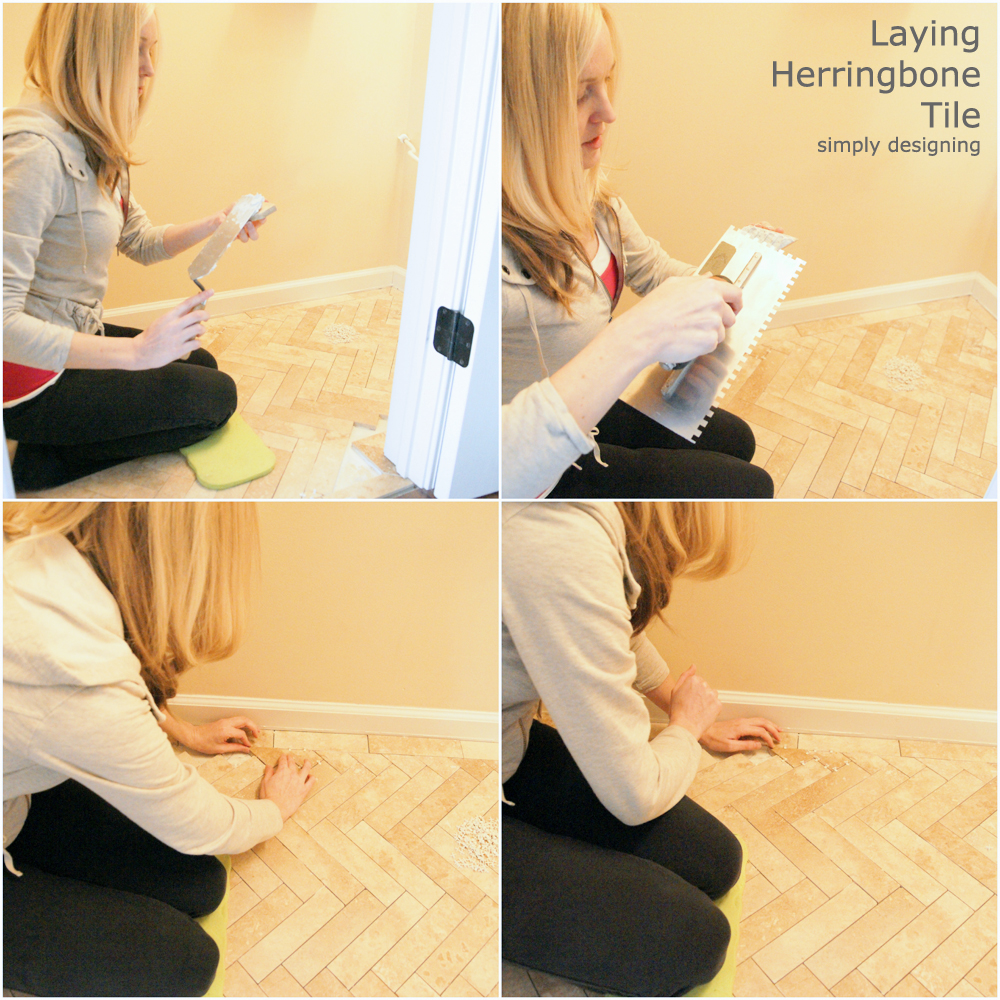
5. How to lay and install a herringbone tile floor
6. Using Spacers when installing a herringbone tile floor
As you lay your tile, you will want to use spacers in between every edge of your tile.
We chose to use 1/16" spacers for this project.
You can also use spacers to scrape out any extra thin set that may ooze out in between your tiles as you are laying them. (I don't think this is an "official" use, but it works really well!)
7. How to cut and finish the edges when laying tile.
After the majority of the herringbone patterned tiles were in place, we made a million tiny 45-degree cuts to fill in all of the edges.
With two of us working it went fairly fast.
One of us measured and marked the tile, and installed the tile while the other one cut the tile.
We had our system down to an art by the end!
8. How to grout a tile floor.
You need to let your tile set completely before grouting. (Always read the thinset and grout instructions for time frames.)
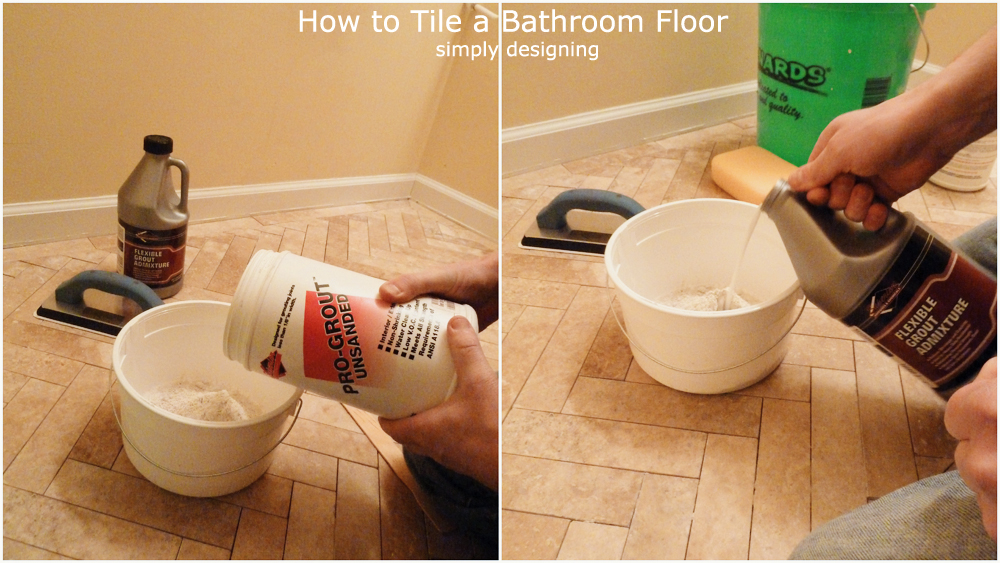
You will mix your grout and grout admixture together until it is a toothpaste consistency.
Use a grout float at a 45-degree angle to spread and work the grout into your grout lines.
Be sure that every grout line is filled well with grout.
Work one small area at a time.
And about every 15 minutes, take a break to wipe your surface clean using a large wet sponge.
Then continue until the entire floor is grouted.
9. How to de-haze and seal a herringbone patterned floor
After your grout has dried, use a film remover (aka de-hazer) and a bristle brush to clean your tile.
Then wipe it up with paper towels.
Wait 48 to 72 hours and then you can seal your floors!
You will use a sealer sponge and a sealer for natural stone and/or travertine.
Follow the instructions on the back of the bottle.
But basically you will wipe on a coat of sealer with your sealer sponge, let it soak into the stone for about 10 minutes.
And then wipe off any excess with a clean, dry cloth.
Wait about 30 minutes and repeat for a second coat if needed.
You will know if you have enough sealer on your floor by doing a drip test.
Drip a few drops of water onto your stone and if the water beads up, you do not need another coat of sealer.
If the water absorbs into the stone, you will want to apply another coat of sealer to your stone.
Be sure to follow all manufacturer instructions and let your sealer dry completely prior to use.
The Tile Shop holds tiling classes every Saturday morning at 9:30 am!
This can be a great way to get a little hands-on experience prior to attempting to tile yourself! Plus, the staff is so knowledgeable and helpful too!
And now it's time to be inundated with way too many "after" photos!
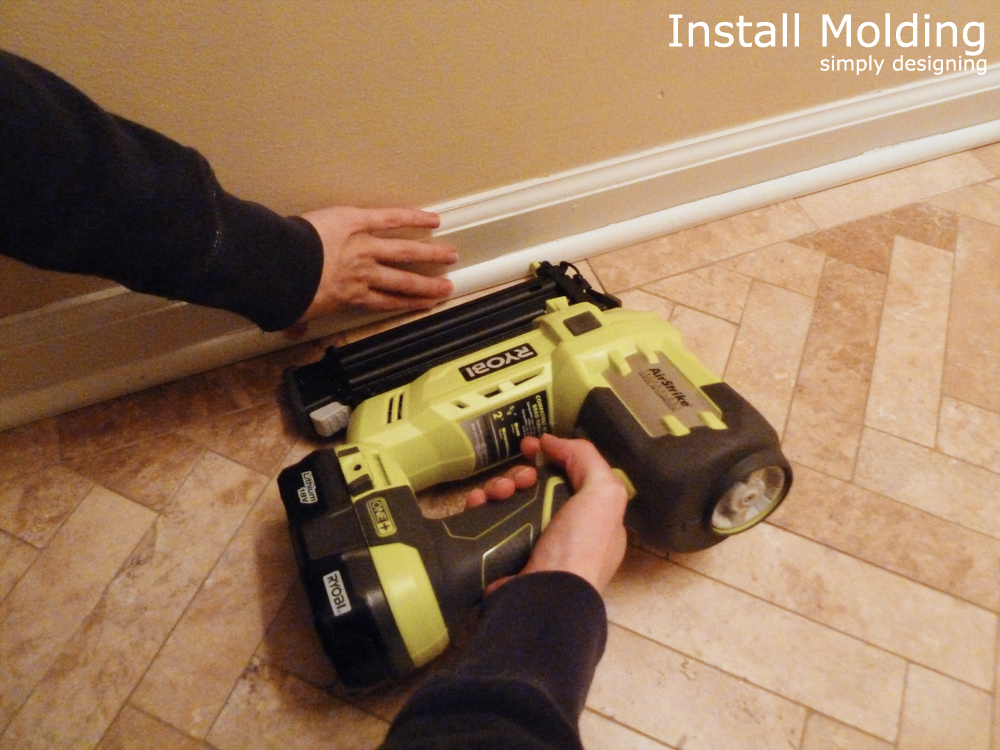
After your floor is fully installed, you will want to re-attach your baseboard (we used our super cool Ryobi AirStrike).
Then re-install your toilet and sink! Be sure to caulk around the toilet and sink for a finished look.
This tiling project has inspired another bathroom project that I will be showing off soon 🙂 Eek! I can't wait!
A few tips to remember when you are installing a herringbone tile floor:
- Be sure to have all the right tools prior to beginning a project like this
- Be careful to lay your tile evenly so that tiles aren't higher than the next one. Some like to use a level to help with this, others run a plastic cup (upside down) around the tile to be sure nothing catches, and some like to just use "feel" to get the tile level and smooth. Either way, you don't want any stubbed toes, so just be sure your tile edges are level with the tile next to it.
- Measure twice and cut once.
- When in doubt, ask a professional! The Tile Shop has many professionals that love to help answer your DIY questions.








Colleen
Love the looks of your new tiled floor. You done a wonderful job
Ashley Phipps
Thank you so much Colleen!
Kim Wilson
This is absolutely gorgeous! You all did such an amazing job with the tile. Pinned it and sharing later today on my FB page! BRAVO girl!!!
Ashley Phipps
Kim!! Thank you so so much for pinning and sharing on FB! You are so sweet to do that! <br /><br />And thank you!! 🙂
Julia from It's Always Ruetten
Gorgeous! You all did a fabulous job!
Ashley Phipps
Thanks so much Julia! And thanks for stopping by!
Cynthia Banessa
Love the work!!! Fantabulous!!!
Ashley Phipps
Thank you Cynthia!
thetileninja
Smart to start on a small room for this level of intricacy. Tile guy for 20 years and even we get challenged by such a layout. You could take your time and do it right. Nice job! The border is also a nice touch.
Ashley Phipps
Thank you so much! And thanks for stopping by!
Ashley Phipps
This comment has been removed by the author.
Kimber Matherne
This is absolutely stunning! I would love to do a floor like this in our master bath. It really makes it look so high end!
Ashley Phipps
Thank you so much! This would be so pretty in a master bathroom!!
Stacy Risenmay
Girl! That is gorgeous!!! I love it 🙂
Ashley Phipps
Thanks so much Stacy!!! 🙂 And thanks for stopping by!
Amy Anderson
I can't believe you did that yourself - it looks amazing!
Ashley Phipps
Oh thank you so much Amy!! You are so sweet!
Kaysi @ Keeping it Simple
This is seriously amazing!!!! You have been doing so much on your house and it all looks awesome! I wish that I had your energy
Ashley Phipps
Oh thank you so much Kaysi!! 🙂 And thanks for stopping by!
Melanie @ bear rabbit bear
This looks awesome! Great job!
Ashley Phipps
Oh thank you Melanie!! And thanks for stopping by!
Kimberly Marie
Your floor came about fabulous! I can't believe you did that yourself!
Ashley Phipps
Thank you so much Kimberly!!! Oh and thank you, you are so sweet!!
Kara
I've been wanting to do this for years! Your floor is gorgeous!!
Ashley Phipps
Thank you Kara!! And you should totally do it! 🙂
Kristin @ My Uncommon Slice of Suburbia
WOW Ashley, this floor is amazing, it looks beautiful in your bathroom, love it!
Ashley Phipps
Thank you so very much Kristin!!
Katie
WOW this is amazing! I would never think to do a herringbone pattern for a bathroom tile floor! LOVE IT!
Ashley Phipps
Oh thank you so much Katie!! You are so sweet 🙂
Carrie @ lovely etc.
This looks gorgeous - love herringbone! Great job.
Ashley Phipps
Thank you so much Carrie!! 🙂
Britni Vigil
Ashley this turned out gorgeous. Want to come do mine?
Ashley Phipps
Thank you Britni!! That would be way too much fun 🙂
Carol-living in Mid-Missouri
This comment has been removed by the author.
Carol-living in Mid-Missouri
It is beautiful! Great job. Thank you for posting the pics and DETAILED tutorial!
Ashley Phipps
Thank you so much Carol! And you are welcome! I am glad that the detailed tutorial and photos are helpful!
Leanne
The floor turned out beautiful. You did such a great job and I love how it looks against the wood floor.
Ashley Phipps
Thank you so much Leanne!! 🙂 And thanks for stopping by!
Angelina- JoJo & Eloise
This looks GORGEOUS!!!!! You guys dis an AWESOME job. Pinning :)<br />xoxo
Ashley Phipps
Oh thank you so much! And thanks for pinning!
House in the Heights
Gorgeous! I have dreams of laying herringbone tile in our kitchen....thanks for a great tutorial!
Ashley Phipps
Thank you so much! And that would be beautiful!!
delightinginthemoment.blogspot.com
Thanks for your tutorial! Could you do this with a 3 x 6 sized tile?
Ashley Phipps
You are welcome! And yes, you can do this with a 3x6 tile. The portions will look a little different then mine, but you can in theory do this pattern with any rectangle tile! The dimensions just determine the exact look! Good luck!
Corinna Bennett
I love this floor! You did an excellent job! Thanks for the tutorial too. How inspiring. 🙂
Ashley Phipps
Corinna, thank you so much! And thanks for stopping by!
Natalie V
I think dealing with all of those angles might drive me a little batty, but it would be worth it to have a floor this gorgeous. I love seeing other DIY-ers and the amazing things they come up with! 🙂
Ashley Phipps
hahaha! It was definitely tricky in a few areas :/ But it was TOTALLY worth it! Thanks for stopping by Natalie!
K Quinn
That is beautifu!. I would love to know how to use all those tools you're using. I can no longer look at my icky tile bathroom floors the same again.
Ashley Phipps
Thank you so much! I truly believe that anyone can learn to use tools! 🙂 Good luck replacing your bathroom floors!
Rebecca Scaglione
That looks AMAZING! So great that you were able to do it!!!!
Ashley Phipps
Thank you so much Rebecca! And thanks for stopping by!
vw bug
Love the look of your tiled bathroom floor. I wasn't that brave. I just did the square tiles. You did a much better job and it looks beautiful.
Angie Young
That is such a pretty floor. I've never seen one laid like that. I have to say, I'm really liking that pattern. And thank you so much for posting a detailed list of everything that is needed for the project along with detailed instructions. That really helps someone like me who's never done this, but would love to with some help.
Shirley Wood
Great DIY job! Love the Herringbone pattern too. It turned out beautiful. We took a floor tile class at Home Depot's Do It Herself class. They made it seem so easy. We want to do our bathroom floors also.
Marcia Shaw Wyatt
Your floor turned out gorgeous! And this post is absolutely wonderful - so informative and helpful! Thank you! 😀
Ashley Phipps
Thank you so much Marcia!! You are so sweet! And thanks for stopping by!
Hil'Lesha O'Nan
It looks like it takes a lot of the work, but the end result makes it all worth it. So beautiful!
Val
Wow. You did a fabulous job! Want to come do my bathroom?
Laura P.
I am so impressed! Not only do you know the names of all these tools & materials, you used them yourself to tile a beautiful floor! Not to mention creating a wonderful post about the wonderful job...
Laura P.
I am so impressed!
Jeanette Foss
It looks awesome. Much better:)
phoward336
I'm impressed! I've done several tile jobs with my husband, and since I HATE the grouting process, we elected for 18" tiles for our screened in porch - it looks gorgeous and meant fewer grout lines - yours would be a TON - like I said, impressive!
Meeghan Mousaw
So pretty and such useful information! Great work! Thanks!
Sarah Barker
Ashley, it really is gorgeous, I'm SO impressed! I've always been intimidated by tile and especially how to make it level/the tops even, so I especially appreciate your tips about that. <br /><br />Sarah's Fare recently posted → <a href="http://sarahsfare.com/eggs-in-a-nest/”>Eggs in a Nest</a>
Tink Bell
Wow. What a great job. Makes me want to run out and redo my own bathrooms. Which hopefully I will be doing sometime this year. And I will be referring to this post when I do. Thanks for the excellent instructions.
Lalia Frolick
My husband is a tile setter, and it's definitely best to ALWAYS backbutter all the tiles. One step that I would highly recommend which I didn't see mentioned was leveling a floor before installing tile. It's crazy how crooked and wavy floors can be, and you don't really notice until you're trying to put furniture on a surface you think is flat, but isn't! I used to help my
Jaclyn
Love all the step by step photos. Great work!!
Johnnalynn
This is absolutely gorgeous! I am sooo not good at things like this but it actually sounds like a fun challenge. Thanks for sharing!
Johnnalynn
This looks fabulous! I am sooo bad when it comes to doing things like this on my own, but it sounds like a great challenge! Thanks for sharing!
Liz Lewis
OK, YOU are awesome! I love that you tackled this project. The detailed photos were amazing, but I especially appreciated that you put in a list of all the supplies needed. Some people don't do this and it can be soooooo frustrating!! You rock, did I mention that? Wow!
Stacey Gibbon
Beautiful work! I can't wait till we own a house and I can do projects like this. We are military so we have only lived in rentals. I hate the restrictions {especially since I'm a crafty and DIY gal} I really love what you did!<br />-Stacey<br />GluedToMyCraftsBlog.com
Lisa {Amateur Nester}
Wow, this is gorgeous! I wish I was handy! Stopping by from Blogelina Commentathon.
Lisa {Amateur Nester}
Wow, this is gorgeous! I wish I was handy! Stopping by from Blogelina Commentathon.
Jen Bradley
Wow! That looks great, and actually like a lot of fun. We've stopped making improvements since we now have an offer on our condo, but if we move into my grandma's house in a few years, a lot of these projects will be happening again. I'm glad to know there's a resource which walks right through the steps. Nice blog!
Jennifer at Purposeful Nutrition
That looks so sharp and professional. I wouldn't attempt a project like that but my hubby would. Enjoy. Great post.
Katherine Petrunia
Absolutely stunning! You guys did an amazing job! And A+ for teamwork! I bet the feeling of accomplishment after you finished this project made all the hard work worth it- plus being able to go in and admire your handiwork! Great instructions, info, tips, and photos. All- round, a very user- friendly how to! Thank you for the project idea!
Annette Browning
Great job! It's beautiful. I need to re-tile our entry way (pinky, icky and slippery tiles!). I like the herringbone design.
Jessi
Love love love it!!! So beautiful and now I want to redo our teeny tiny master bathroom! And you are awesome for doing this yourself, I normally leave this kind of work to my hubs. 🙂
Nicole K/GothamGal
As new homeowners, we can be overwhelmed by some of the DIY projects out there, but I love this one and will be adding it to my honey please do this wishlist.<br />I love the look of herringbone, and you took the 'scary' out of this.
Jennifer Hughes
Your floor turned out beautifully!!! I think the small triangles to fit in the sides are what would get me. But I'd be willing to try to get the outcome you did. Thanks for the tutorial :-)<br /><br />Jennifer @ The Jenny Evolution
Kyisha Long
These tiles don't look bad at all.
Tanya
That is so pretty! It really adds a punch to the bathroom. I wish I was handy like that!
Tonia L
Wow! You guys did a beautiful job! Love the herringbone look - you've inspired me for our entryway!
Virginia Megin Gallagher
Super project! I've flipped three houses and learned to install tile myself. I know that the herringbone can be quite a job. But it turned out beautiful!
Marisa Slusarcyk
wow that looks incredible! Great job!
Still Reviewing
Great tutorial and great job on the tile floor.
Tamara Brower
Nice documentation. Beautiful job too. It is definitely an improvement.
Nikki Harvey
Wow! That looks beautiful! Love the tile!
A. Reiding
It's dangerous you make this looks so easy--now I want to do this!
Michelle Moms Are Frugal
I think it is great that you are not afraid to use a saw or tools! That is on my bucket list...closer to the end though because power tools scare me!
Ashley Phipps
Thank you everyone for all your sweet kind comments!!
Laura
Great results! What were the dimensions did you cut the main tiles to?
Ashley Phipps
We only cut the corners of the tile for this floor, the tile came in a small rectangle shape already.
Carol
What is the paint color? It looks lovely with the tile.
Robert
Great job on the floor...love the herringbone!
I realize this is years old but any chance you know what color you used on the bathroom walls?
Thanks.
All the best 🙂
Ashley Phipps
Hi! It is actually a discontinued paint color from Porter Paint...gosh I don't recall the color...but they stopped making it a few years ago and their match just wasn't quite the same. It was definitely a warm yellow-y tan though.
Jennifer
What size tiles did you use? Looks great!
Ashley Phipps
Thank you. They are approximately 2" x 8".